Minimum Load Time
Control Minimum Load Time
Click on the More section, then you can find the option for “Minimum Load Time”.
This option lets you to set the minimum value of the pre-loader’s load time duration. It prevents the pre-loader from disappearing too fast – you may want to show the pre-loader (with your brand image) clearly to your site visitors.
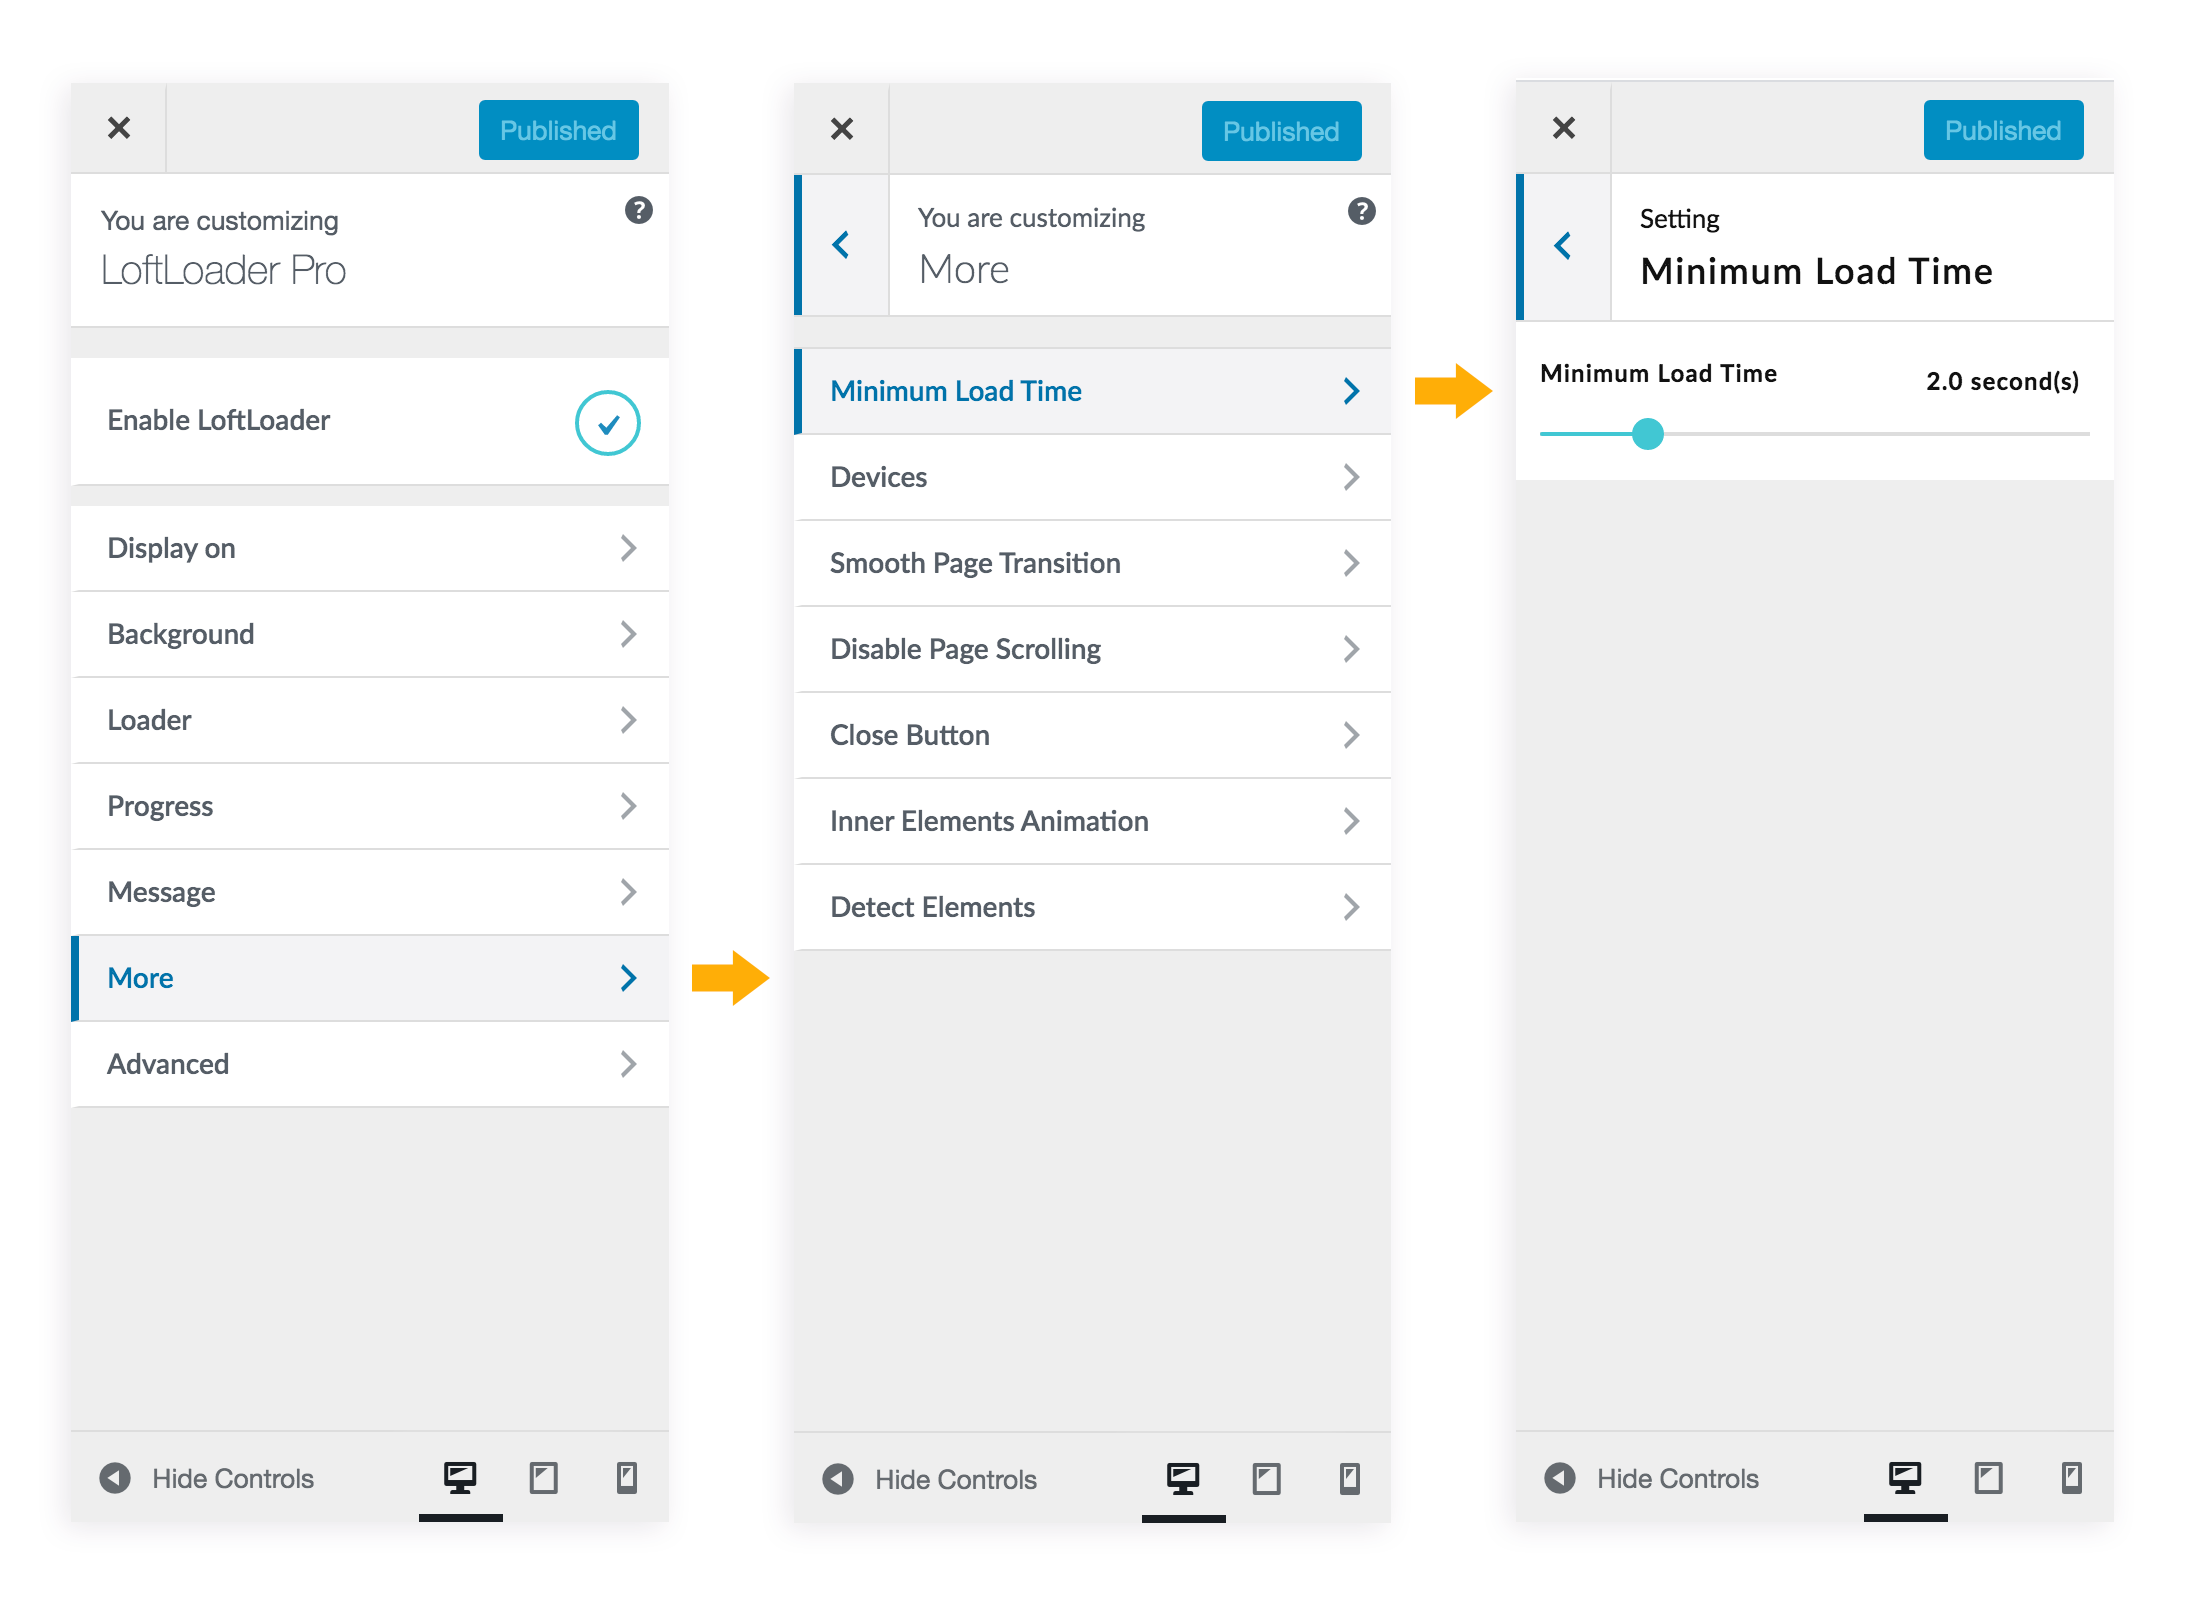
It is the minimum value. It means if your page content is light-weight, let’s say it only need 1 second to load all content, and you set the Minimum Load Time to 5 seconds, then the pre-loader will show for 5 seconds before it’s gone. If your page need 10 seconds to complete loading, then your setting (5 seconds) will not affect the real loading time. The pre-loader will fade away after all content has been loaded.
Please note: the options in the More section only work on front end. It means when you change the settings, nothing will happen in the preview area. Save the changes you have made, they will be applied to your site. Please remember to clear your site cache and browser cache before checking your front-end.
Increase Minimum Load Time
By default, the maximum value of the “Minimum Load Time” option is 10 seconds. But sometimes users may want to set a minimum load time of more than 10 seconds. For now, you can change the limitation by modifying the plugin code. This is easy, you just need to change one value.
Please follow the instructions below.
If you only need to change the “Minimum Load Time” limitation of a preloader shortcode:
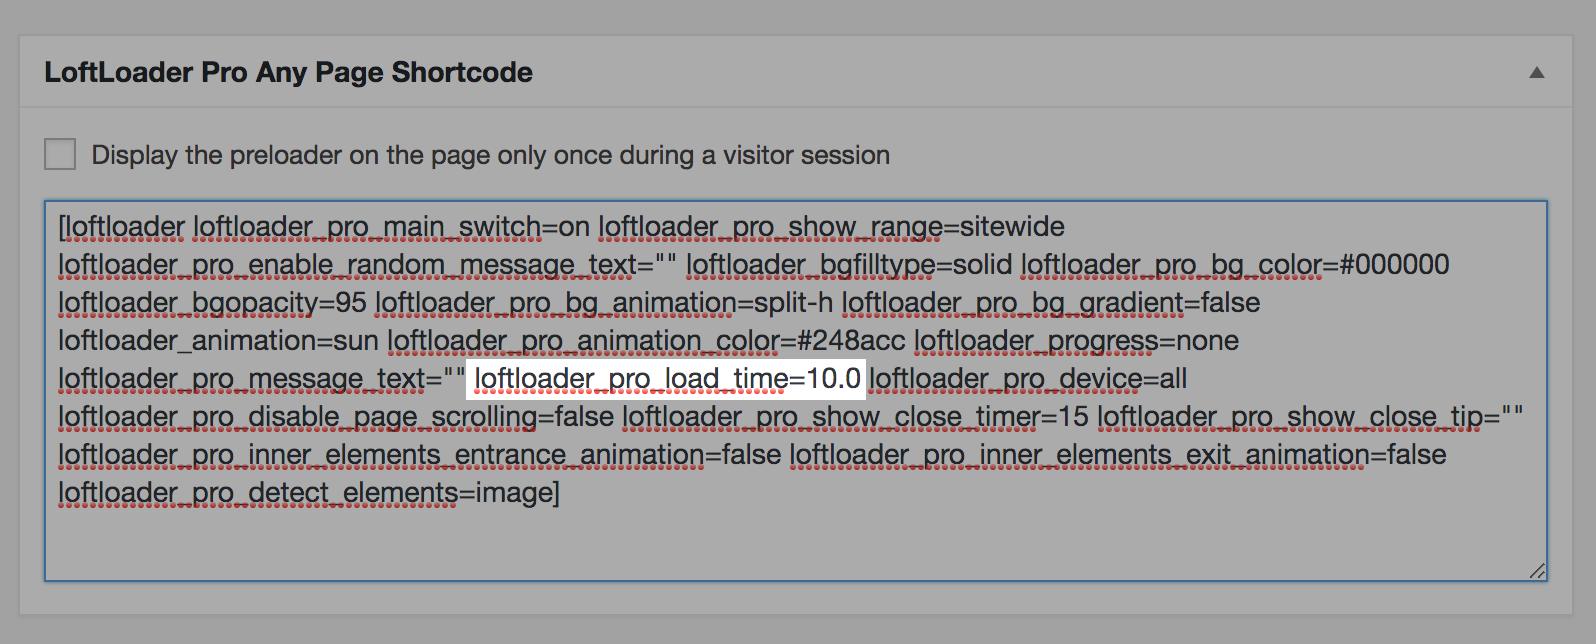
If you have enabled “Any Page Extension” and insert a preloader shortcode to a page/post, and you want to change the minimum load time of this particular page’s preloader to a value of 20 seconds or more, then you just need to edit the shortcode.
Please go to that page, find the “LoftLoader Pro Any Page Shortcode” box, and then find “loftloader_pro_load_time=xx“, then change the value, for example, you can change it to “20.0” for 20 seconds. Please see the screenshot below:
If you need to change the “Minimum Load Time” limitation in the settings panel:
- You will need to login into your site via FTP. If you don’t know how to do it, please search on Google, or contact your hosting provider.
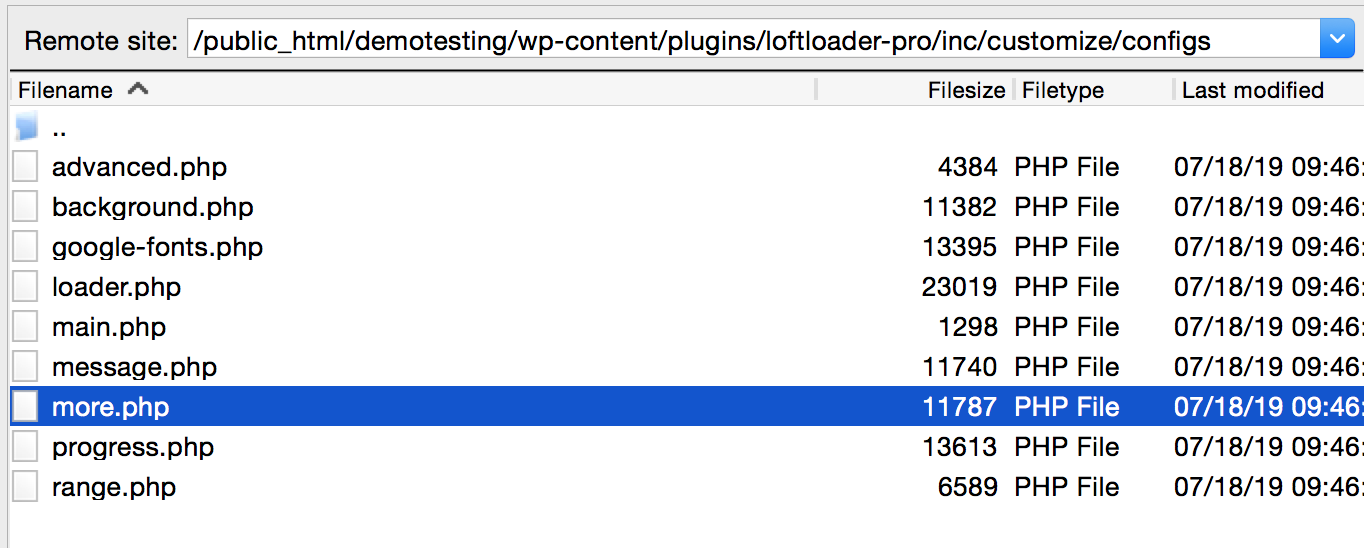
- Then please get into the folder of LoftLoader Pro on your site, and find the php file you will need to modify: “more.php”. The path should be: “(your site root)/wp-content/plugins/loftloader-pro/inc/customize/configs” Please see this screenshot as reference:
- Please edit the php file in a text editor.
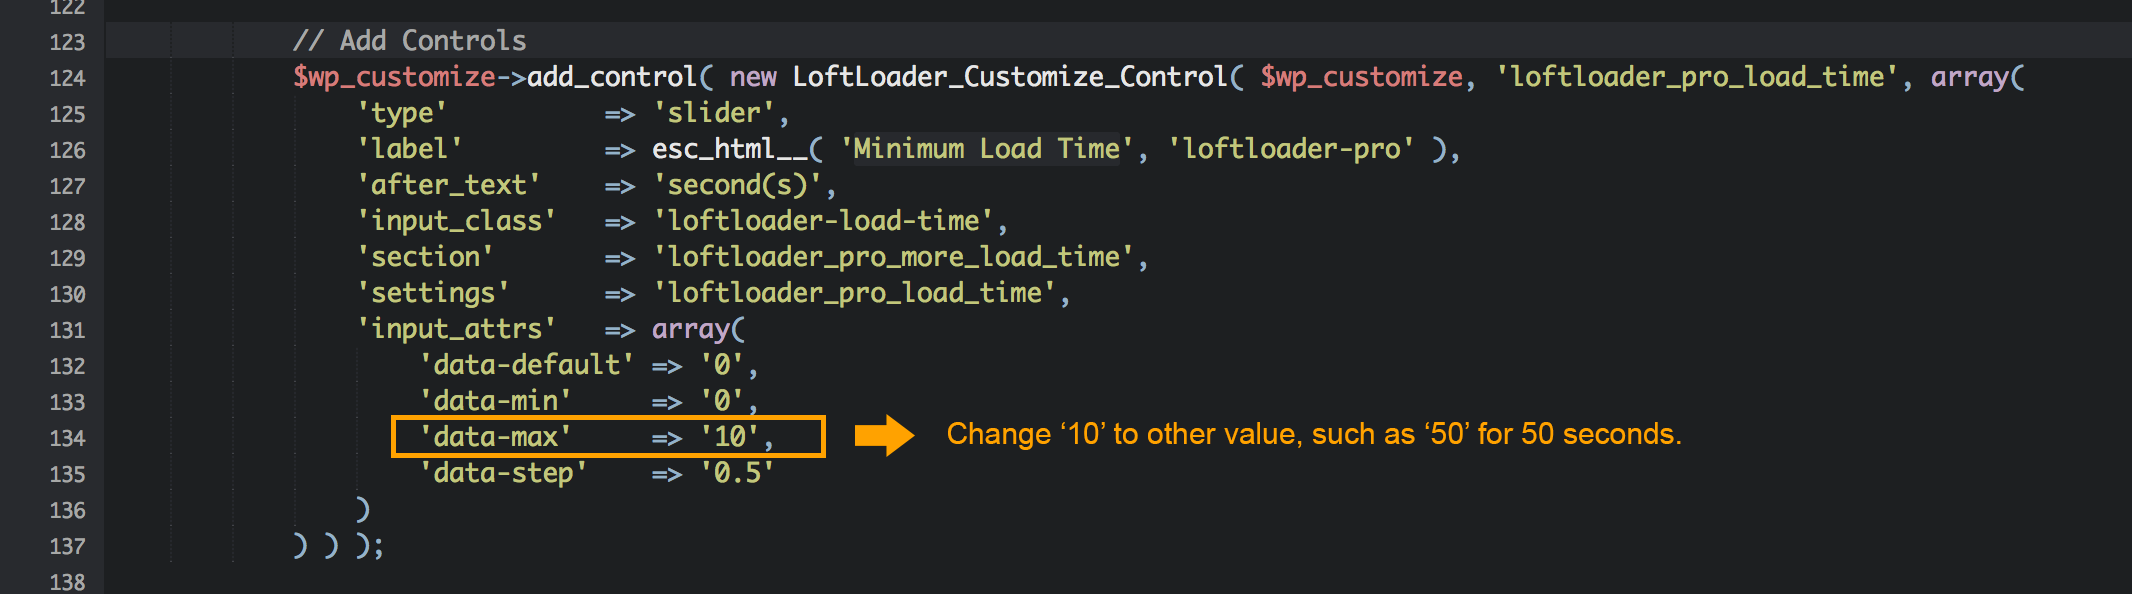
- Please go to line 123 to find the paragraph of “Minimum Load Time”, then change value of the “data-max”. The default value is “10”, you can change it to “50” for 50 seconds. Please see this screenshot as reference:
- Save the modified php file.
- Then please log into your website and open the setting panel of LoftLoader Pro, you will see the limitation of “Minimum Load Time” changes. You can change the load time to more than 10 seconds.
Please note:
- If you have modified the plugin’s code, then every time you update the plugin, you will need to modify the code again because any code customisation will be lost after updating the plugin.
- If you set a very long loading time, it might cause some animation effects to not be smooth, especially the loading animation of the progress bar. Please use it carefully.
If you need to hide the loading screen close button:
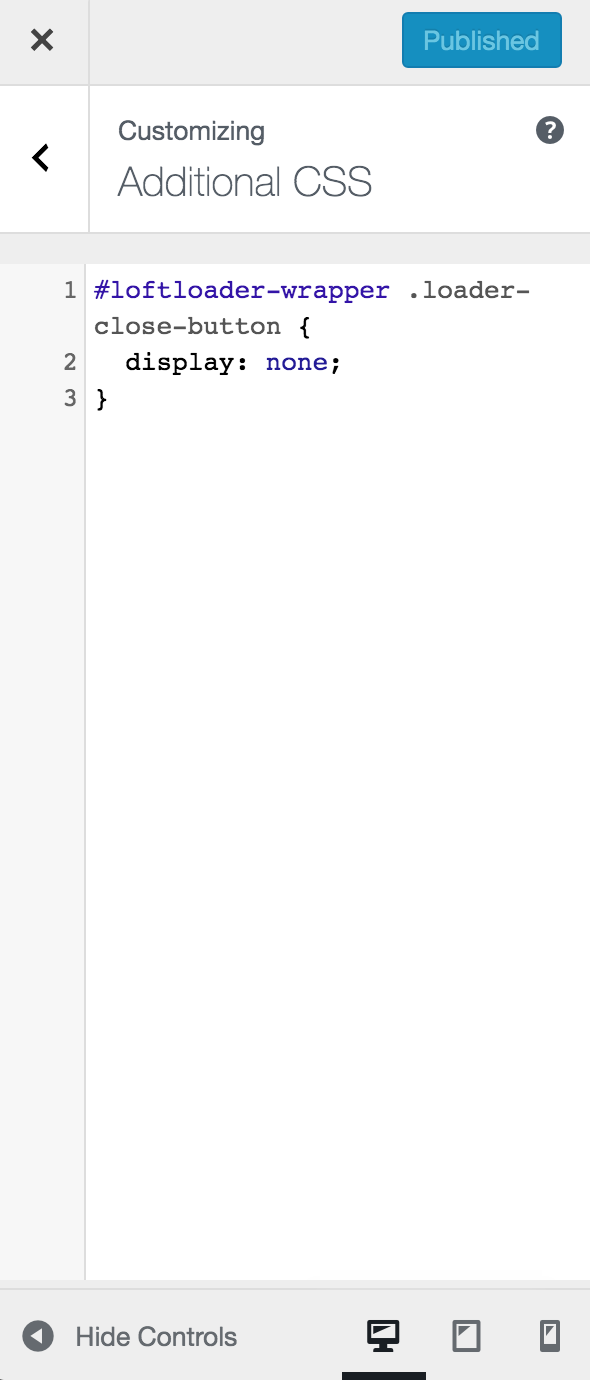
Please add the following custom CSS to your website to hide the close button (via Customizer > Additional CSS):
#loftloader-wrapper .loader-close-button {
    display: none;
}
Please check the following screenshot for reference: