Advanced
Where to save customize styles
Click on the Advanced section, here you can choose to save loader customize styles:
- As inline styles in < header > – Default setting.
- As an external .css file – When choose this option, please make sure your WordPress has write permission to create files. Or the styles will be saved as inline styles in < header >.
JavaScript Loading
In the LoftLoader Pro’s settings panel, please navigate to Advanced > JavaScript Loading. Here you can change the JavaScript Loading Priority:
- Default
- Immediately after the preloader HTML
- At the end of the site footer
There will be JavaScript code from different plugins and the theme on a WordPress site. Usually these JavaScript code need to be loaded in a specific order to work properly. However, JavaScript from multiple different sources can sometimes cause problems in collaboration. If you encounter similar problems, you can try to adjust the loading order of LoftLoader Pro’s JavaScript.
Display different loaders on different pages
To add different loaders to different pages (like what we do on our demo site), please follow steps below:
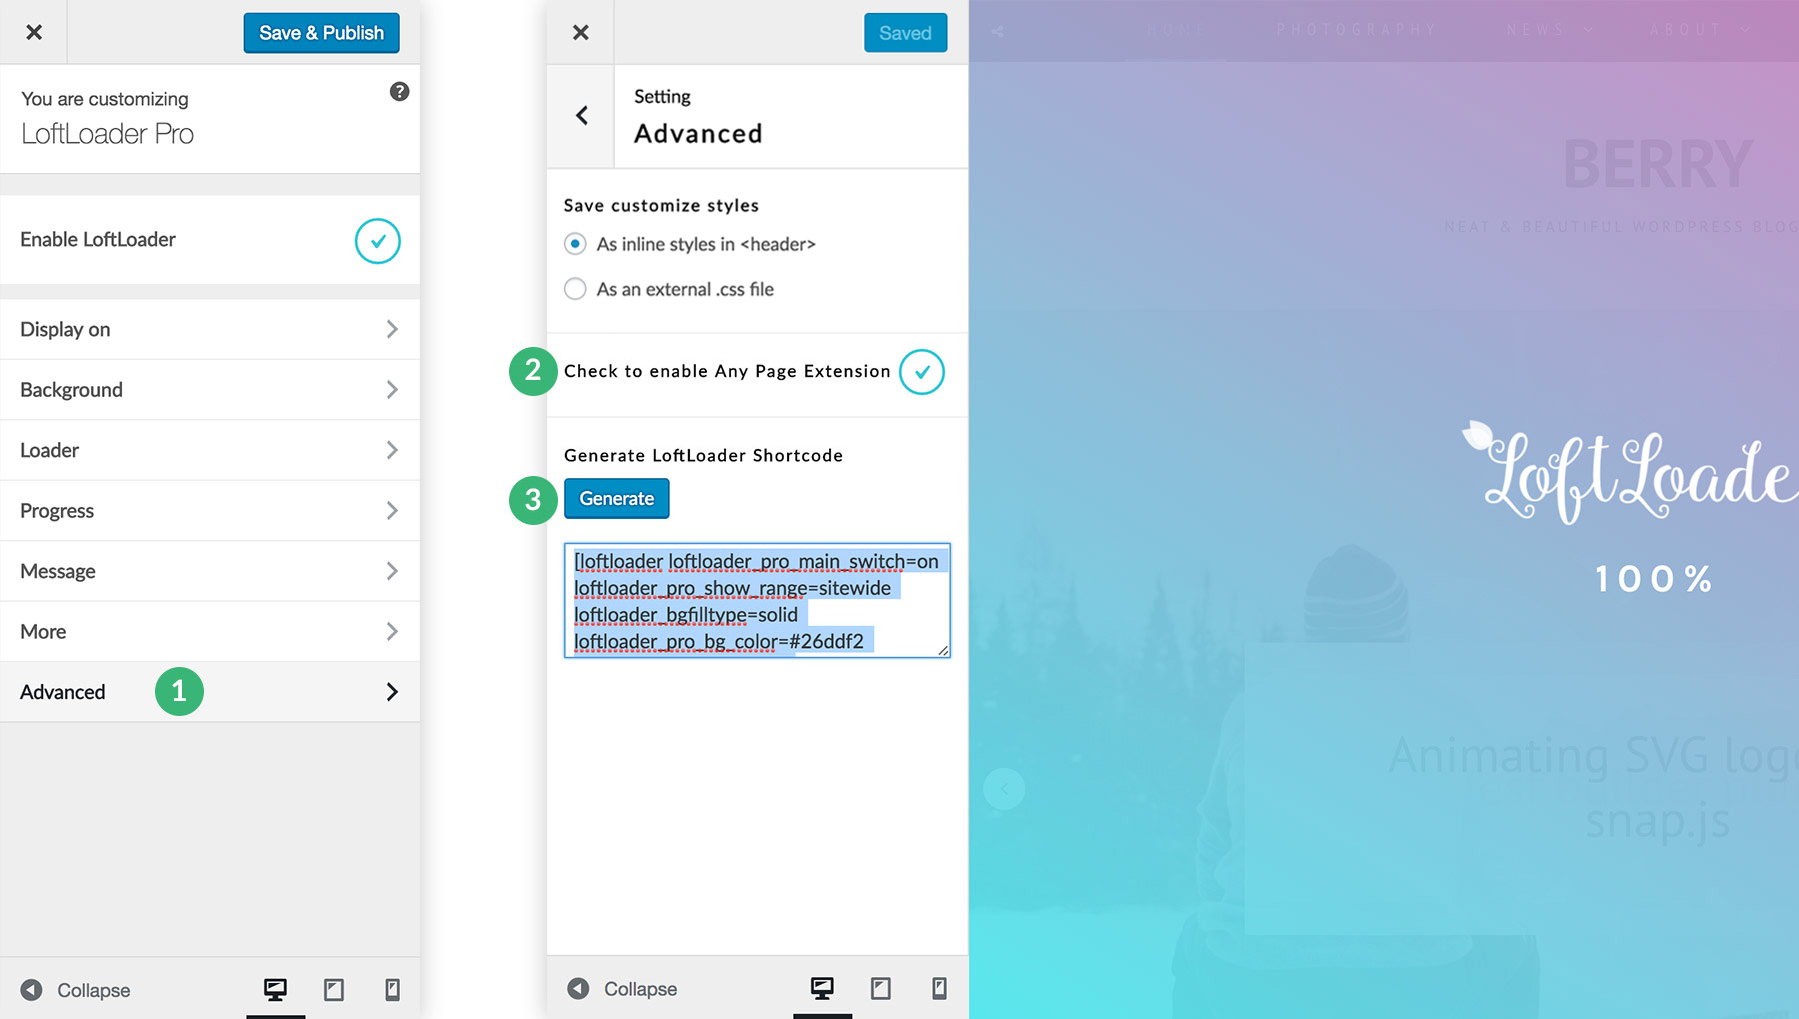
- Open the LoftLoader Pro settings panel, click Advanced section, tick to enable “Any Page Extension”. Then click on the ““Save & Publish” button.
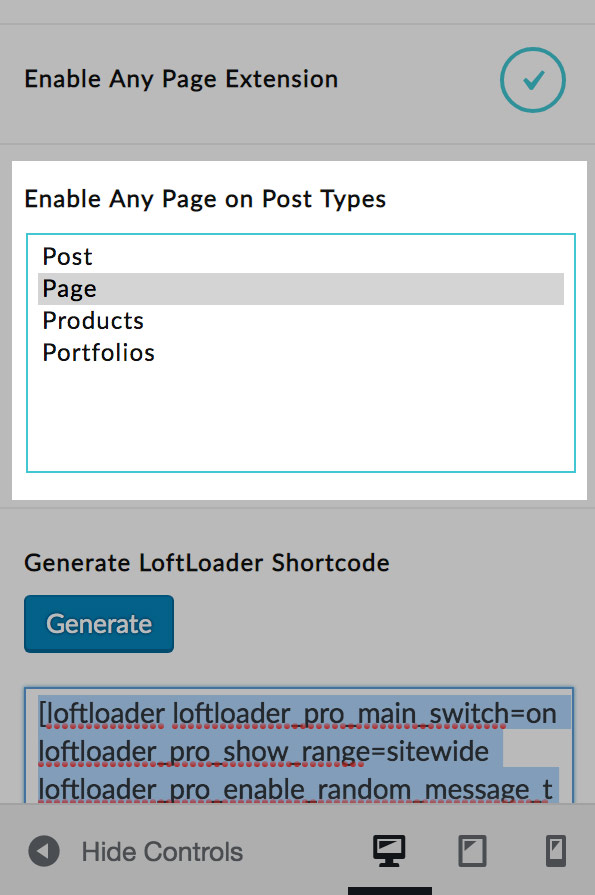
- Before version 2.0, Any Page Extension can only be enabled on Pages. Since version 2.0, Any Page Extension can be enabled on all post types, including Pages, Posts, and custom post types created on your website, such as Products, Portfolios, etc. Only “Page” is enabled by default. To enable Any Page Extension on other post types, please find the “Enable Any Page on Post Types” option, and select the post types. After making changes to this option, please click on the ““Save & Publish” button.
- Then let’s generate the shortcode of the loading screen. Now you can customize the loading screen to make a new style, then come back to Advanced section, click on the “Generate” button to generate shortcode for the loader showing in the preview area. Please note: please do not click on the “Save & Publish” button now. Otherwise, this new loading screen will overwrite the original loading screen of your site.
- Select the shortcode and copy it.
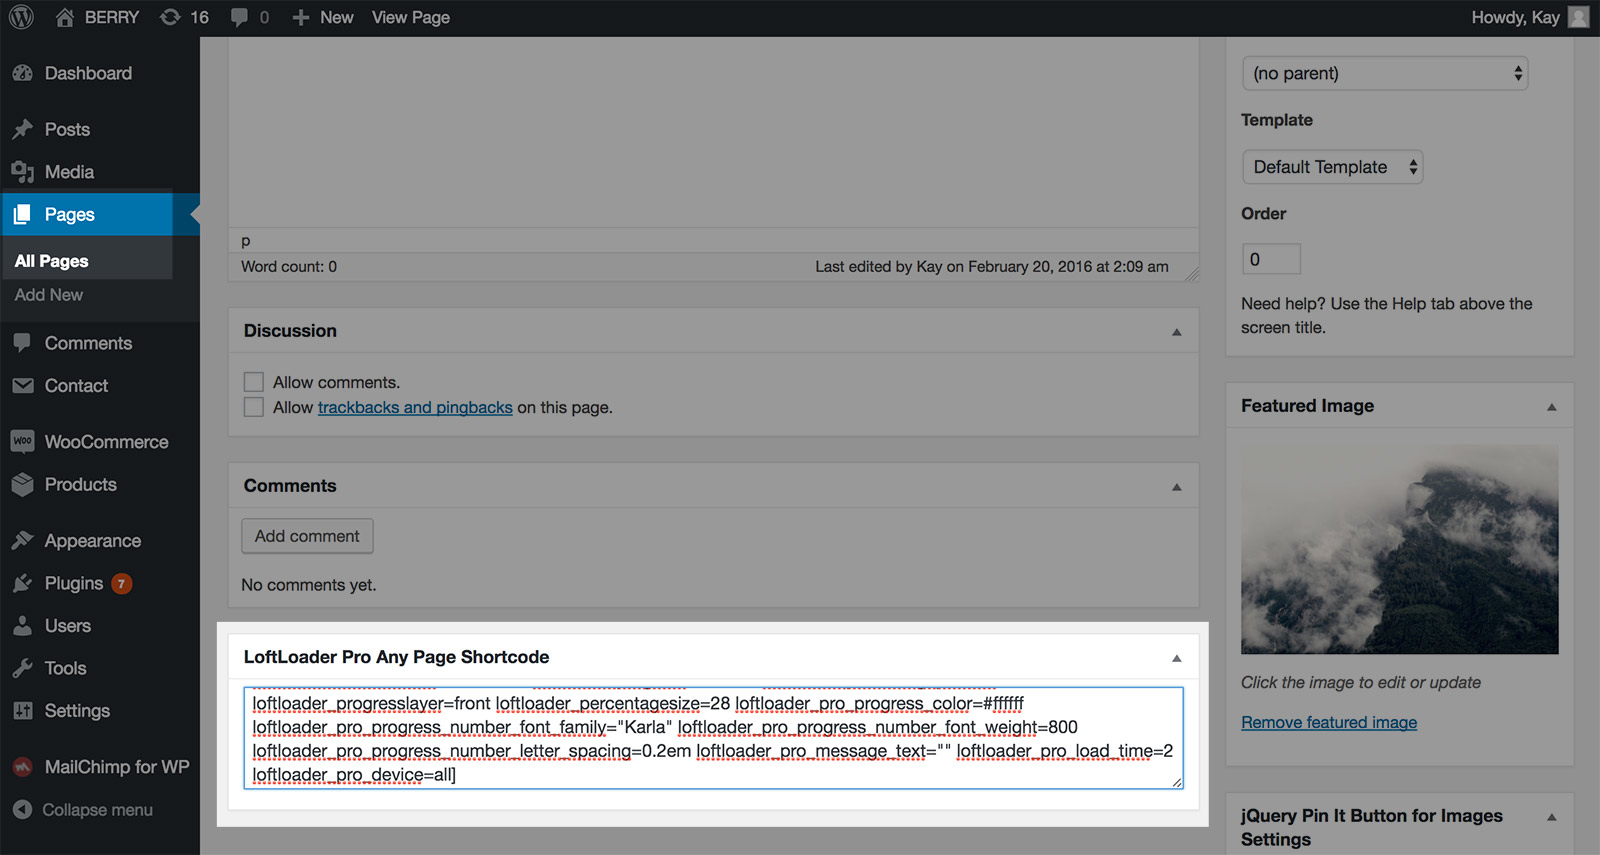
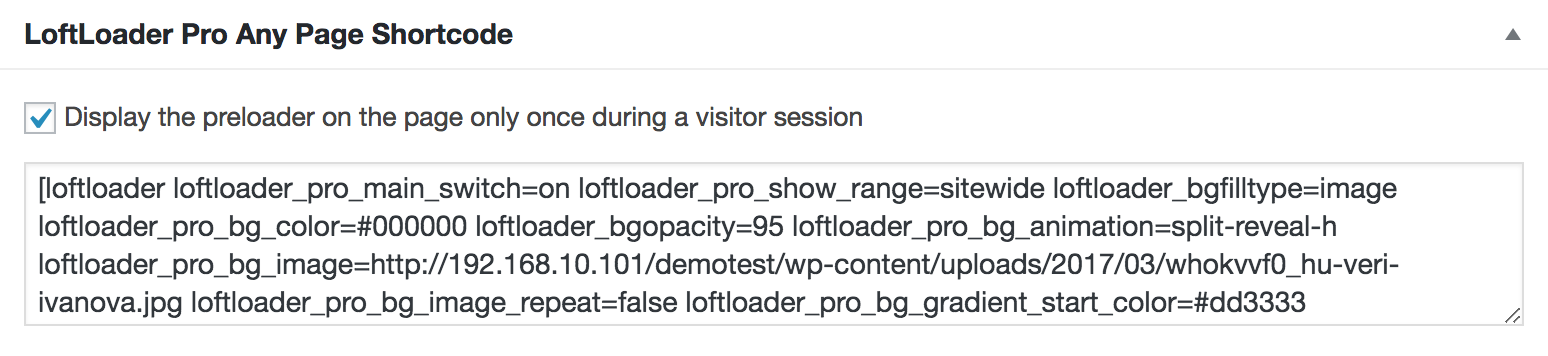
- Go to your site dashboard, create a new page, or edit an existing page. You will see there is a “LoftLoader Pro Any Page Shortcode” box on the page. Paste the shortcode into the box. Save and publish the page. (If you are using Gutenberg editor, please scroll down the page and read “Shortcode – Gutenberg Editor” chapter.)
- Since version 1.1.3, you can display the preloader created by shortcode only once during a visitor session.
- Done.
Shortcode - Gutenberg Editor
In the Classic Editor, the options for adding LoftLoader shortcode are the meta boxes which were displayed below the post editor. Since LoftLoader Pro v1.2.3, we redesigned these settings to fit in the Gutenberg UI – Sidebar. So, if you edit a page in Gutenberg, you can find the “LoftLoader Pro Any Page Shortcode” options in the editor sidebar.
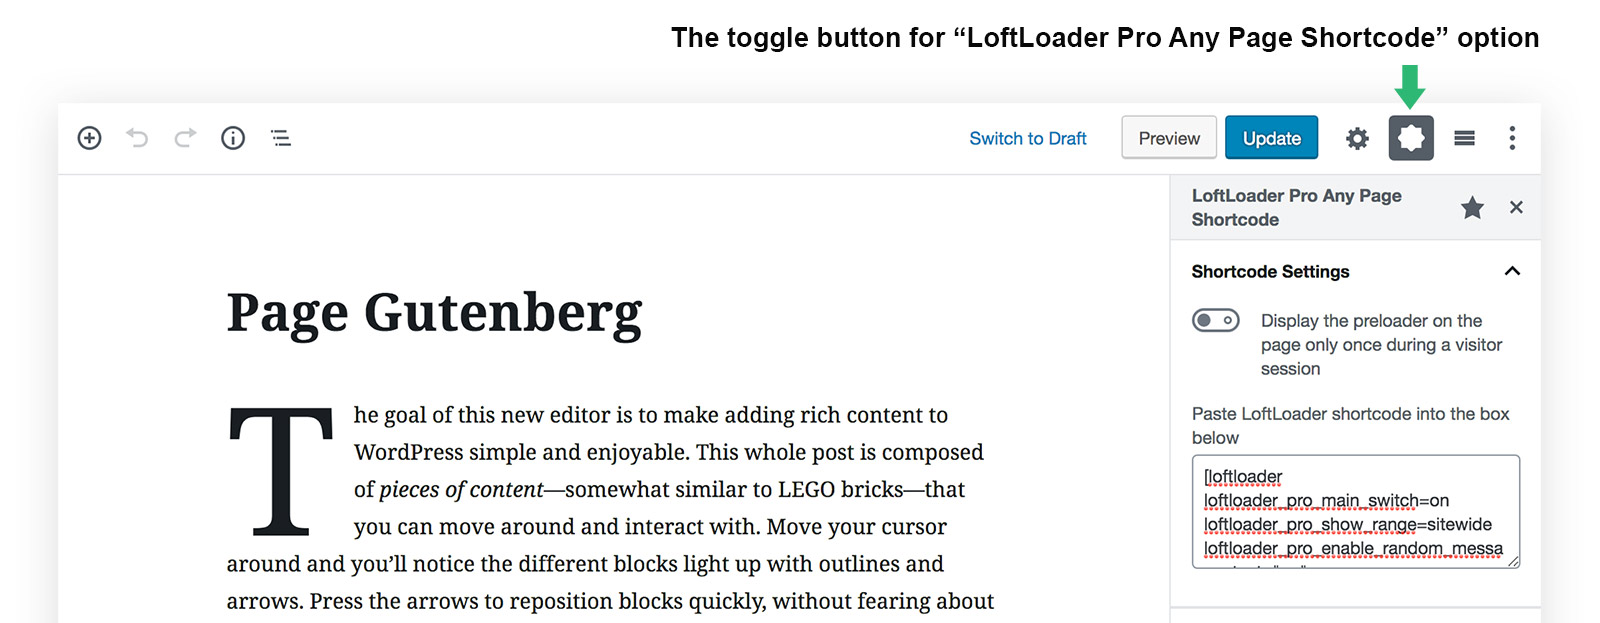
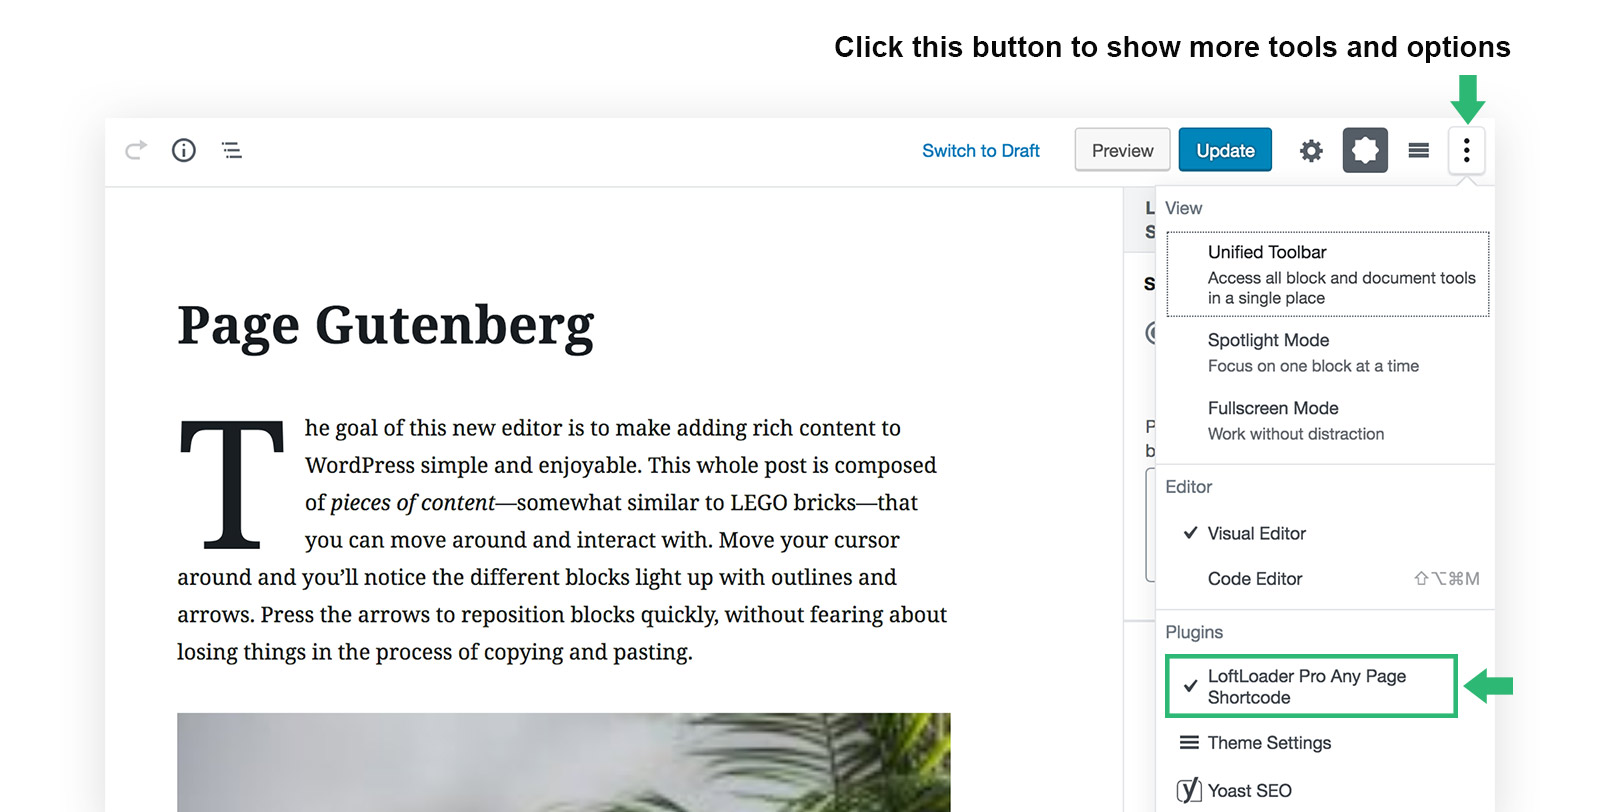
Please make sure the “star” icon is enabled to pin the “LoftLoader Pro Any Page Shortcode” toggle button to Gutenberg Toolbar.
If the toggle button is unpinned from the toolbar and you cannot find it, please click the “Show more tools and options” icon, then you can find “LoftLoader Pro Any Page Shortcode” in “Plugins”.