Special Sections
How to Add a Special Section
- On the LoftBuilder editor screen, activate content edit mode.
- Click on Special Sections button in the main toolbar.
- You can find all special sections show in the sub toolbar. Select one, hold to drag it onto your page and drop it at the target place.
- The special section now appears on the page.
Currently we provide 2 special sections. We will go through them one by one in the following subsections.
Posts
Posts section allows you to add a section of blog posts into any page.
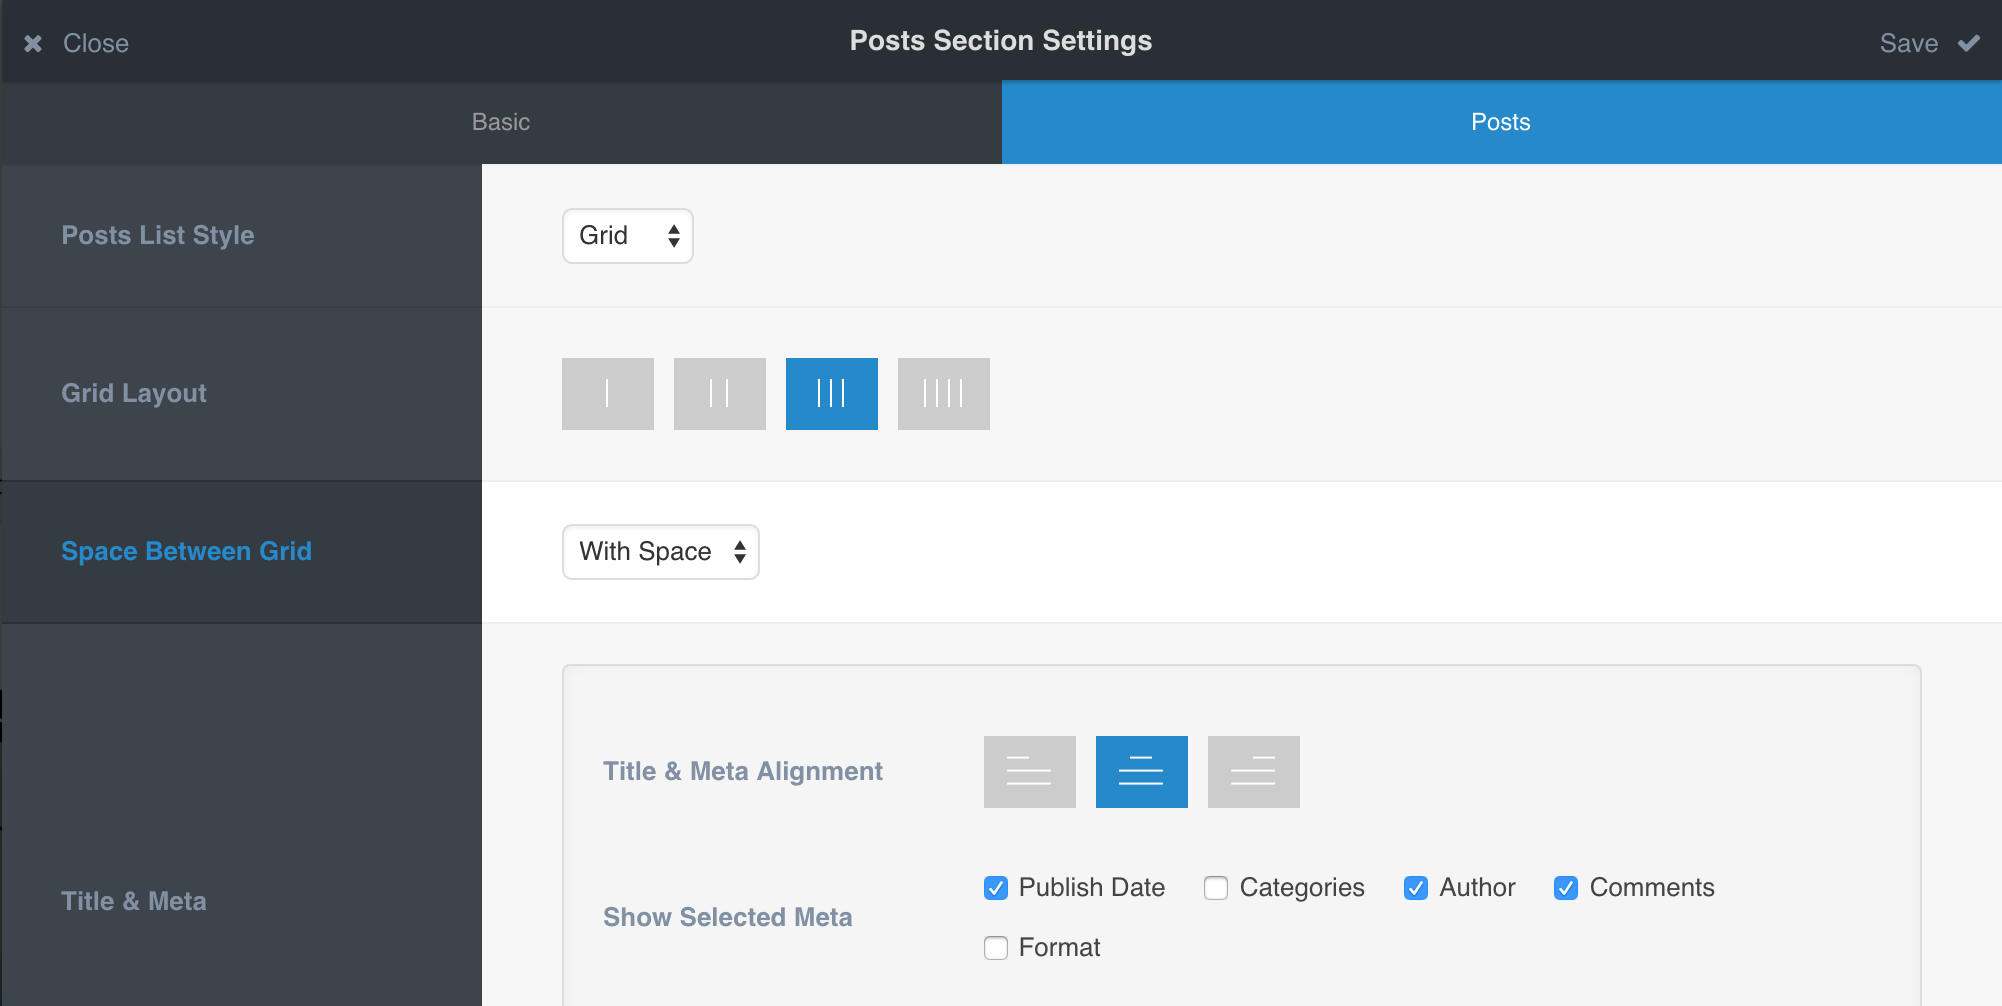
To edit a Posts Section, move your cursor onto the section to show the Section Toolbar and click Settings button to open the Posts Section Settings panel, then click on Posts tab.
Blog posts in the section can be in a Grid layout or in a Slider layout: Choose Slider or Grid for Posts List Style option.

Options of Post Grid
- Grid Layout – Allows to select 1 to 4 columns each row.
- Space Between Grid – No space / With space.
- Title & Meta – You can choose which ones of meta information will display, and control the content alignment.
- Select Posts – Allows you to choose blog posts by categories.
- Categories Filter – Enable to show categories filter.
- Pagination – You can choose one from Multi-pages, Load More button and No Pagination.
Options of Post Slider
- Slider Height– Screen height / Custom height.
- Title & Meta – You can choose which ones of meta information will display, and control the content alignment.
- Select Posts – Allows you to choose blog posts by categories.
- Maximum Slideshows – You can display up to 6 blog posts in a slider.
The posts options are quite self-explanatory so we will not go through every detail here. We suggest play around with those options to create your favourite layout and styles.
Tabs
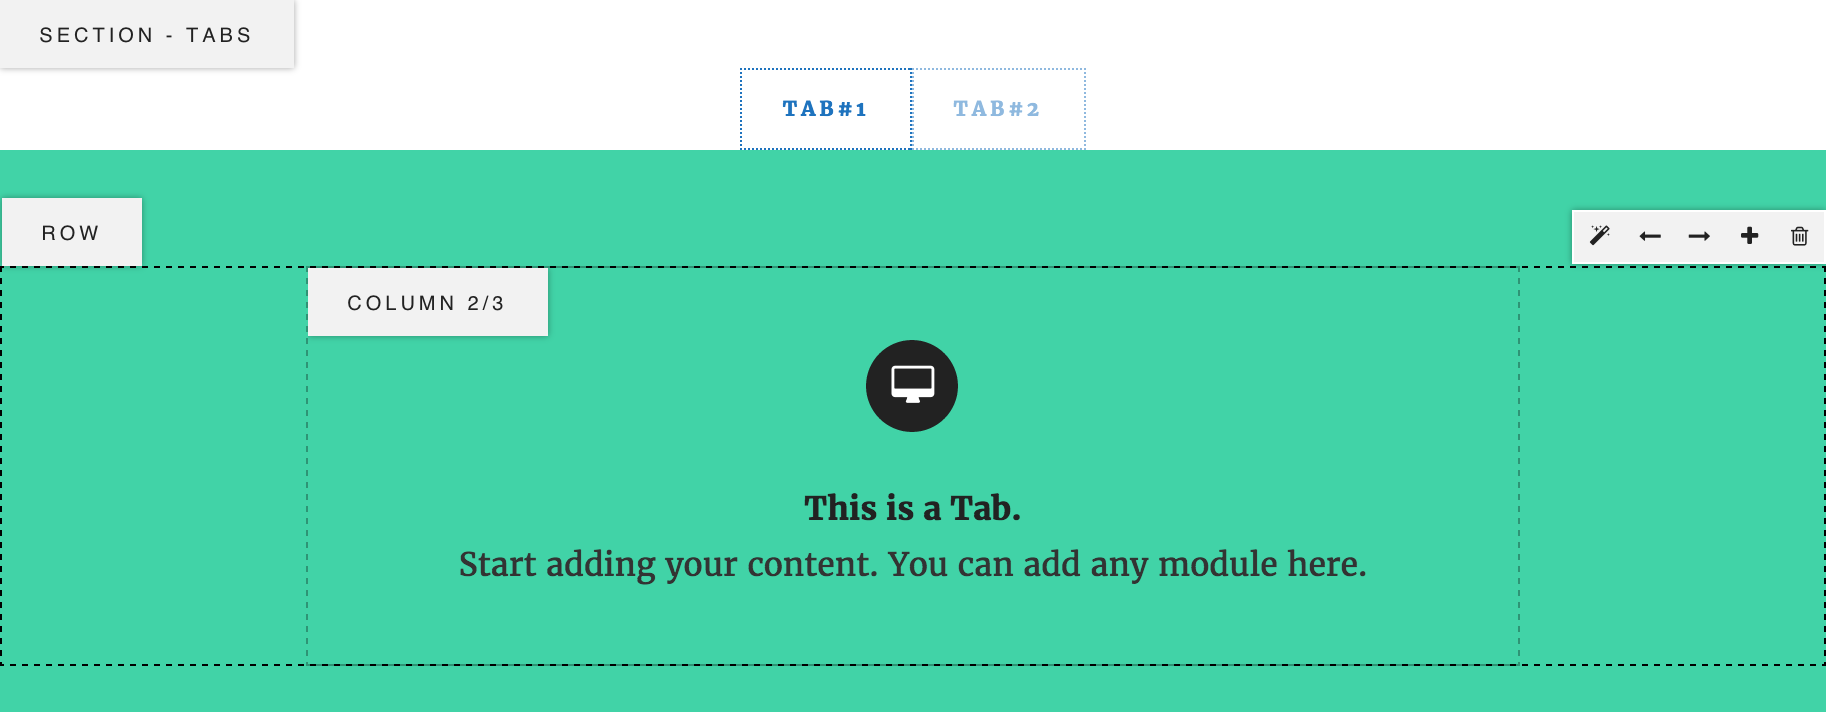
Tabs section allows you to add a section with multiple panels in it, each panel contains its own content, and there is a list of these panels’ titles, click each title to view the associated content.

Editing a Tabs Section:
- Activate the content edit mode of the page.
- Move your cursor onto the tabs section, you can see the Section Toolbar, and the Tab Toolbar for each tab.
Tab toolbar includes:- Background – Click to open Tab Content Background Settings panel where you can set the background color/image and add a color overlay for the current tab.
- Bring Forward – Click to change the tab order: bring forward.
- Send Backward – Click to change the tab order: send backward.
- Add New – Click to add a new tab after the current one.
- Remove – Click to remove the current tab.
- To edit another tab, click the tab link to move to that tab.
- To edit a tab link text, click on the tab link and type the text.
- To edit the content in a tab, just drag and drop rows/columns/modules into the tab and edit those elements.
Slider
Slider section allows you to add a slider with multiple slides. You can create different layouts for each slide, and can add any module into a slide.

Editing a Slider Section:
- Activate the content edit mode of the page.
- Move your cursor onto the slider section, you can see the Section Toolbar, and the Slide Toolbar for each Slide.
Tab toolbar includes:- Background – Click to open Slide Content Background Settings panel where you can set the background color/image and add a color overlay for the current slide.
- Bring Forward – Click to change the slide order: bring forward.
- Send Backward – Click to change the slide order: send backward.
- Add New – Click to add a new slide after the current one.
- Remove – Click to remove the current slide.
- To edit another slide, click on the prev/next arrow or the indicator circles to locate to that slide.
- To edit the content in a slide, just drag and drop rows/columns/modules into the slide and edit those elements.
