Predefined Sections
Start with Predefined Sections
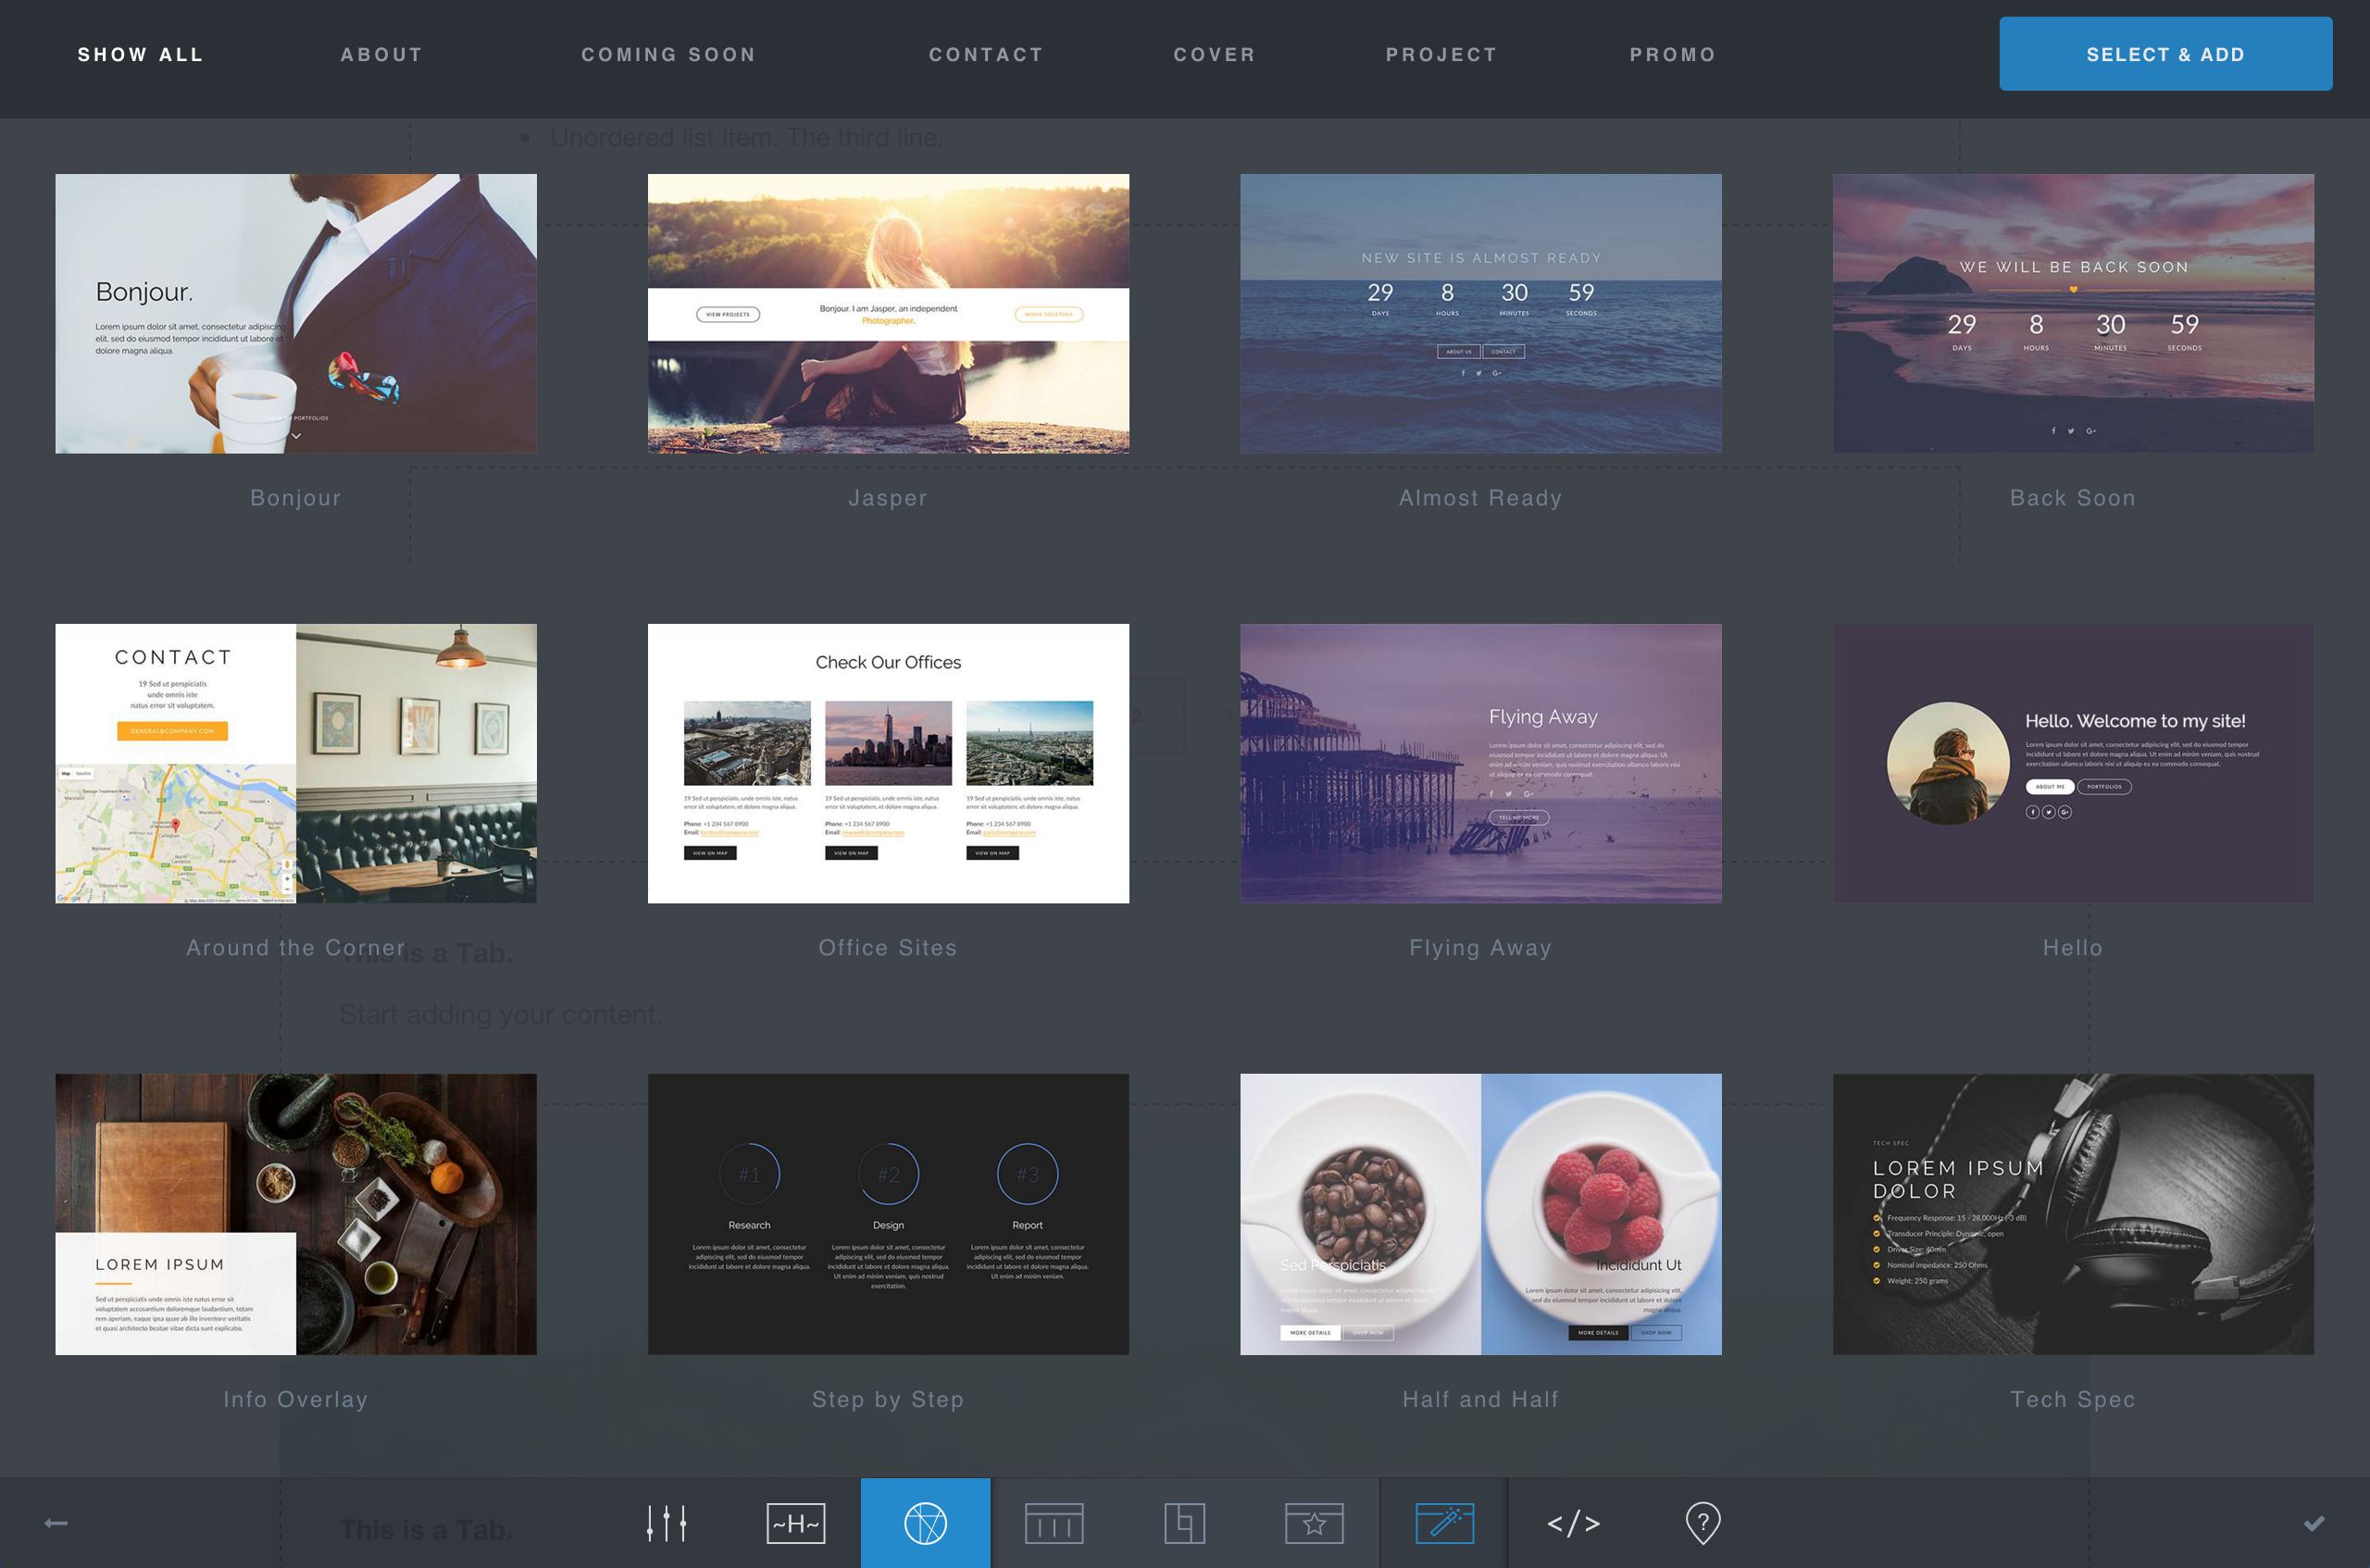
LoftBuilder provides 12 predefined sections. They are not templates – They are combinations of features and layouts, with preset design and sample content.
You can add any of them to any page, then edit content, layouts and styles as you want, replace the sample text and media files with your own content.
- On the LoftBuilder editor screen, activate the edit mode.
- Click on Predefined Section button in the main toolbar to open the sub panel.
- Click to select one or several, and click on Select & Add button. The selected sections will be added to the end of the page.
Custom Predefined Section
Create a custom predefined section
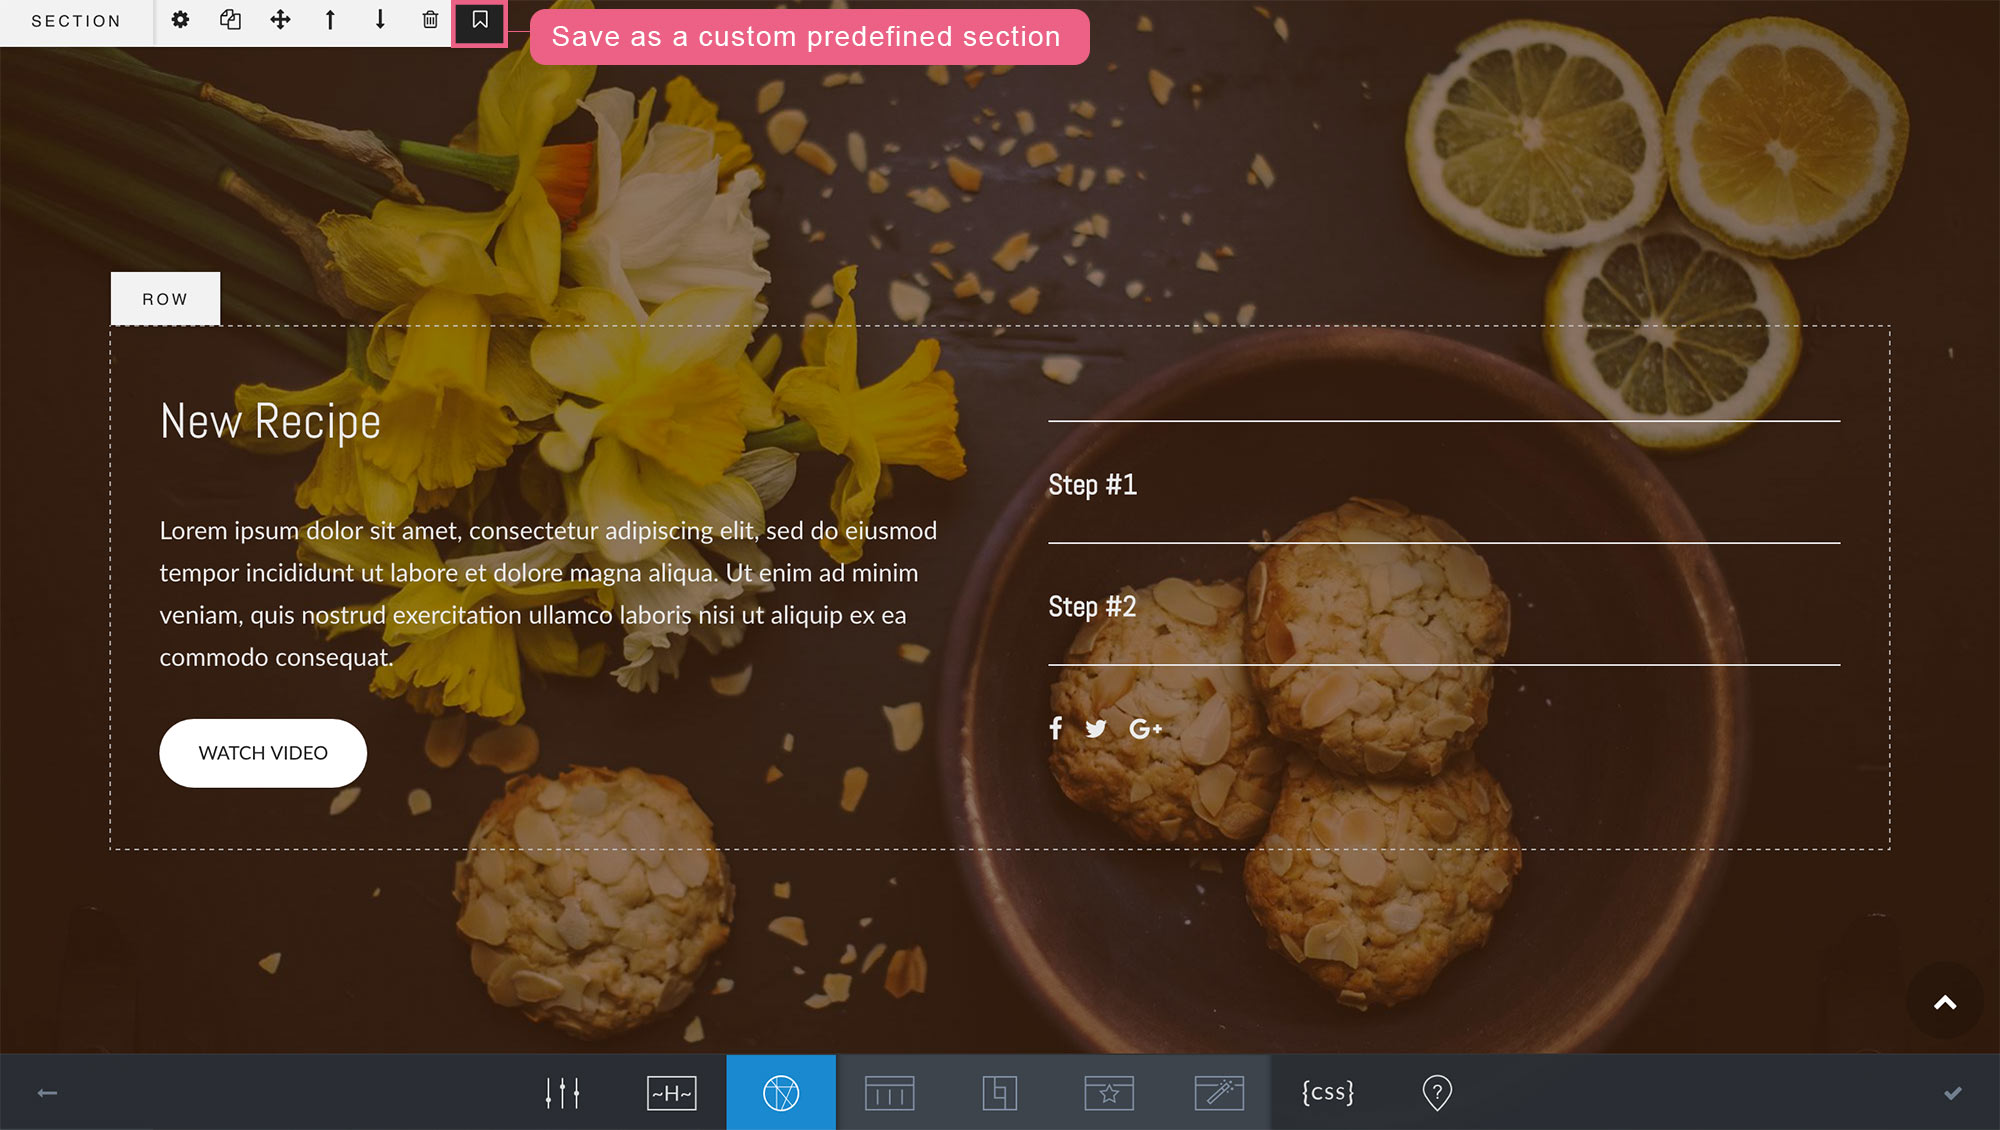
When you create a section with layout and content in it, and then you can save it as a custom predefined section and reuse it later.
Hover on the section toolbar, you will see the “Save as predefined section” button. Click on it.
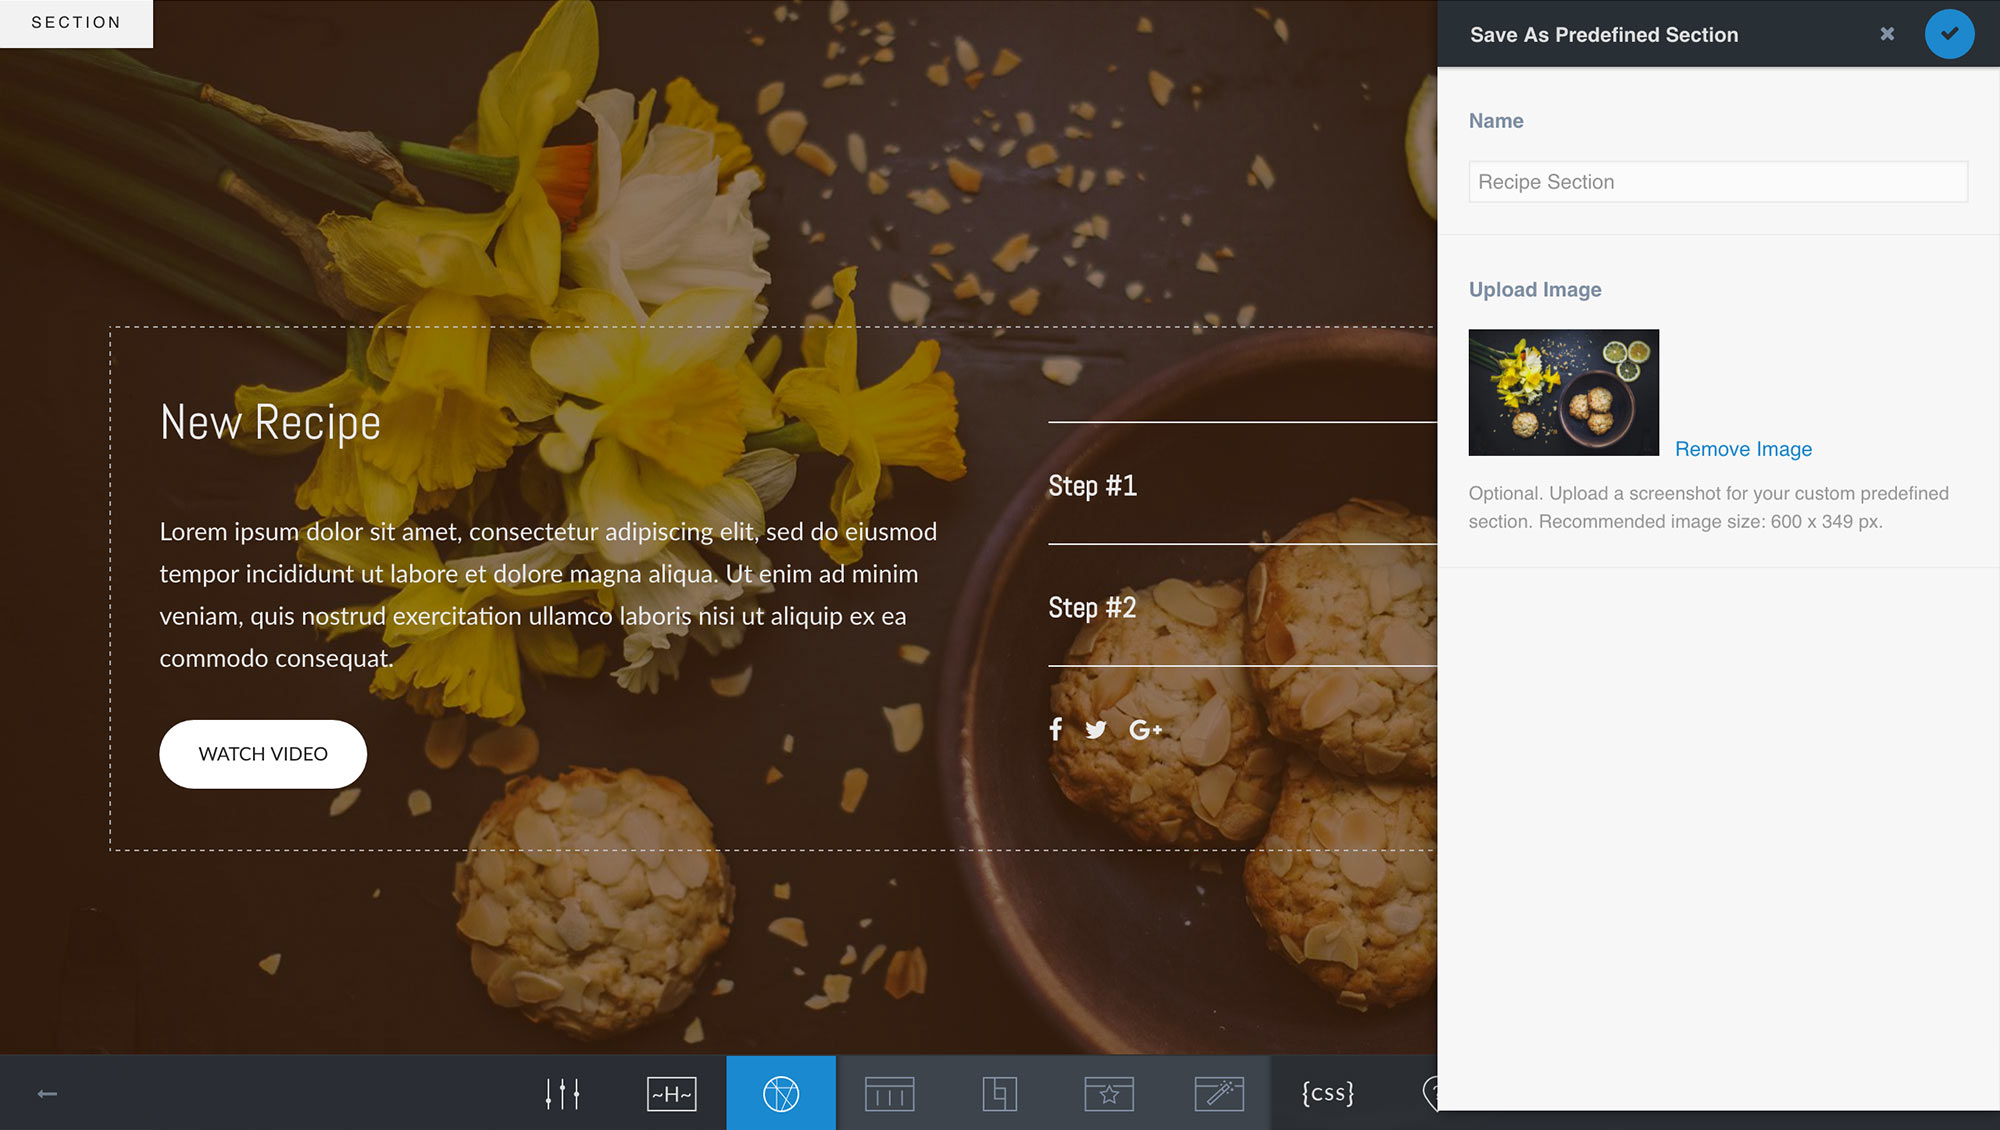
In the pop-up panel, you can give it a name, and also upload an image or a screenshot of it. Then click on the “Apply/Save” button.
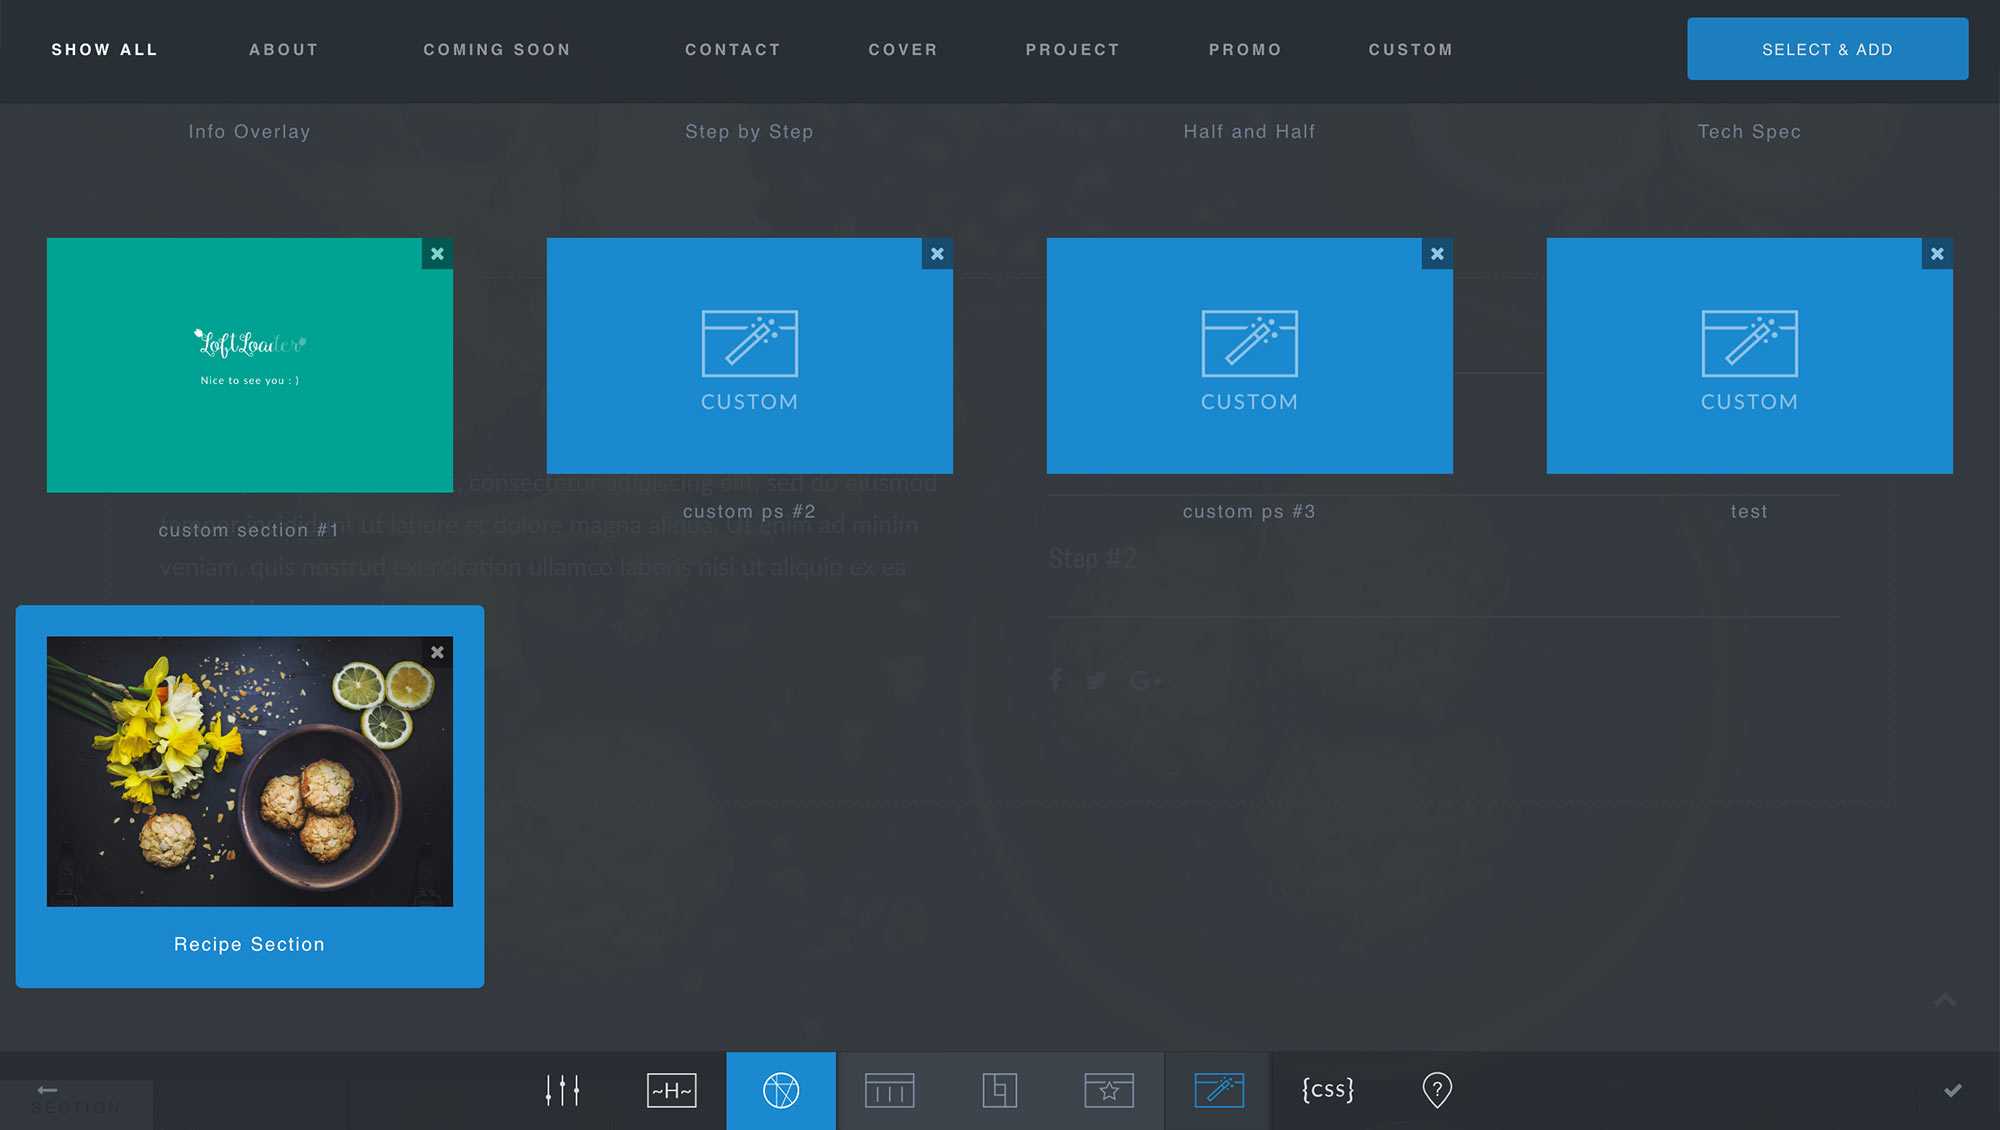
Open the Predefined Section panel, you will see the section you just saved in the end of the list. Now you can select and reuse it on other pages.
Remove an existing custom predefined section
In the Predefined Section panel, you will also find there is a small “x” button on the top right corner of each custom predefined section. Click on it if you’d like to remove the predefined section.
Update some content/layout/style of an existing custom predefined section
- Open the Predefined Section panel, find the one you’d like to update, select and add it to the page.
- Change anything in it, and hover on the section toolbar.
- You will find there is a new “Quick Save” button. Click on it.
- Done. All changes will be saved into the predefined section library. Now you can remove the section from the page.
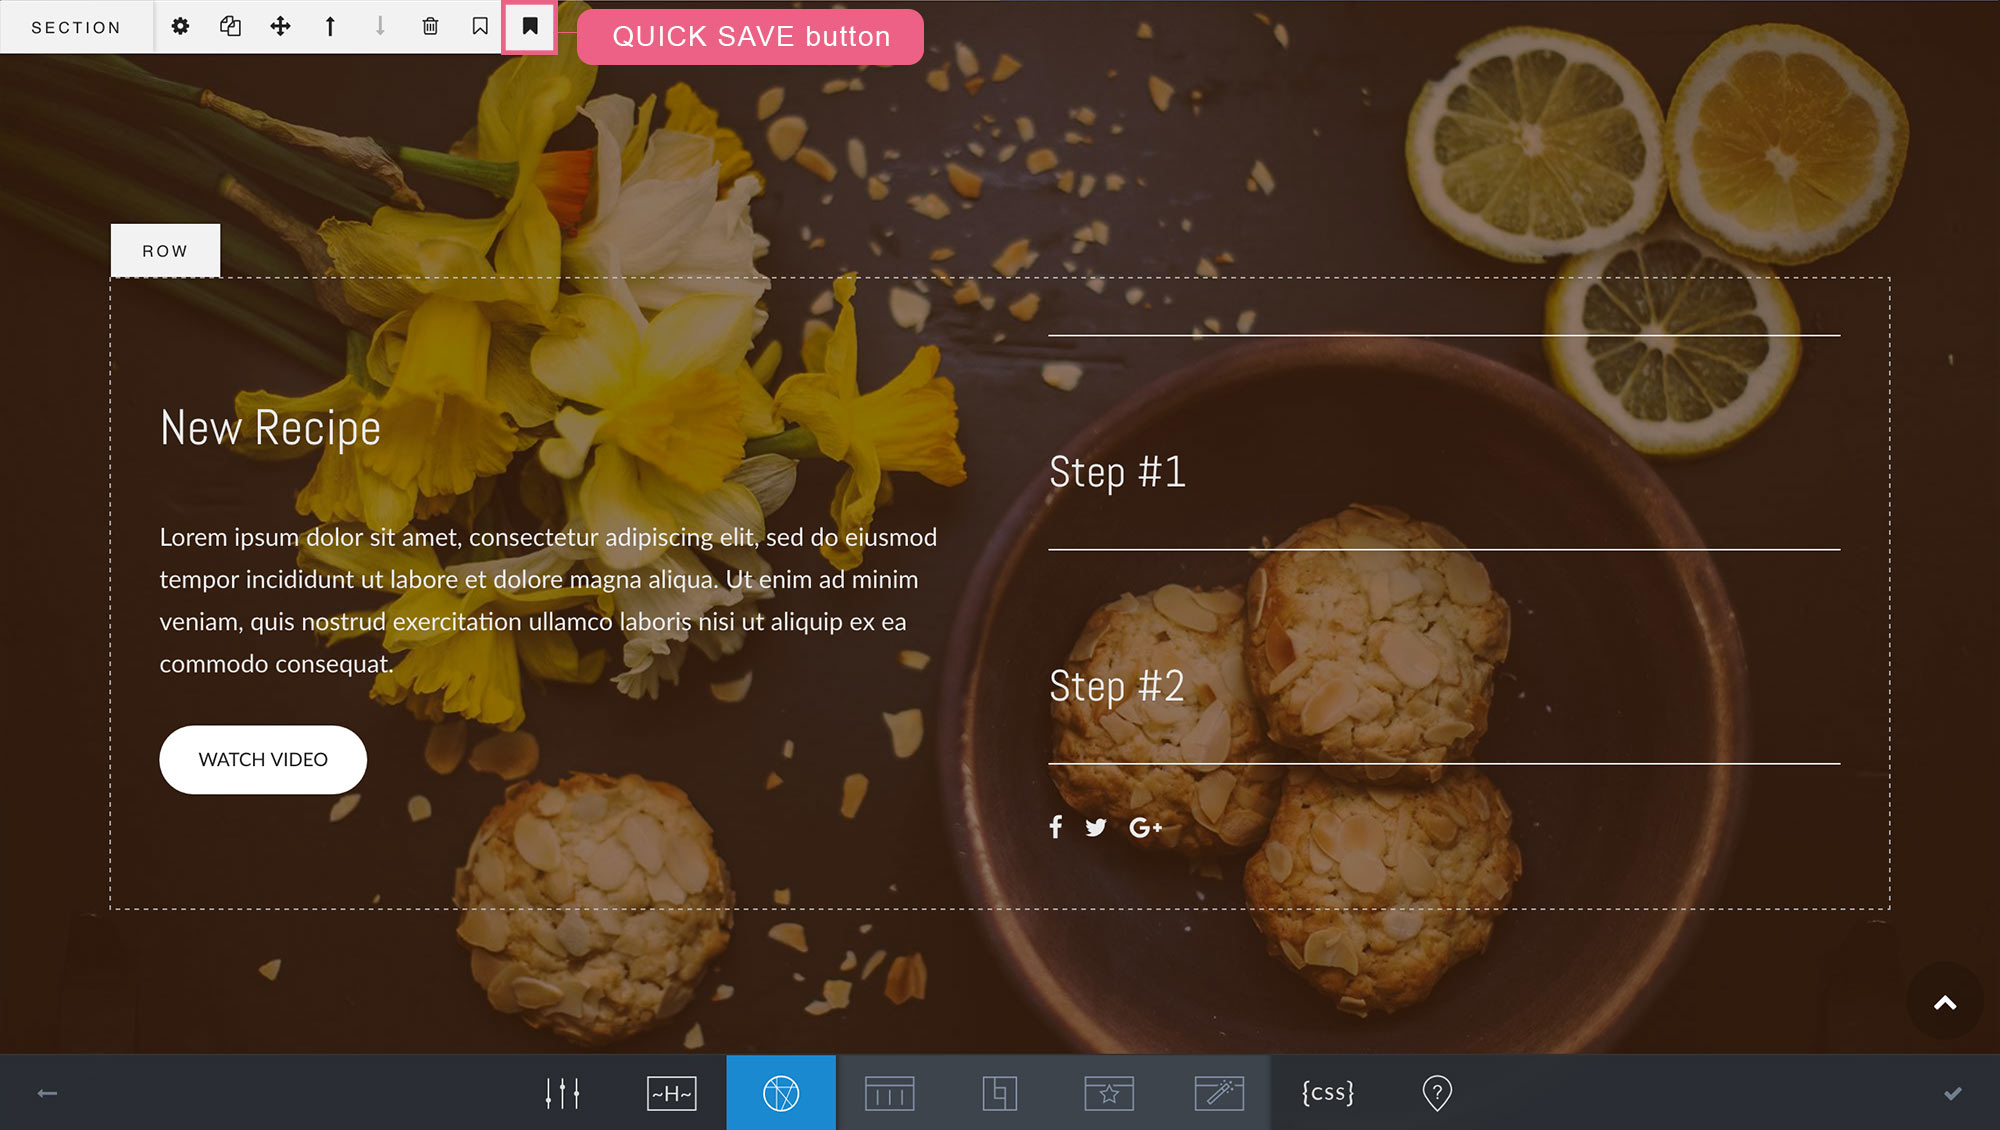
Please note: the “Quick Save” button only appears when the section is a saved custom predefined section.
Update content/layout/style AND section name/screenshot of an existing custom predefined section
- Open the Predefined Section panel, find the one you’d like to update, select and add it to the page.
- Change anything in it, and hover on the section toolbar.
- Click on the “Save as predefined section” button to pop up the setting panel.
- Change the section name, or upload a new screenshot.
- Done. It will create a new predefined section with updated layout/content/section name/screenshot. You can remove the old one if you like.
And if you want to create another custom predefined section based on an existing one, just follow the same steps as above.
Photos used in Predefined Sections
The photos used in Predefined Sections are from Unsplash.
And you can also find them in the plugin folder: assets > img > predefined.