Plugin Settings
Overall
On your WordPress dashboard, go to Settings > LoftBuilder. There you can find the overall settings for LoftBuilder:
- Color Scheme – The basic color scheme of the site, light or dark.
- Primary Color – The main accent color can be applied to many elements.
- Default Separator Style
- Default Button Style
Primary Color
Primary Color is the accent color can be used site-wide. Once set up, you can apply it to many elements created by LoftBuilder, such as buttons, icons, overlays, etc. Stay on one main accent color is a good way to keep the look consistent throughout your site.
Before starting to set up the primary color, you need to enable it first. If not, the default color of elements will be black or white, depends on the color scheme.
Setting primary color
- On your site, go to Dashboard > Settings > LoftBuilder > Overall.
- Find Primary Color options.
- Click to enable it.
- Select a color from the color picker.
Using primary color
When you edit color for an element, for example, an icon, when set its color, you just need to click on the Primary Color button in the color picker panel. Then the primary color you have defined will be applied to the icon.
If you change the primary color setting, the color of elements using primary color will also be updated.
Default Separator Style
For the site look consistency, you are able to decide the default style for all separators created by Separator Module.
On your WordPress dashboard, go to Settings > LoftBuilder > Overall, you will find options for separator lines.
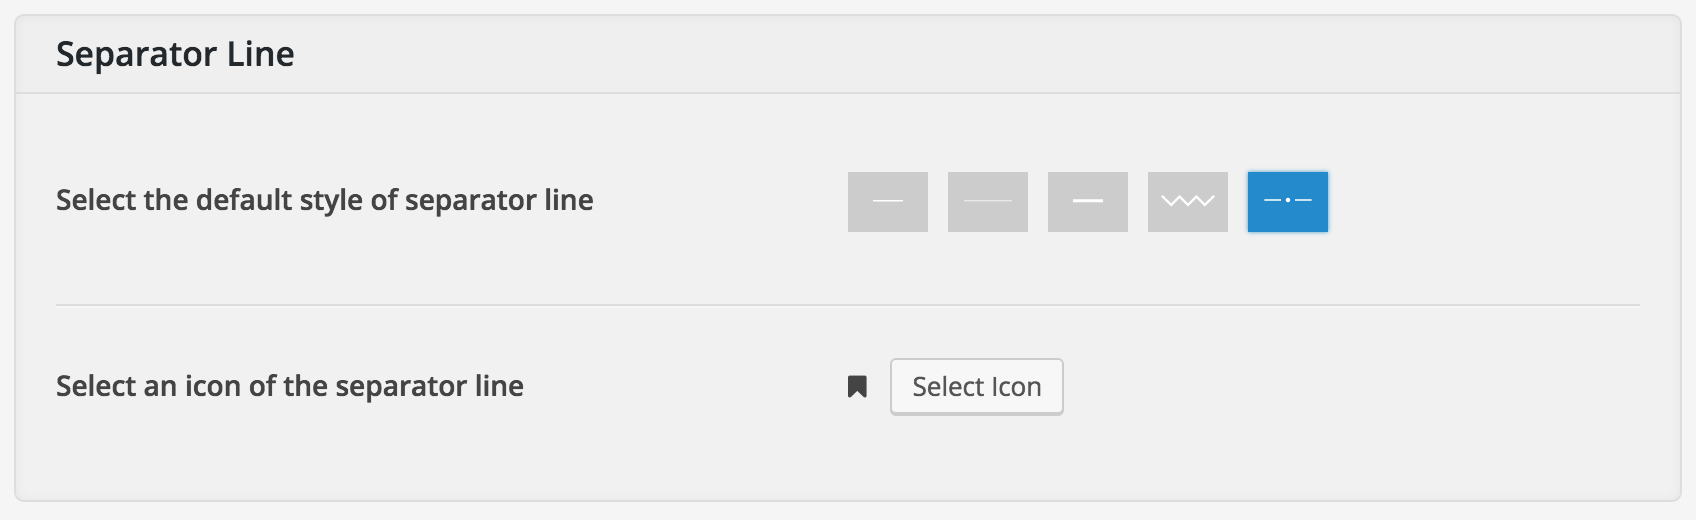
We provide 5 styles of separator lines:
- Thin & Short
- Thin & Long
- Bold & Short
- Zigzag
- With Icon
If select the last one, then you can also pick a default icon goes with the separator.
Here you are only choosing the default type of separators. Later when you add and edit a Separator Module on a page, you can set color for it, and you are always able to select another style as you wish.
Default Button Style
For the site look consistency, you are able to decide the default style for all buttons created by Button Module.
On your WordPress dashboard, go to Settings > LoftBuilder > Overall, you will find options for buttons.
- Button Style – With Border / With Background
- Button Shape – Square / Rounded Corne / Pill
- Rounded Corner Size – If choose Rounded Corner as button shape, then drag the slider to set the rounded corner size.
- Button Size – Small / Medium / Large
Here you are only choosing the default styles of buttons. Later when you add and edit a Button Module on a page, you can set color for it, and you are always able to select another style as you wish.
Color Scheme
LoftBuilder provides 2 color schemes: Light & Dark. The color scheme settings can be applied to containers: each page, section and column.
Modules have different basic colors when they are in columns with different color schemes. For example, when you add an icon to a light scheme column, the icon is dark grey, then you drag and drop it to a dark scheme column, it turns to white.
You can change the default color settings for each color scheme. On your WordPress dashboard, go to Settings > LoftBuilder > Color Scheme.
Inheriting Color Scheme
The color scheme settings are inherited. It means:
- If you choose Light Scheme as your site basic color, then all NEW pages built by LoftBuilder will be set to Light Scheme as default when you create them.
- If work with LoftBuilder, when you set a page’s basic color to Light Scheme, then all NEW sections you add to the page will be set to Light Scheme too.
- When you set a section to Dark Scheme, then all of the NEW columns added to the section will be Dark Scheme as well.
You can always change any container’s color scheme: the page, the page header (if it is a Fancy Header), any section, and any column.
Please note: When change the parent container’s color scheme, it won’t change the existing child containers’ color scheme.
For example – A Light section has a column inside, the column is Light Scheme as default. Then change the section’s color scheme to Dark, but the column stays with Light Scheme. Now if you add a new column to the section, the new one will be Dark Scheme.
Slider Settings
When add a Posts Section to a page, you can choose to display the posts in a slider.
On your WordPress dashboard, go to Settings > LoftBuilder > Slider. There you can change the settings of your post slider’s animation effects.
- Enable autoplay – If enable, the slideshows roll one by one in a loop automatically.
- Transition
- Fade – Slideshows fade in and out.
- Slide Horizontally – Slideshows slide horizontally.
- Slide Vertically – Slideshows slide vertically.
- Slider Stop Duration – Controls how much time each slideshow will stop.
- Slider Transition Duration – Controls the transition duration between 2 slideshows.
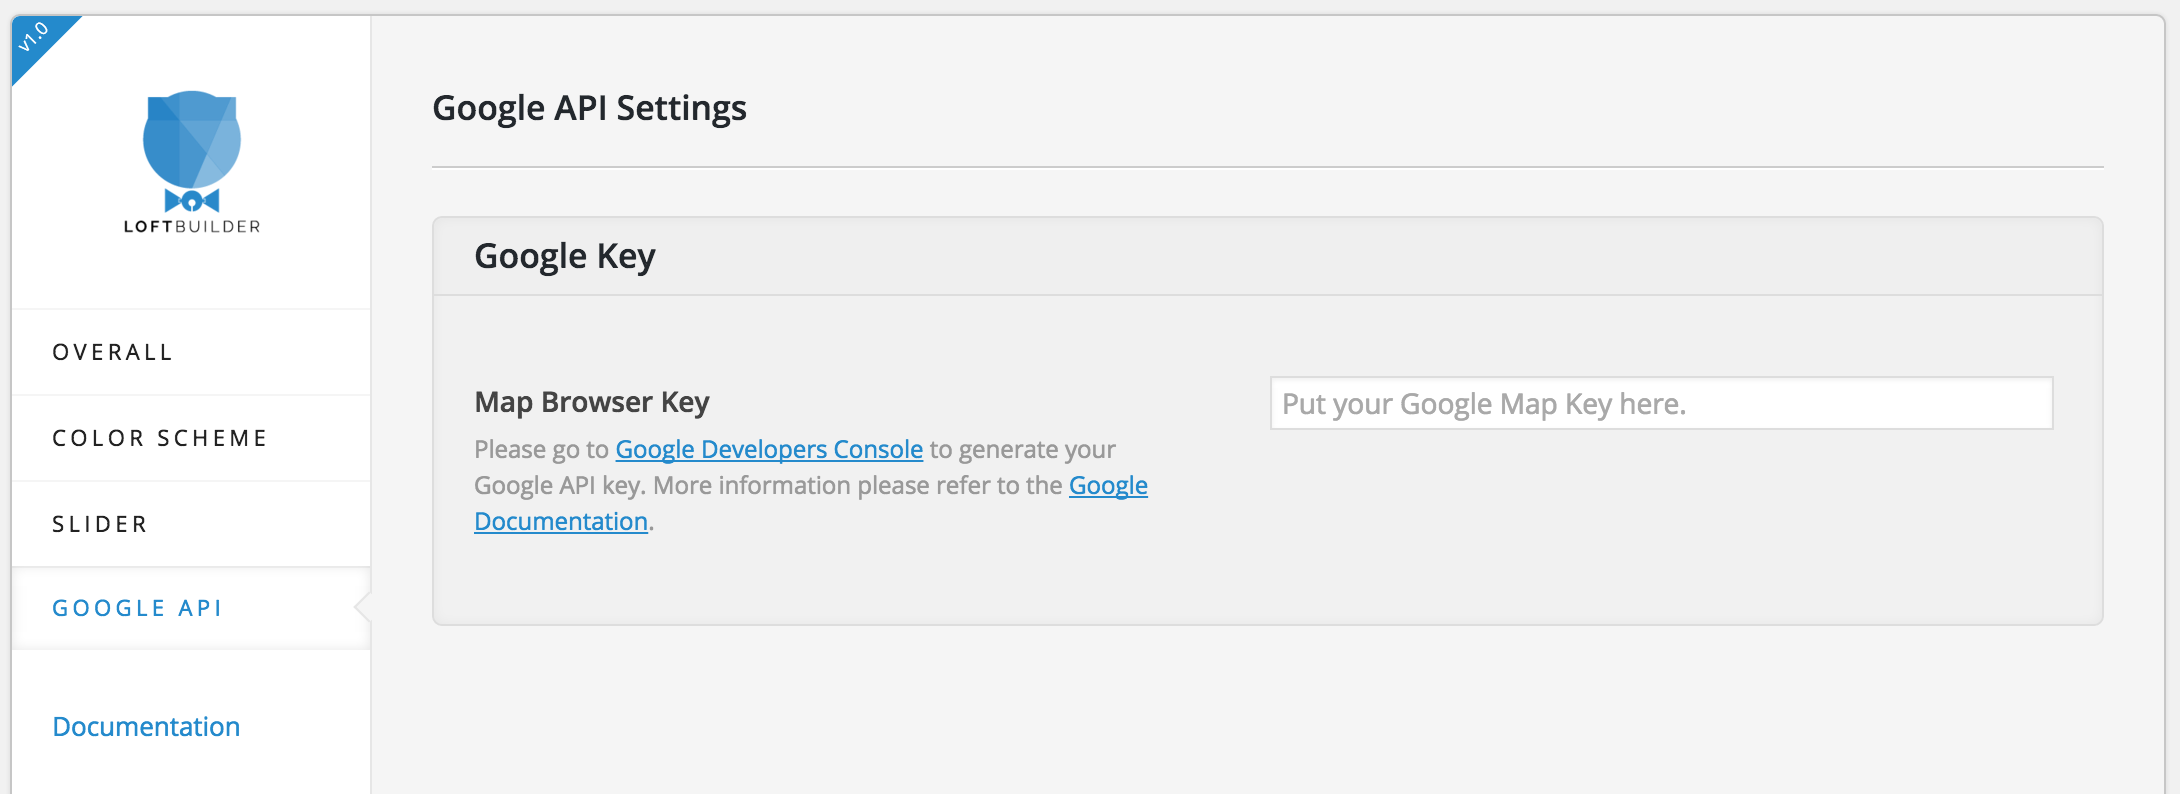
Google API
Before adding a Google Map to your page by using the Map Module, you need to add an API key. Because “All JavaScript API applications require authentication” (please click the link to check more details on Google Developers official site).
You can use the API under the standard plan or under the Google Maps APIs Premium Plan. You may want to check Google Maps JavaScript API Usage Limits.
Most websites and applications may use the standard JavaScript API free of charge. See below (click on the screenshot to read the full article):

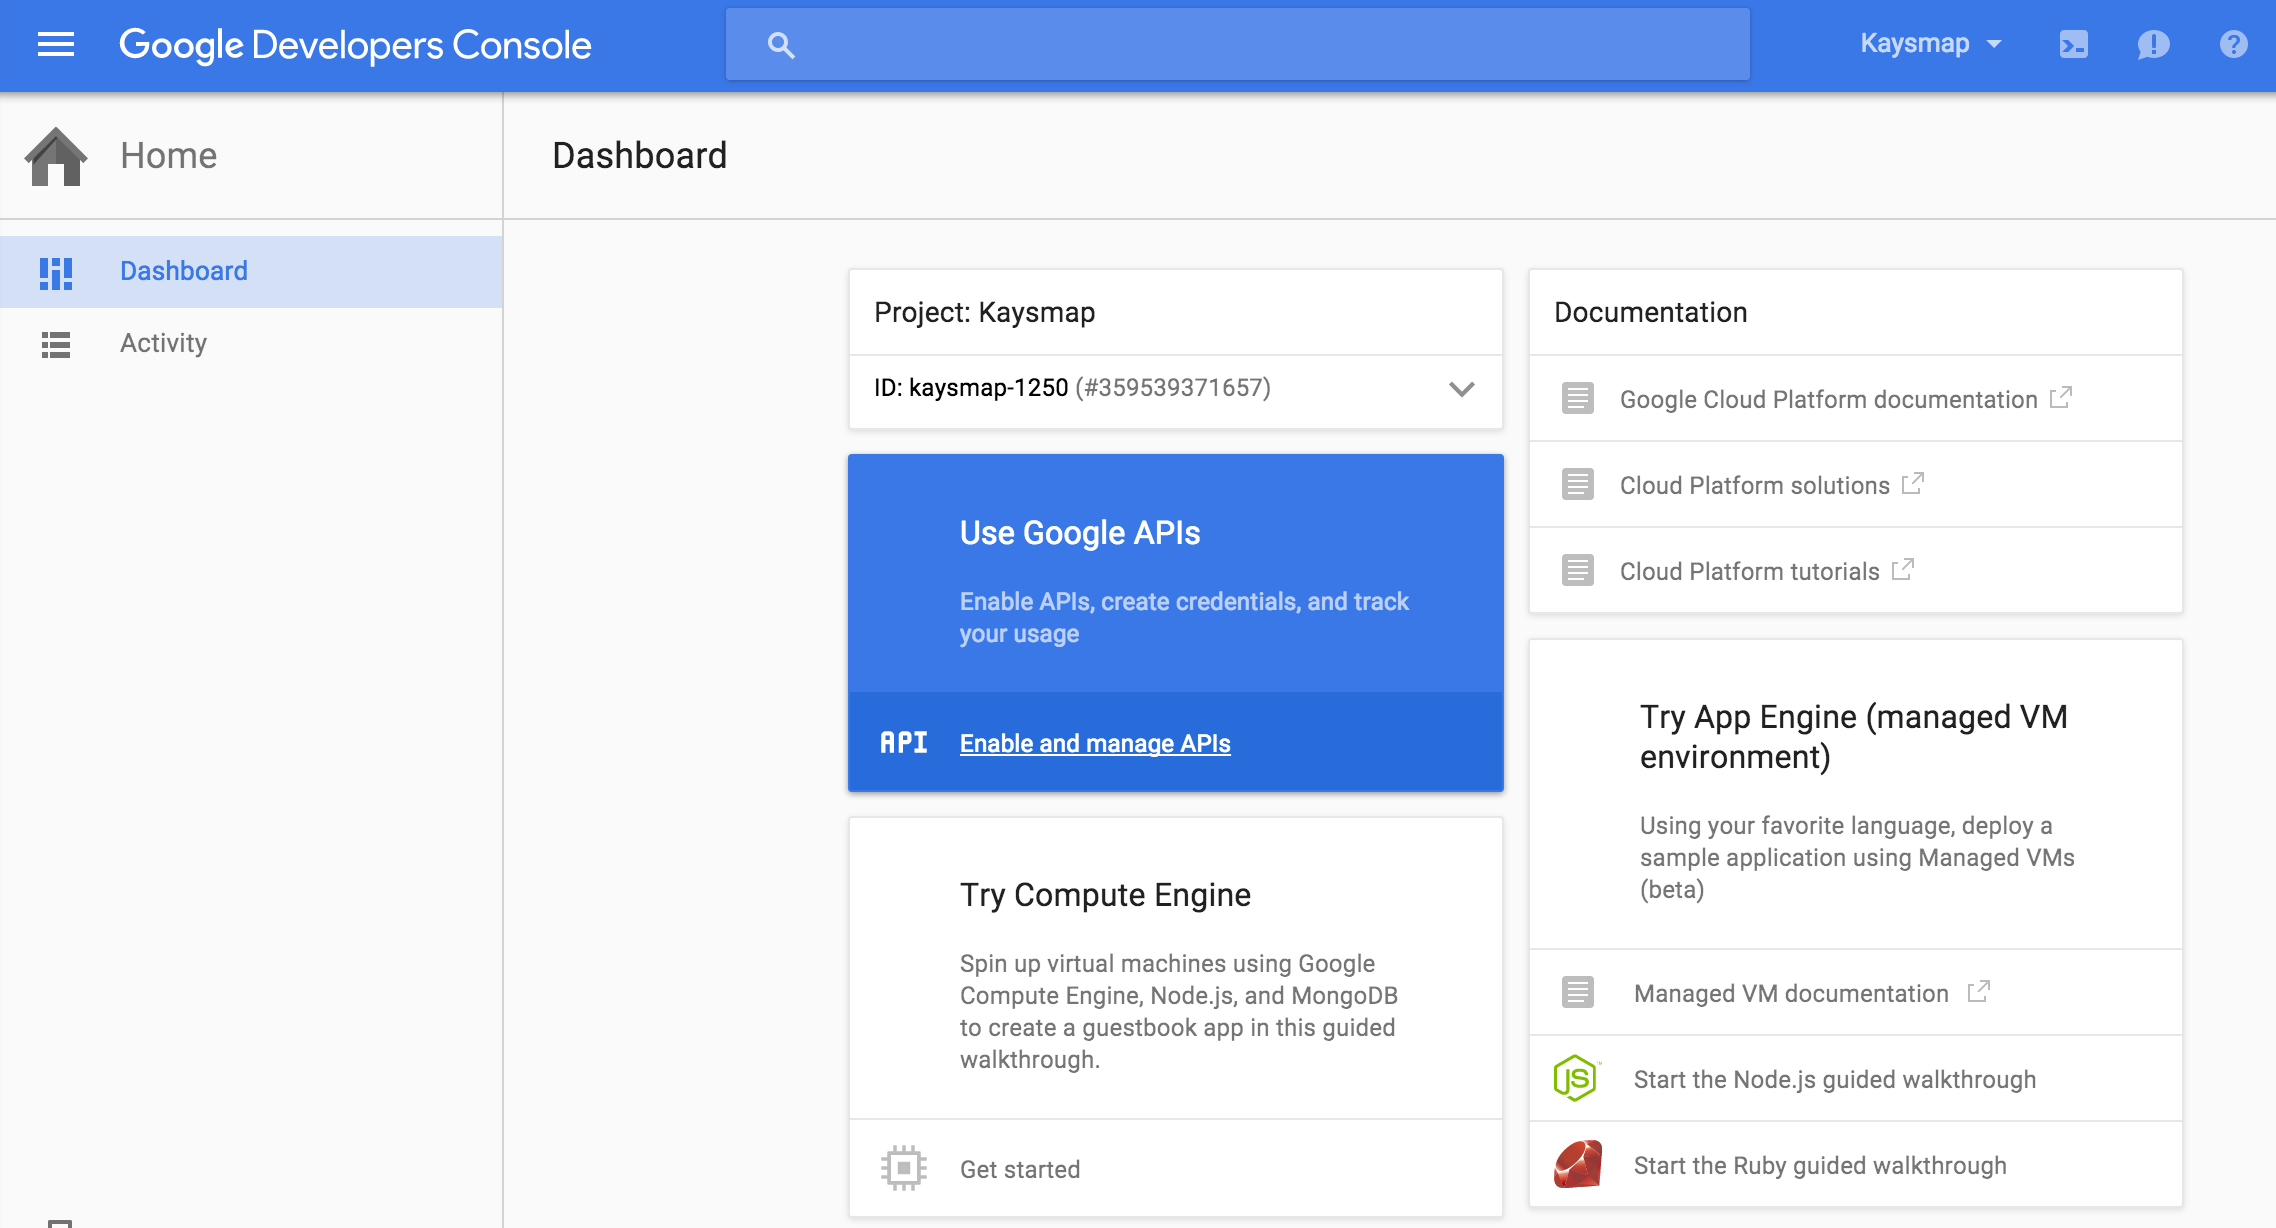
To get a key, go to Google Developers Console page:
- Log in or sign up a new Google account.
- Create a new project. Name it to fit your project.

- Click on Use Google APIs panel.
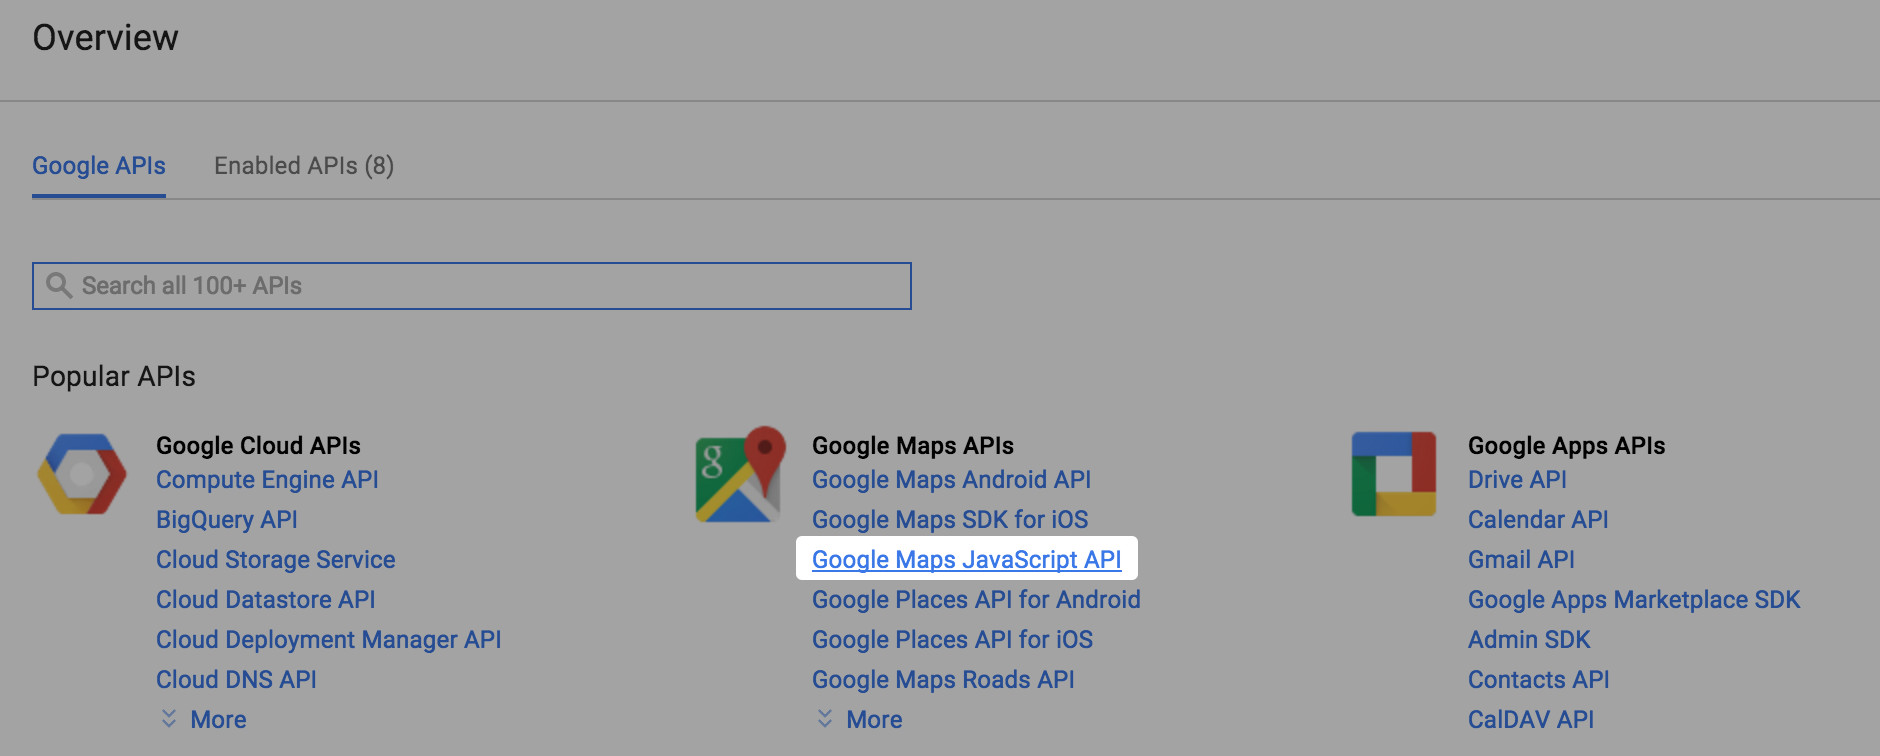
- Click on Google Maps Javascript API.
- Click on the blue Enable button.
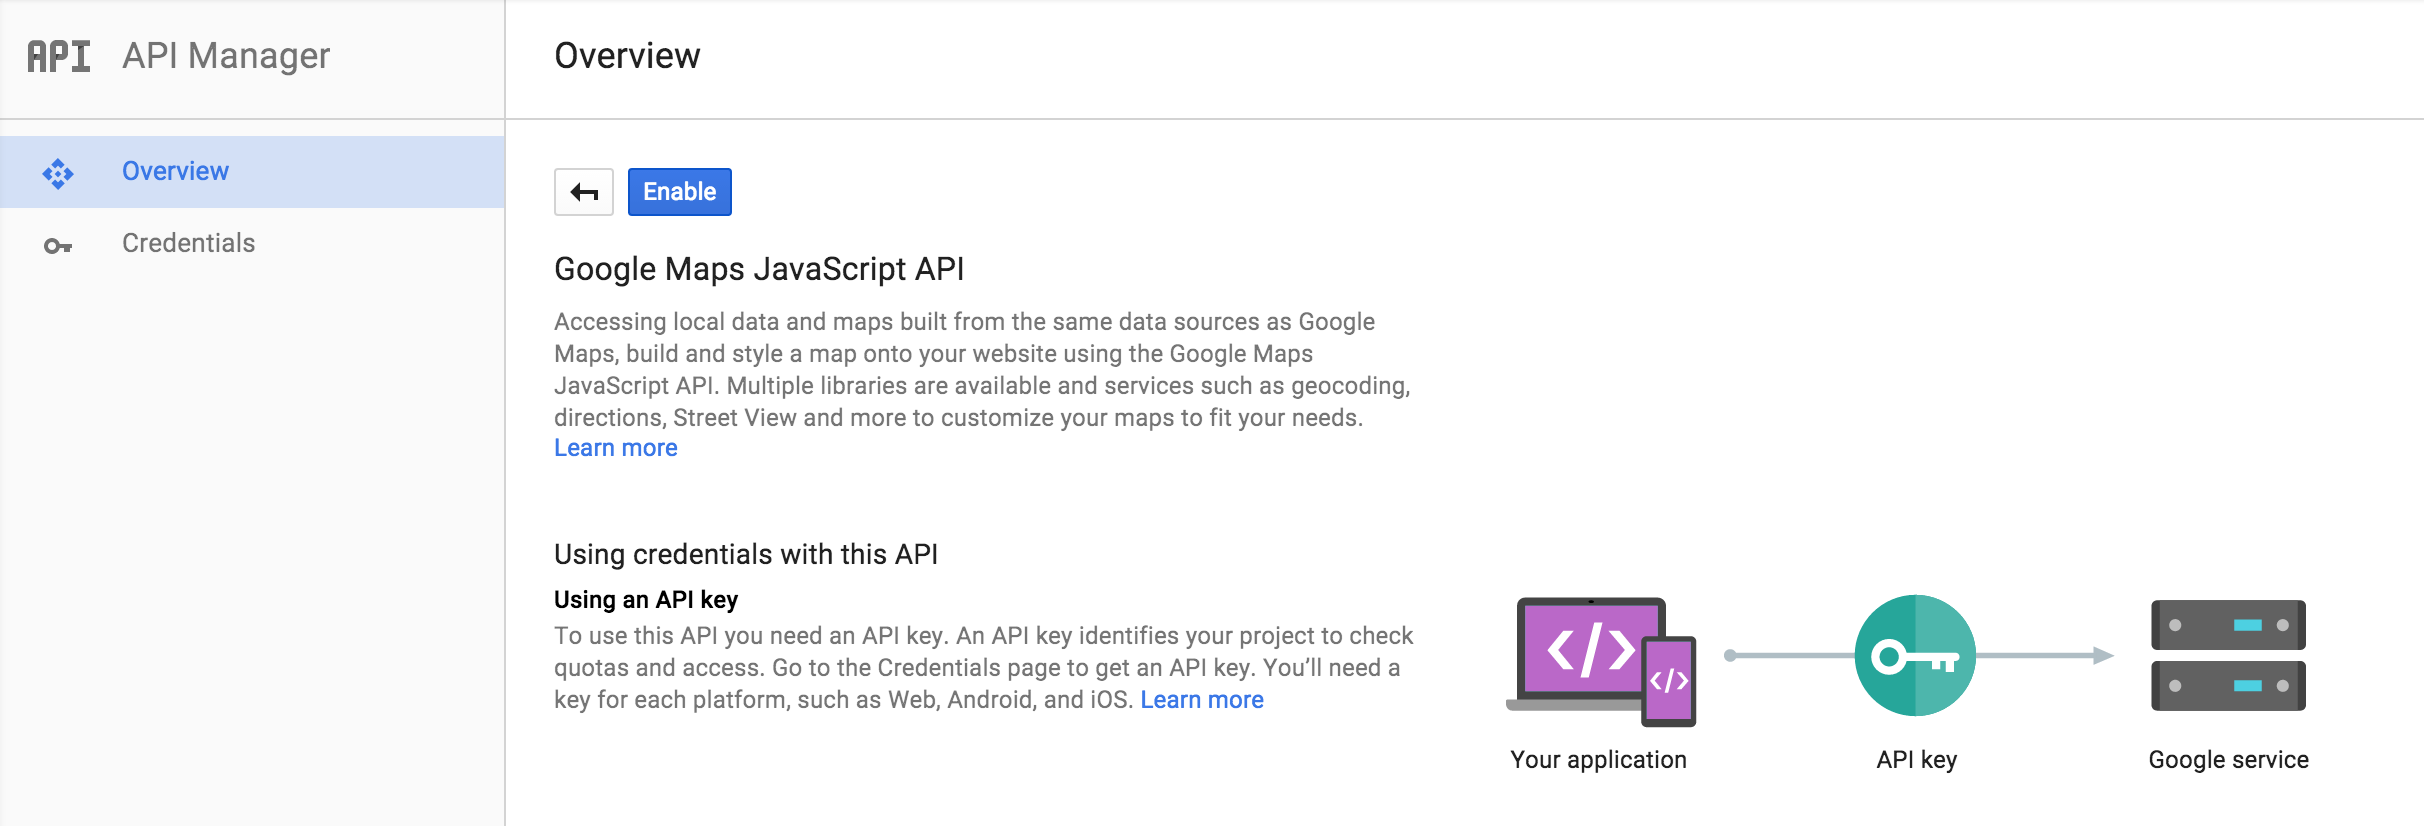
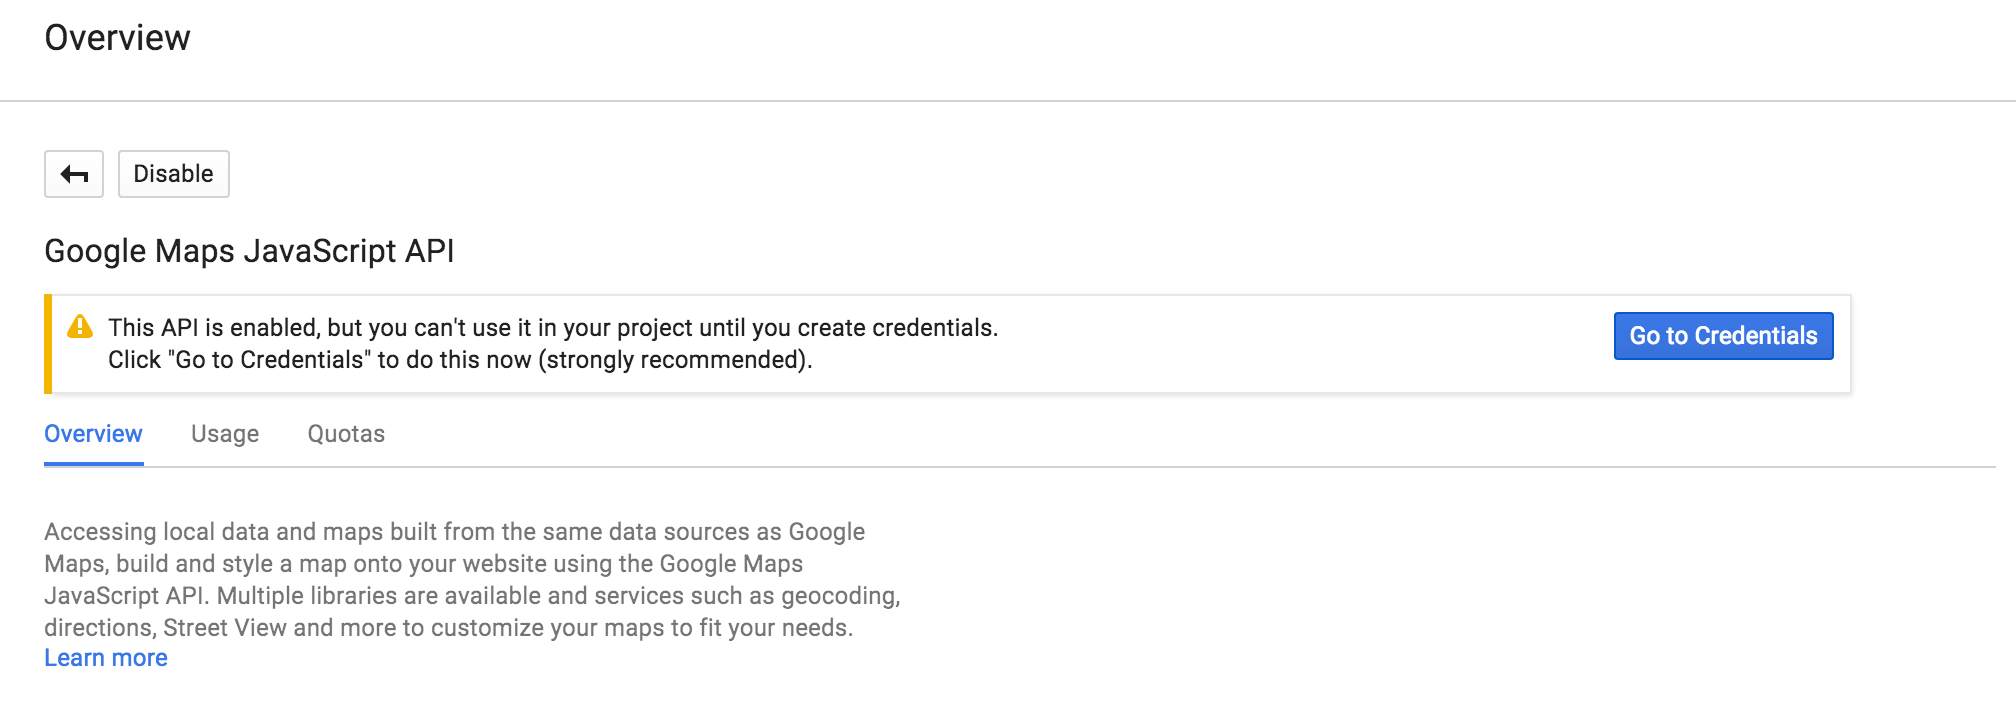
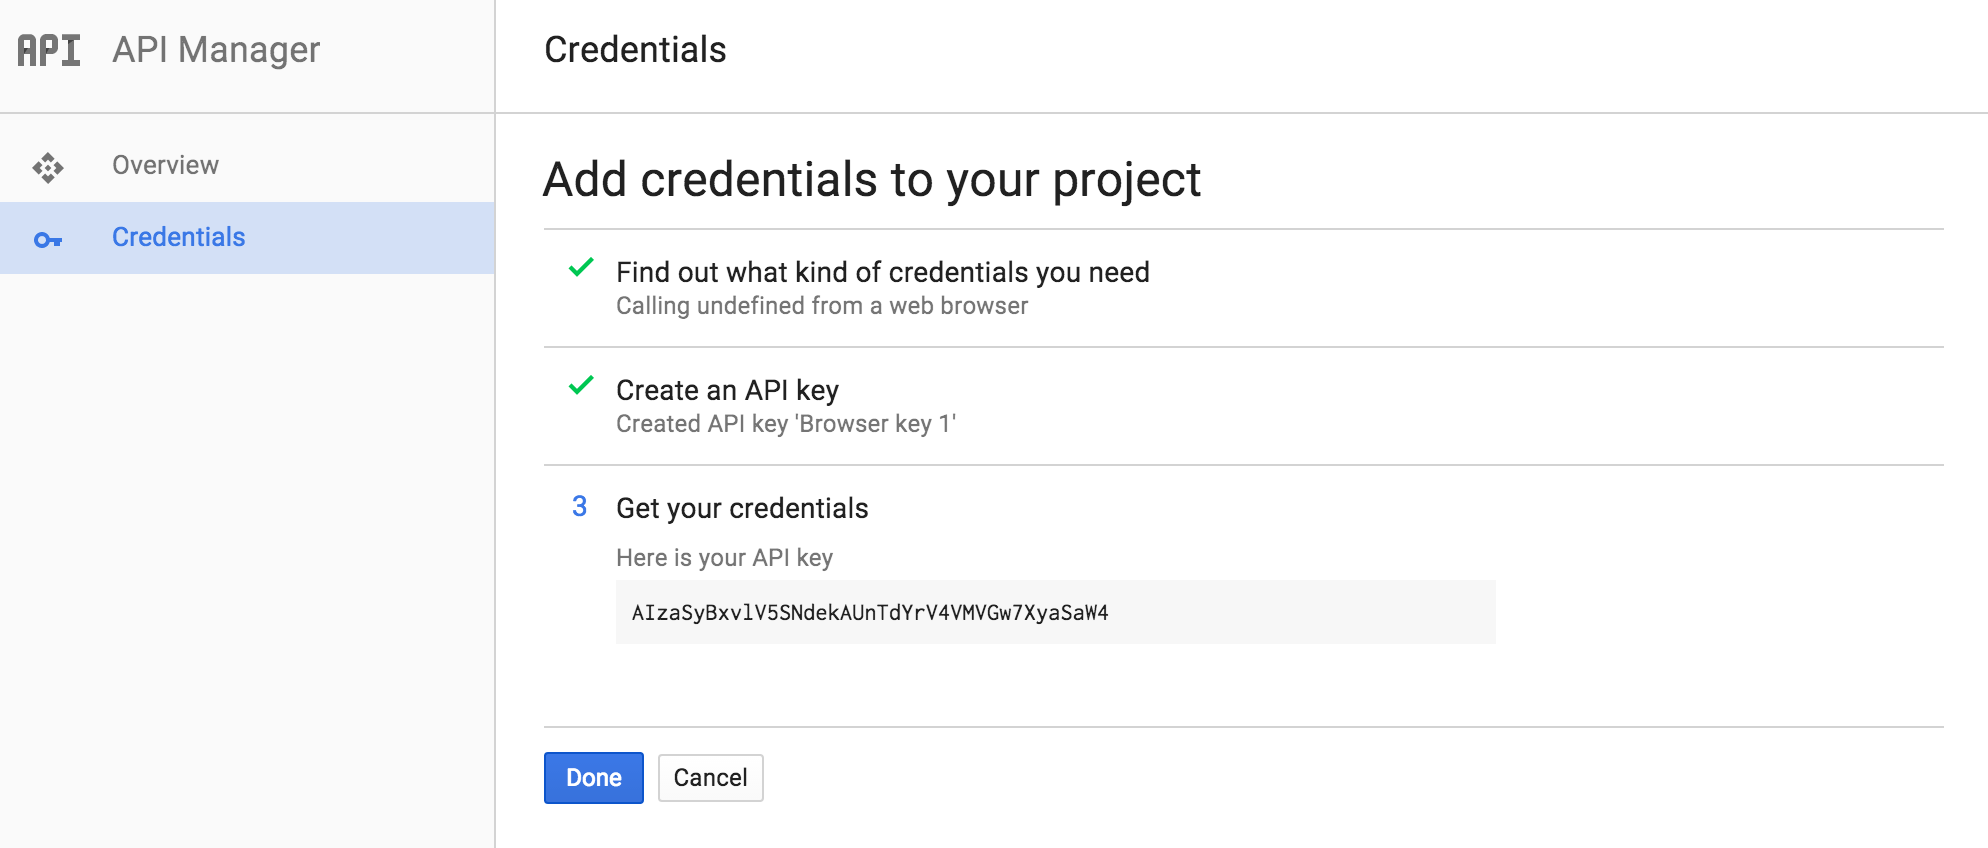
- You need to create credentials to access your enabled APIs. Click on the blue Go to Credentials button.
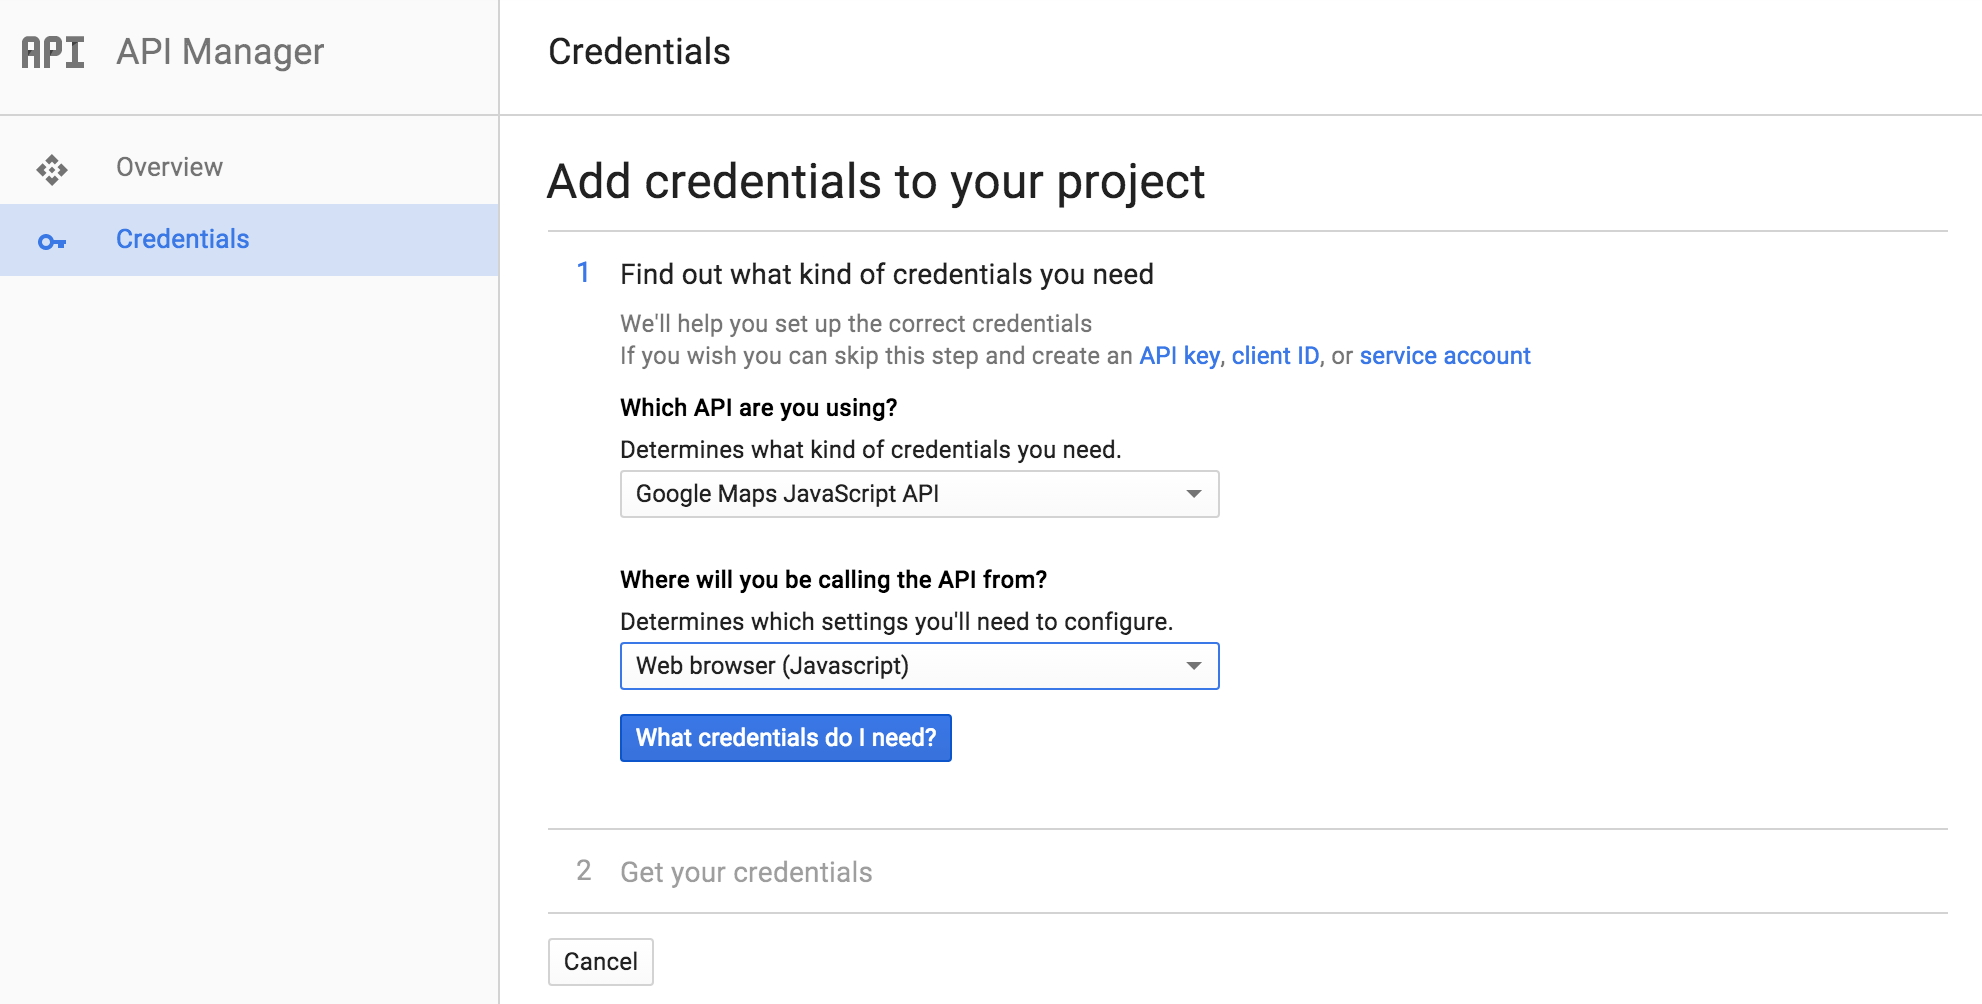
- Find the second drop down list “Where will you be calling the API from?”. Choose “Web browser (Javascript)”. Then click on the blue “What credentials do I need?” button.
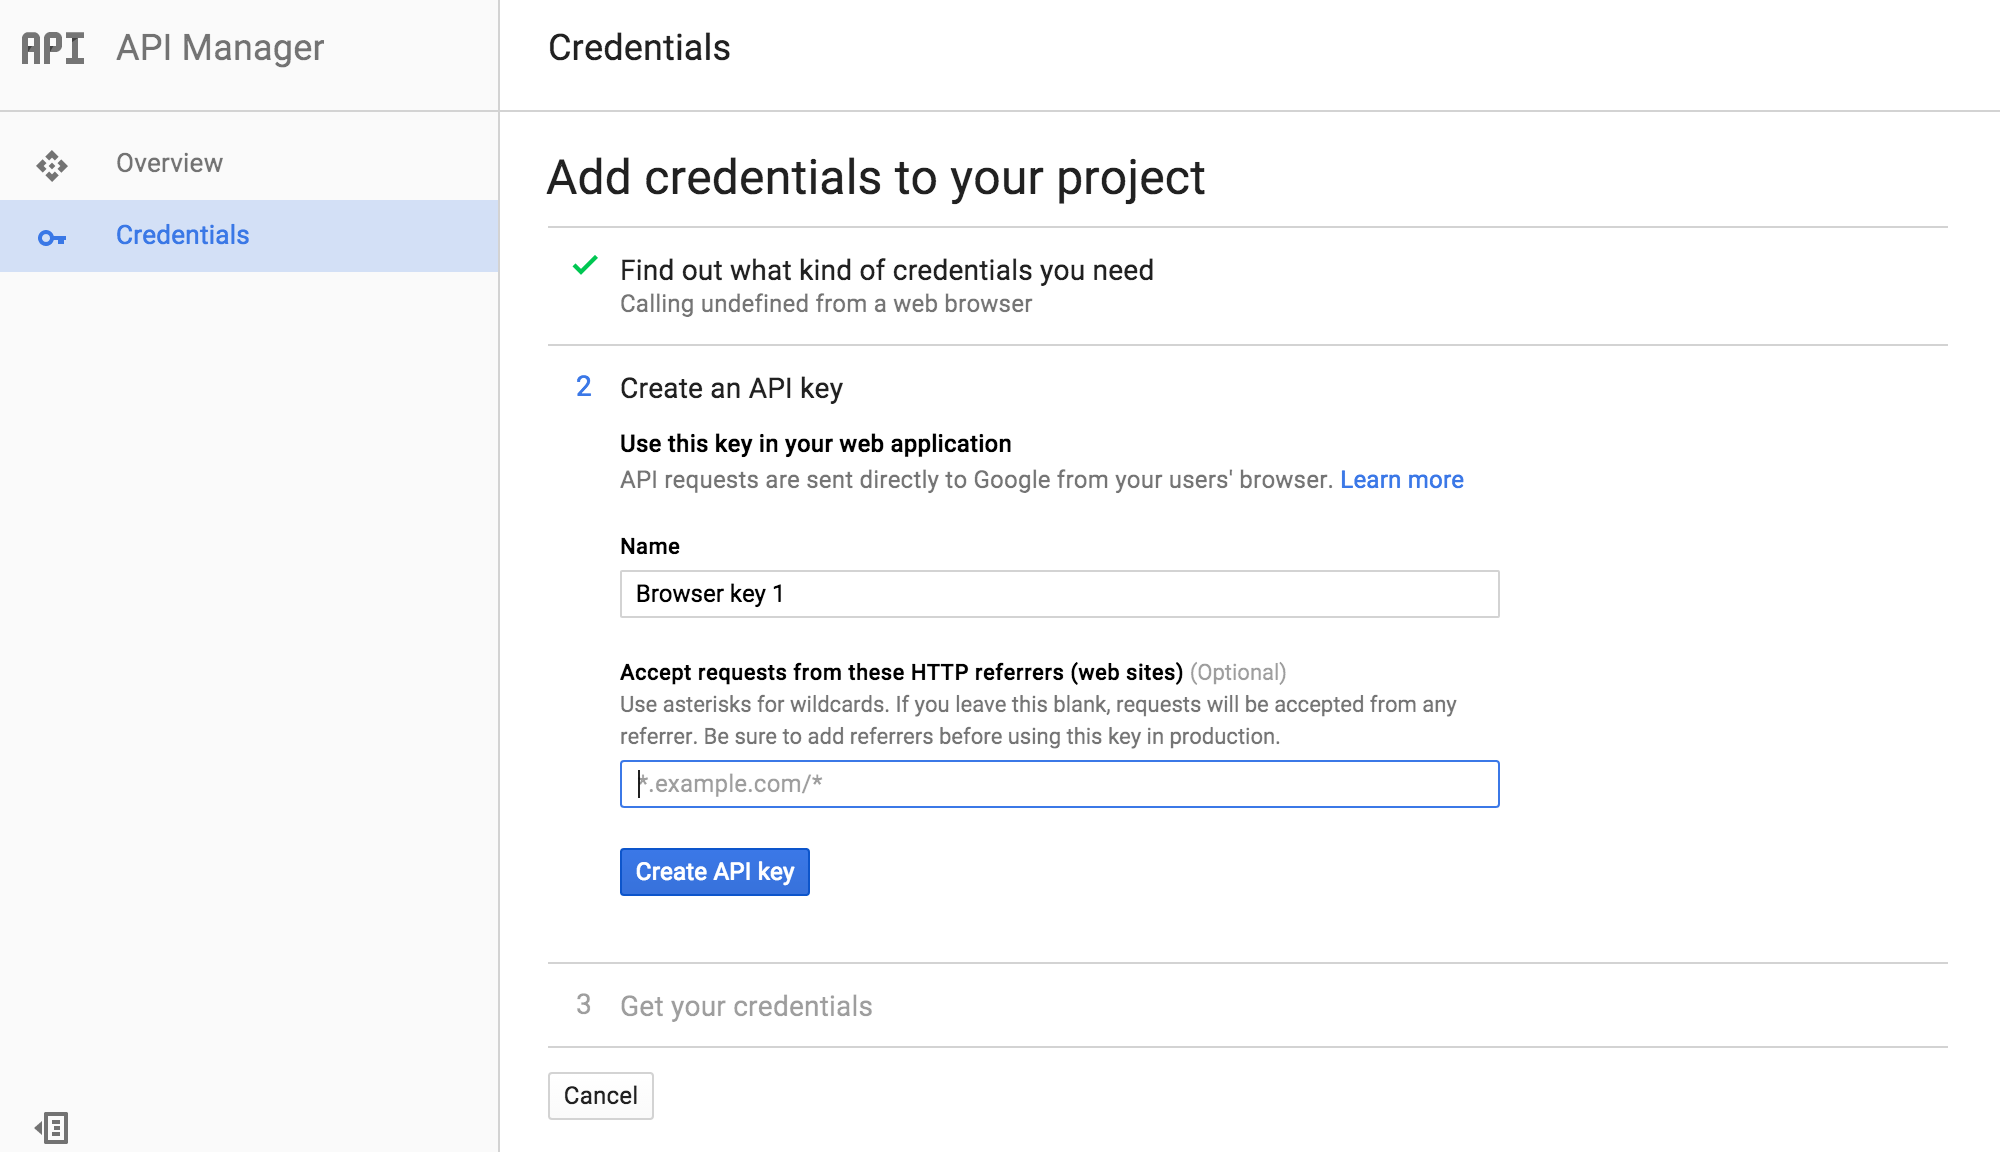
- Find “Accept requests from these HTTP referrers (web sites)” option. You can enter your site URL, or just leave it blank. It’s optional. Then click on Create API key button.
- Now you will get your API key, copy it, then click on Done button.
When you have the API key, go to your WordPress site dashboard > Settings > LoftBuilder > Google API panel. Paste the API key here, and save settings. Done.