Sync Bookings to Apple Calendar
Please follow the steps below:
- Get your calendar URL: On your WordPress website dashboard, please navigate to Rooms > iCal Sync > In the “Sync Calendars” tab, find the “Export” column.
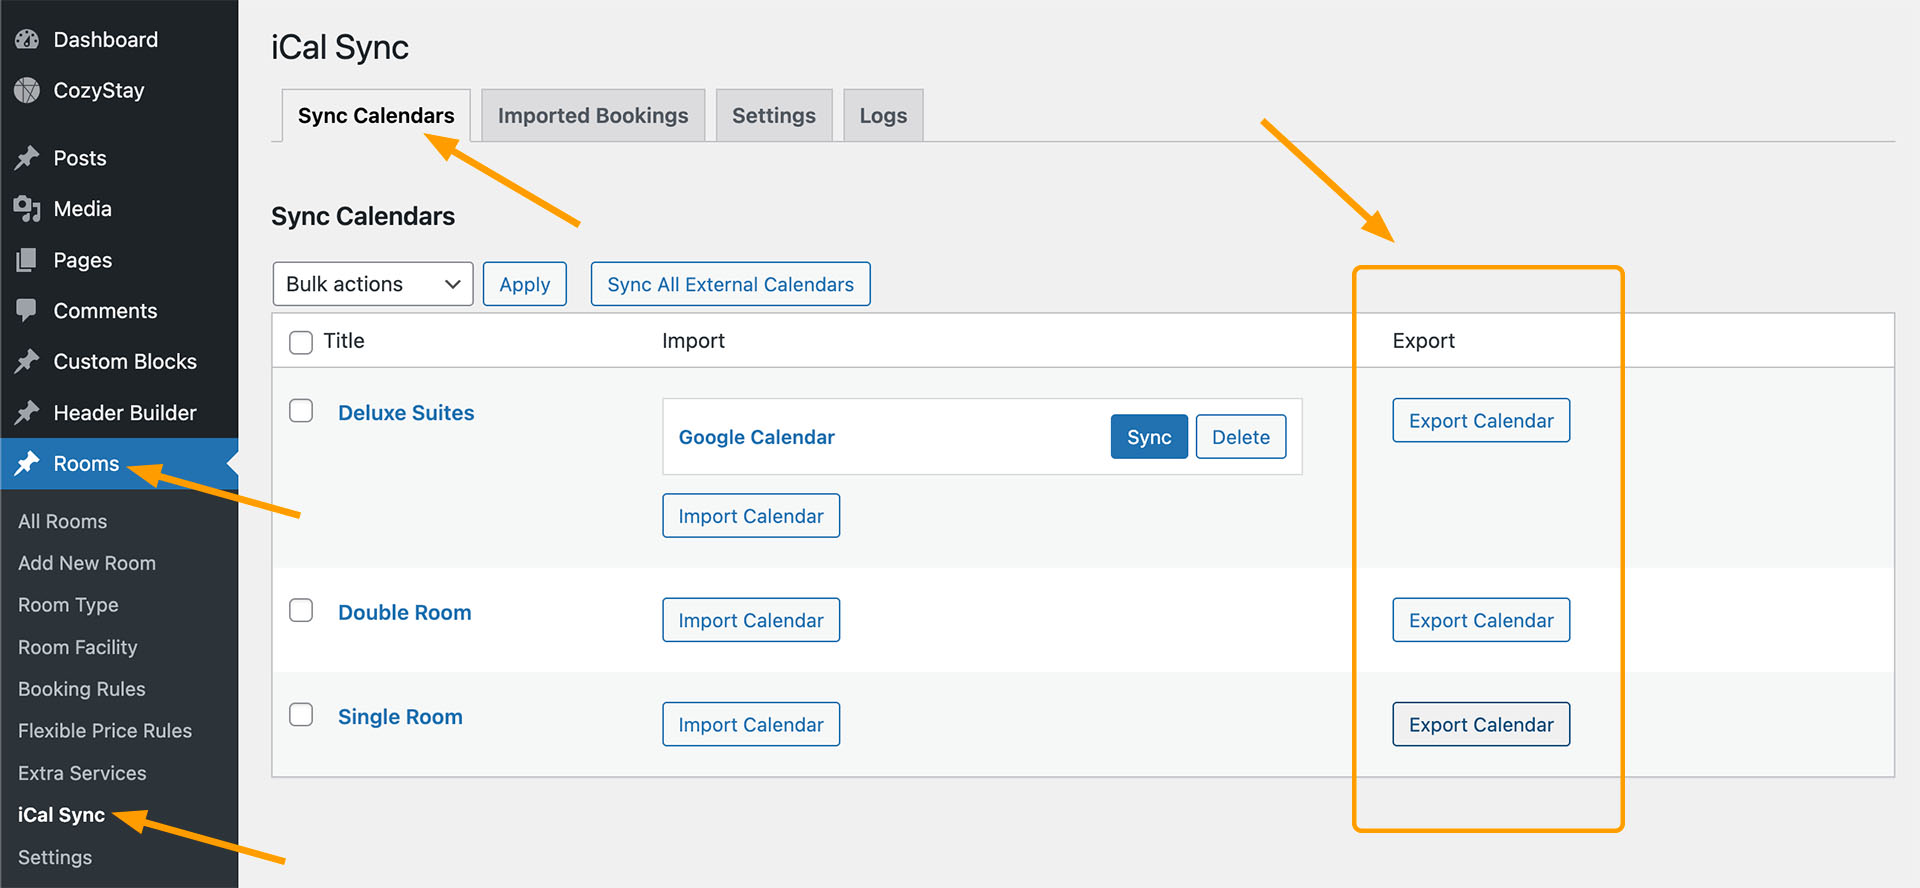
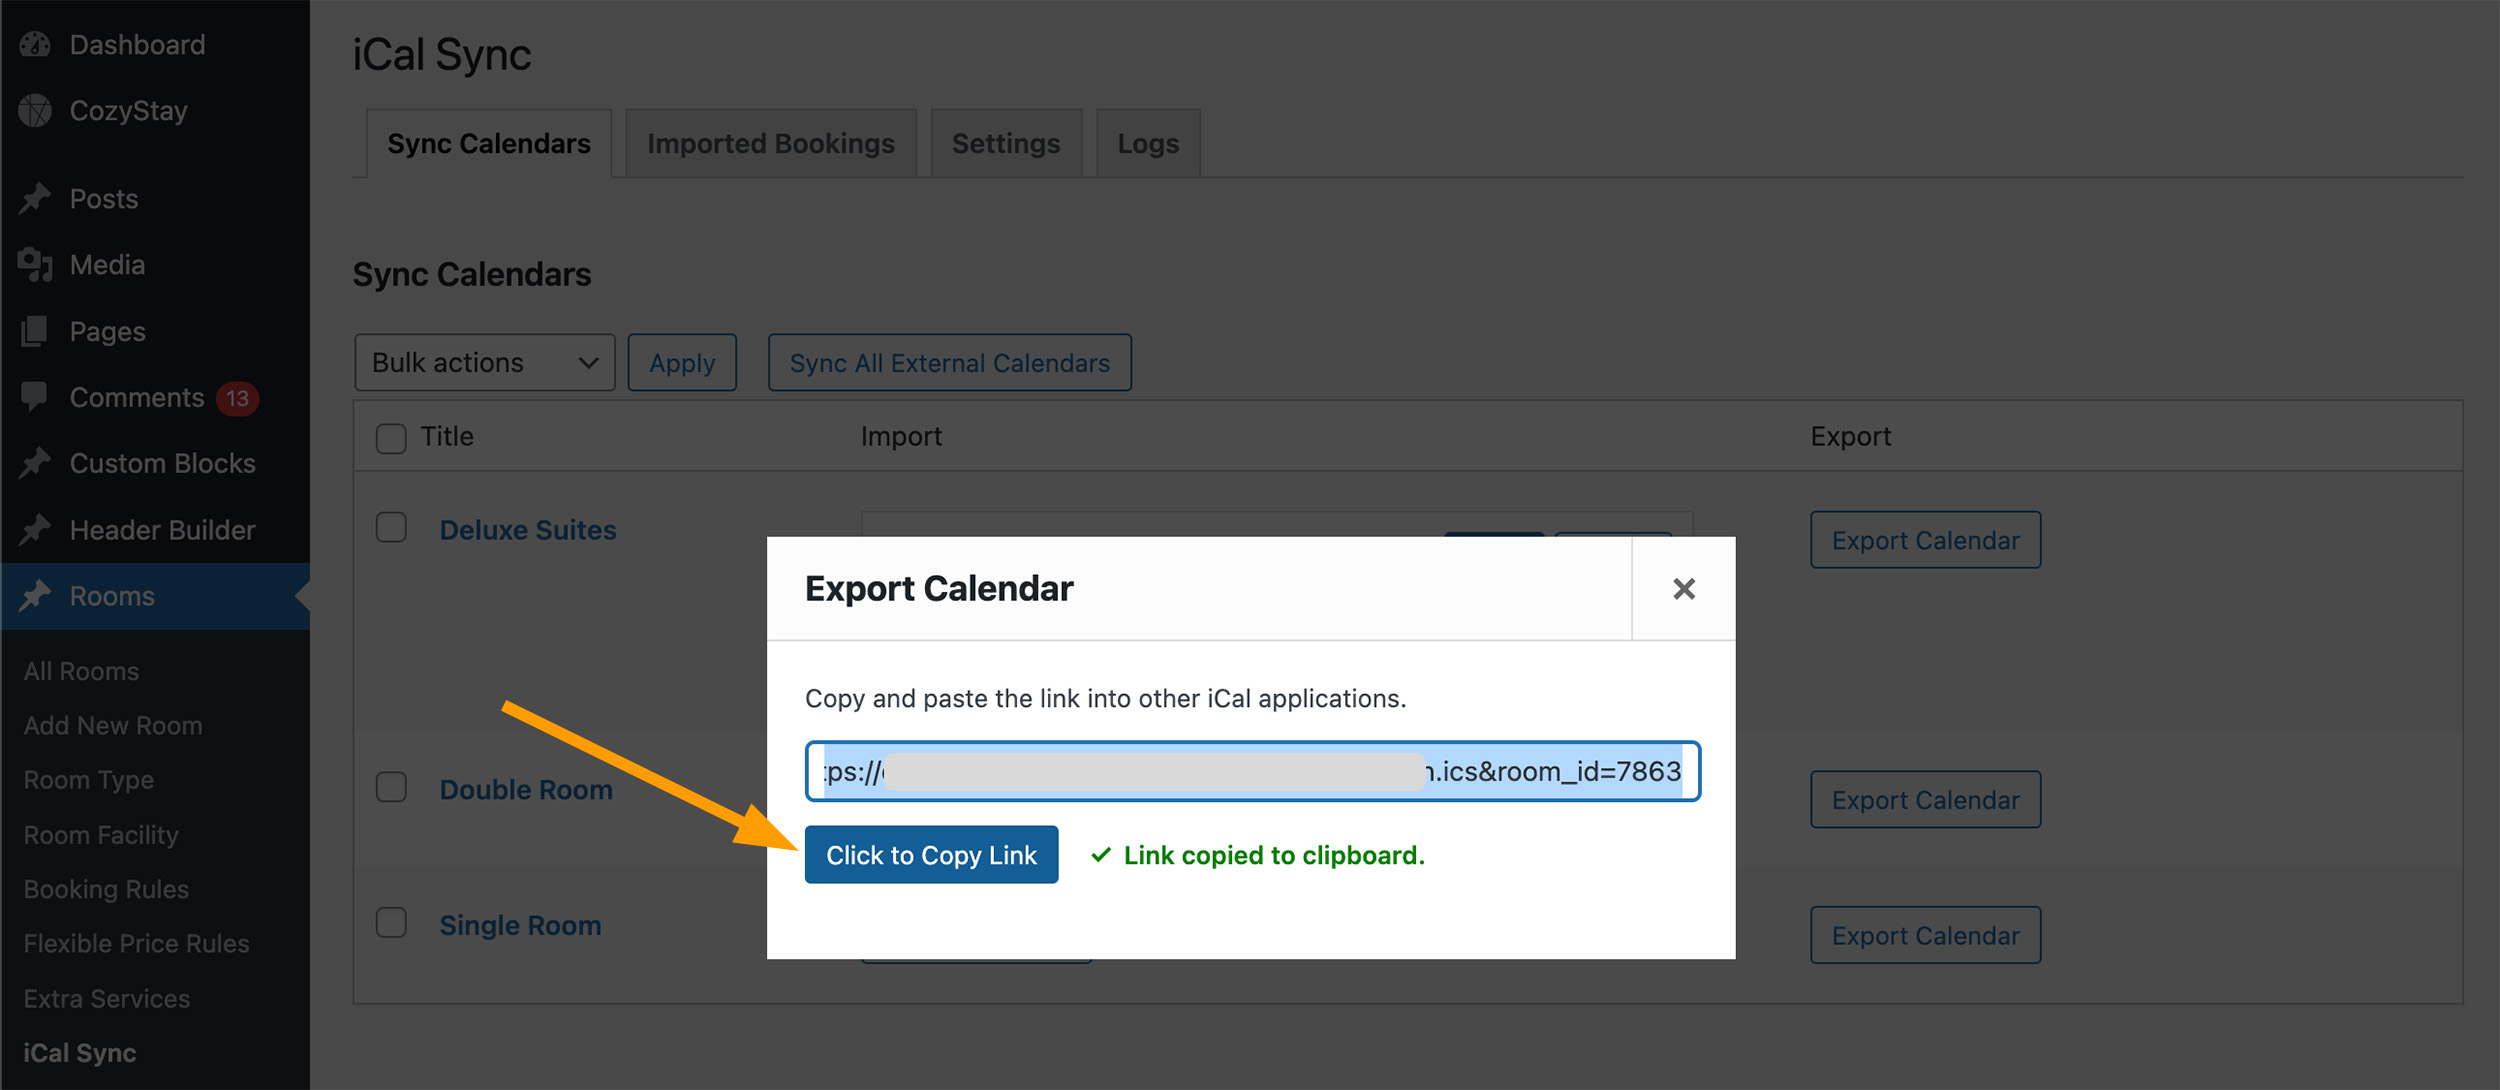
- Click the “Export Calendar” button of a room. Copy the room’s calendar URL in the pop-up window.
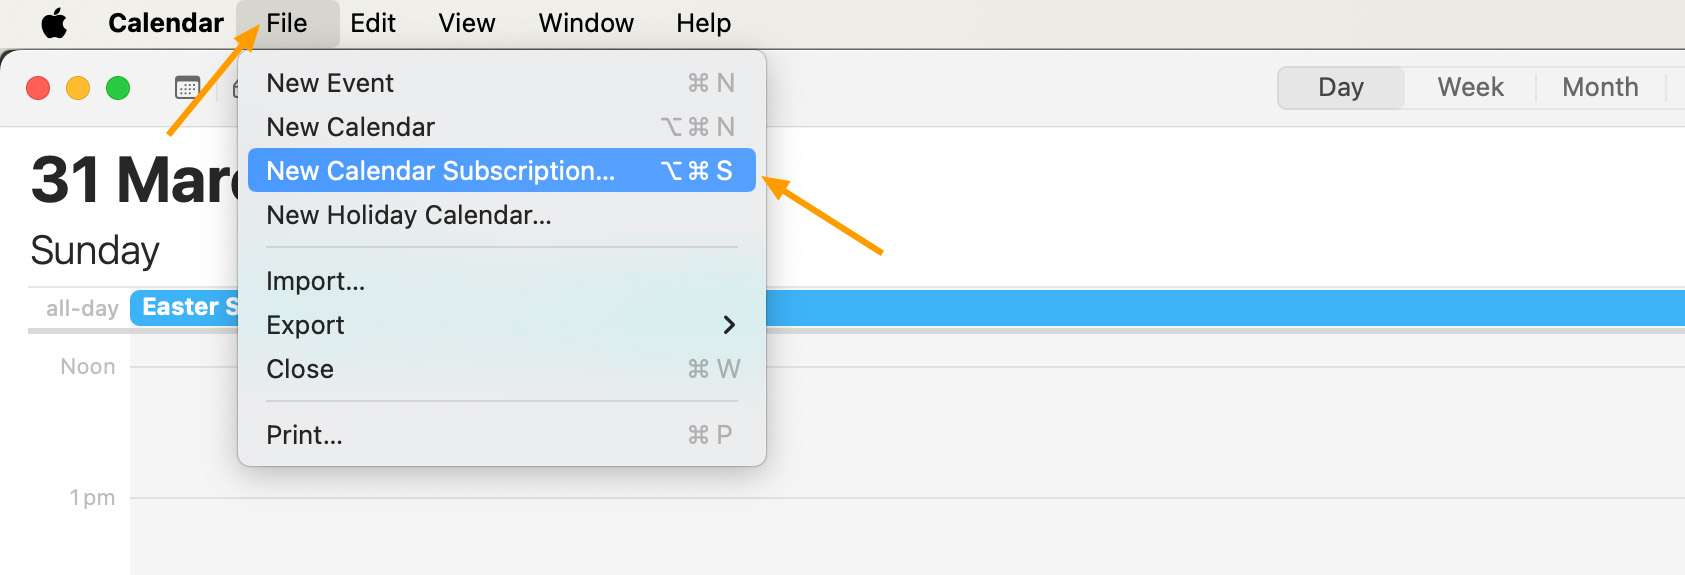
- Launch Apple Calendar on your MacBook. Click “File” > “New Calendar Subscription“.
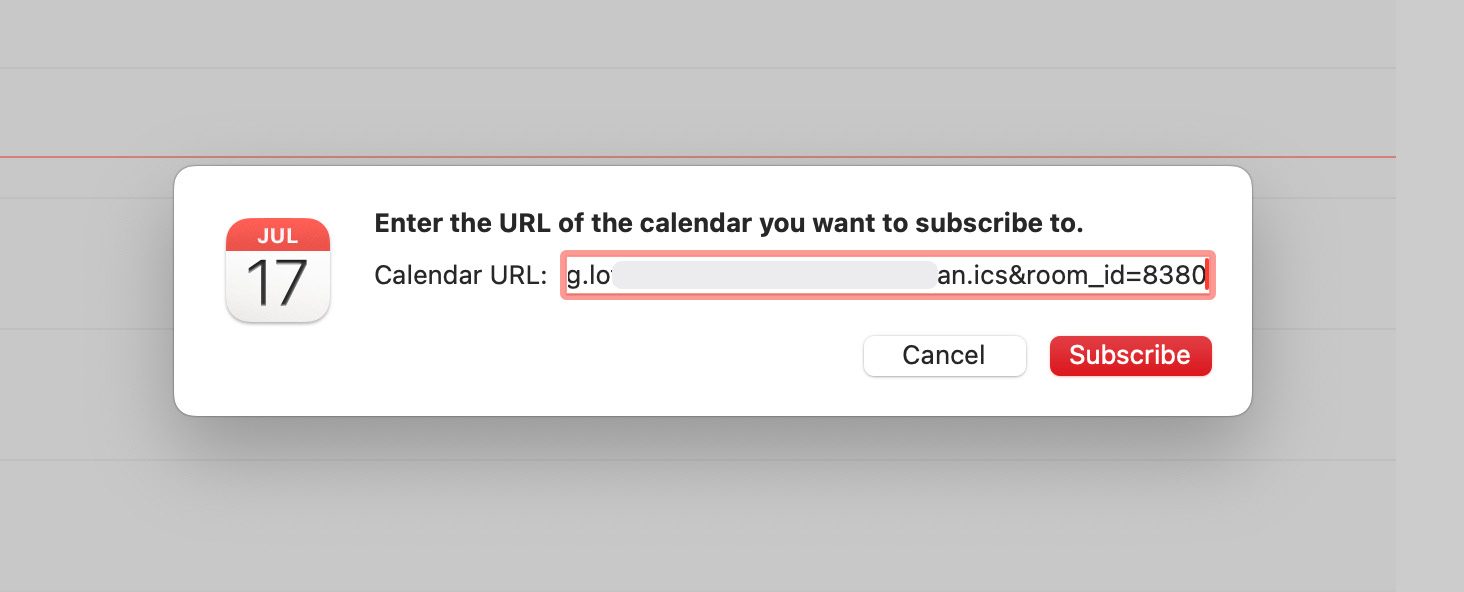
- Paste the calendar URL you just copied from your WordPress site and click “Subscribe“.
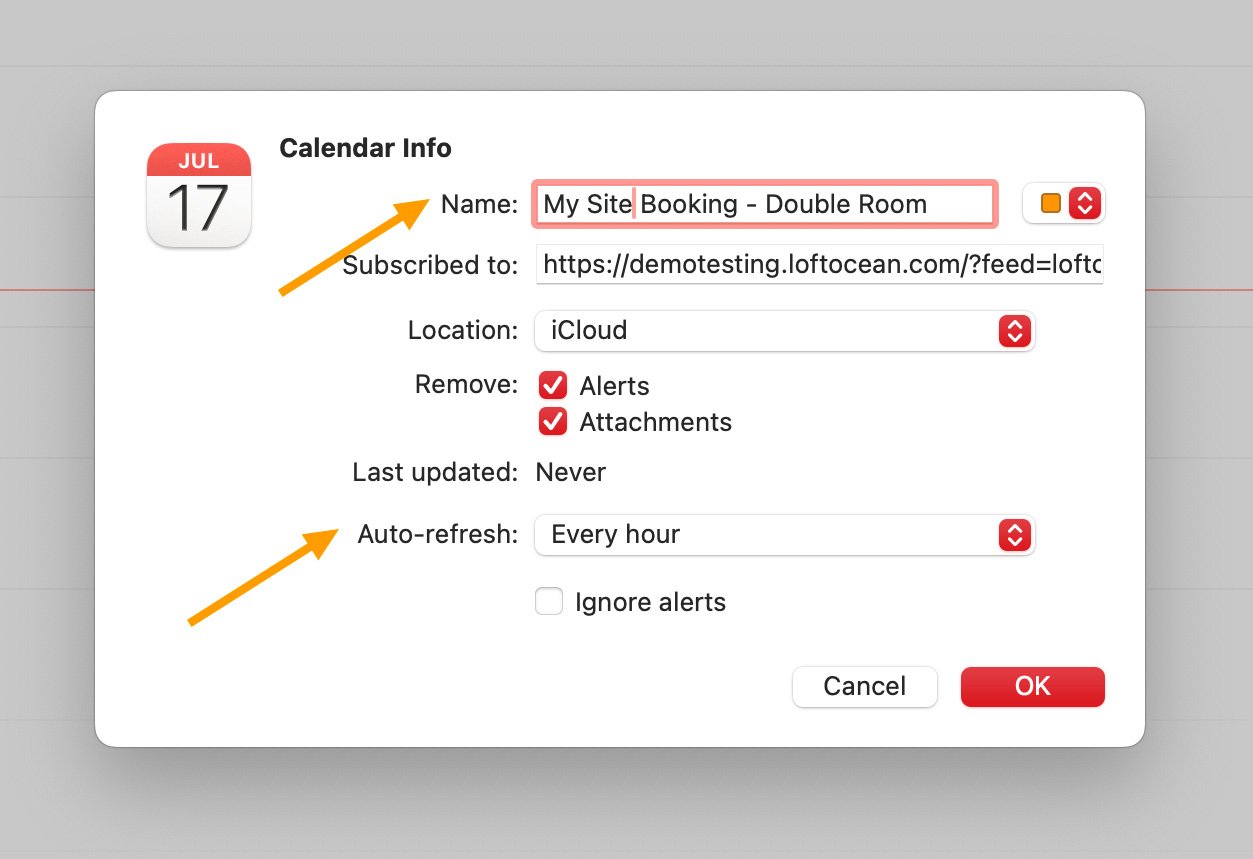
- Then enter a “Name” for the calendar, and set the “Auto-refresh” interval.
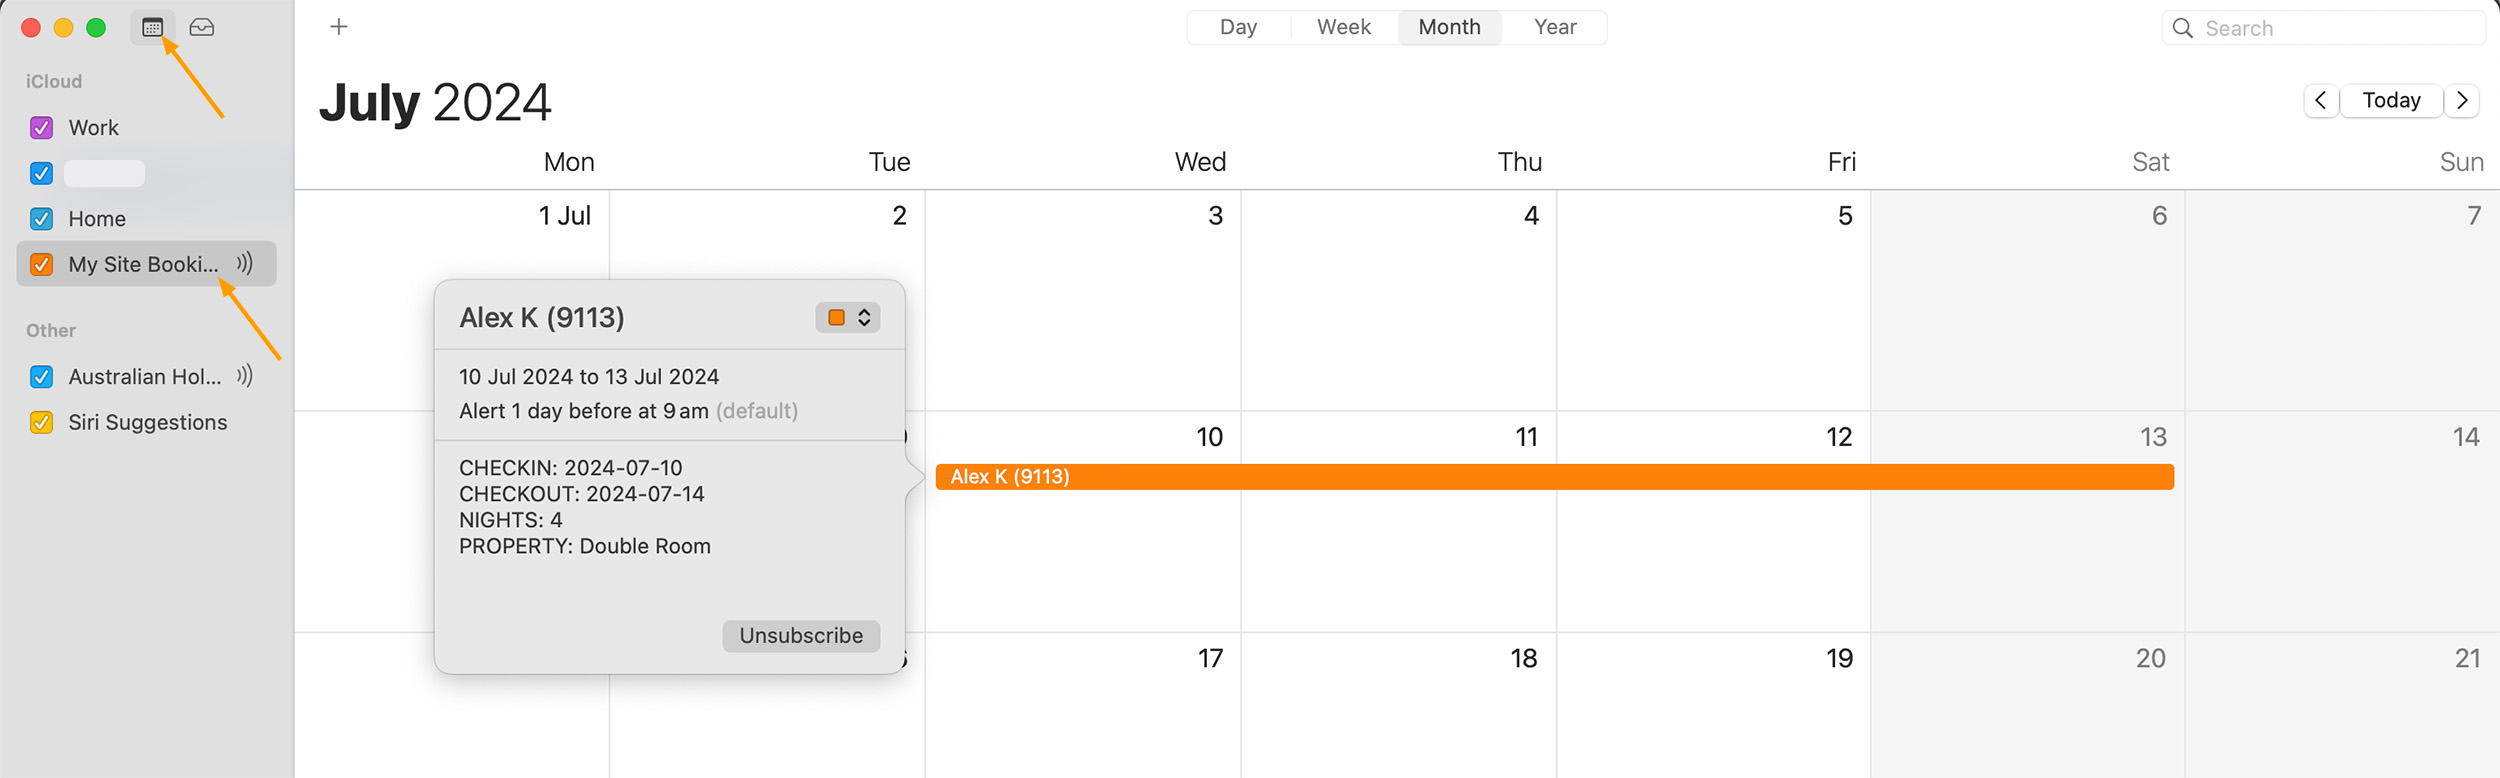
- Imported calendars will appear in your Apple Calendar. Double click on each item to view details.
Create a new Calendar and add bookings to it
Please follow the steps below:
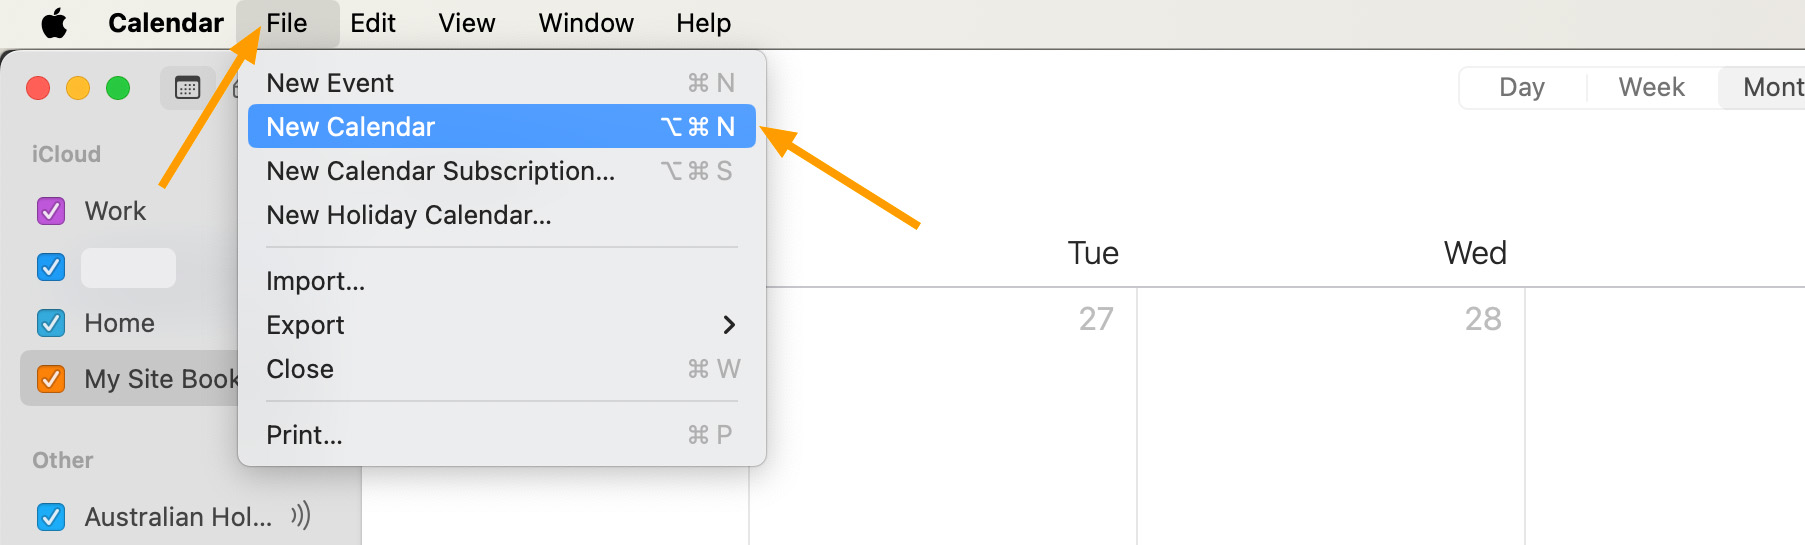
- Launch Apple Calendar on your MacBook. Click “File” > “New Calendar“.
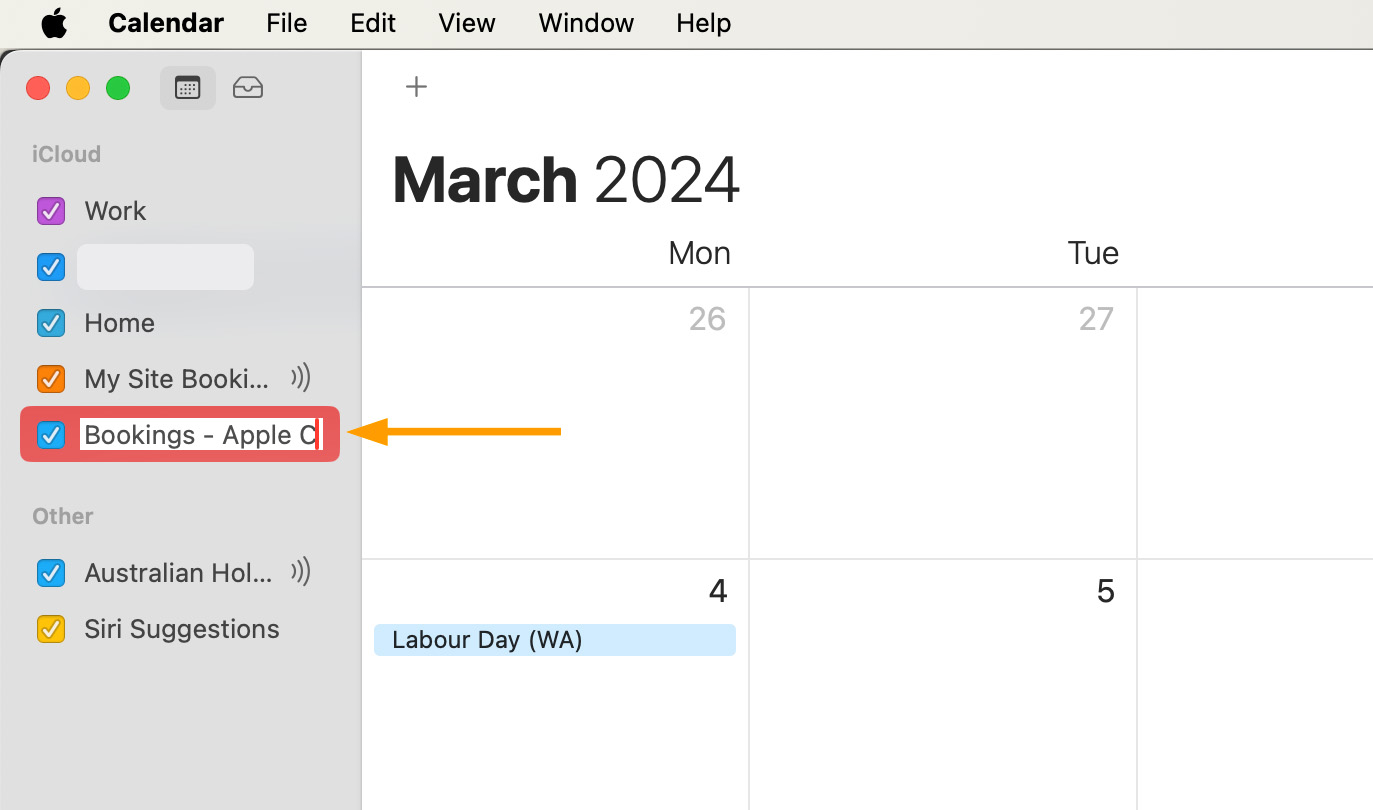
- The newly created calendar will show in the left toolbar, enter a name for it.
- In the Month view of the Apple calendar, select the dates you want to mark as booked. In the pop-up window, add a title for the booking, select dates, add some information/description, and select the new calendar you just created.
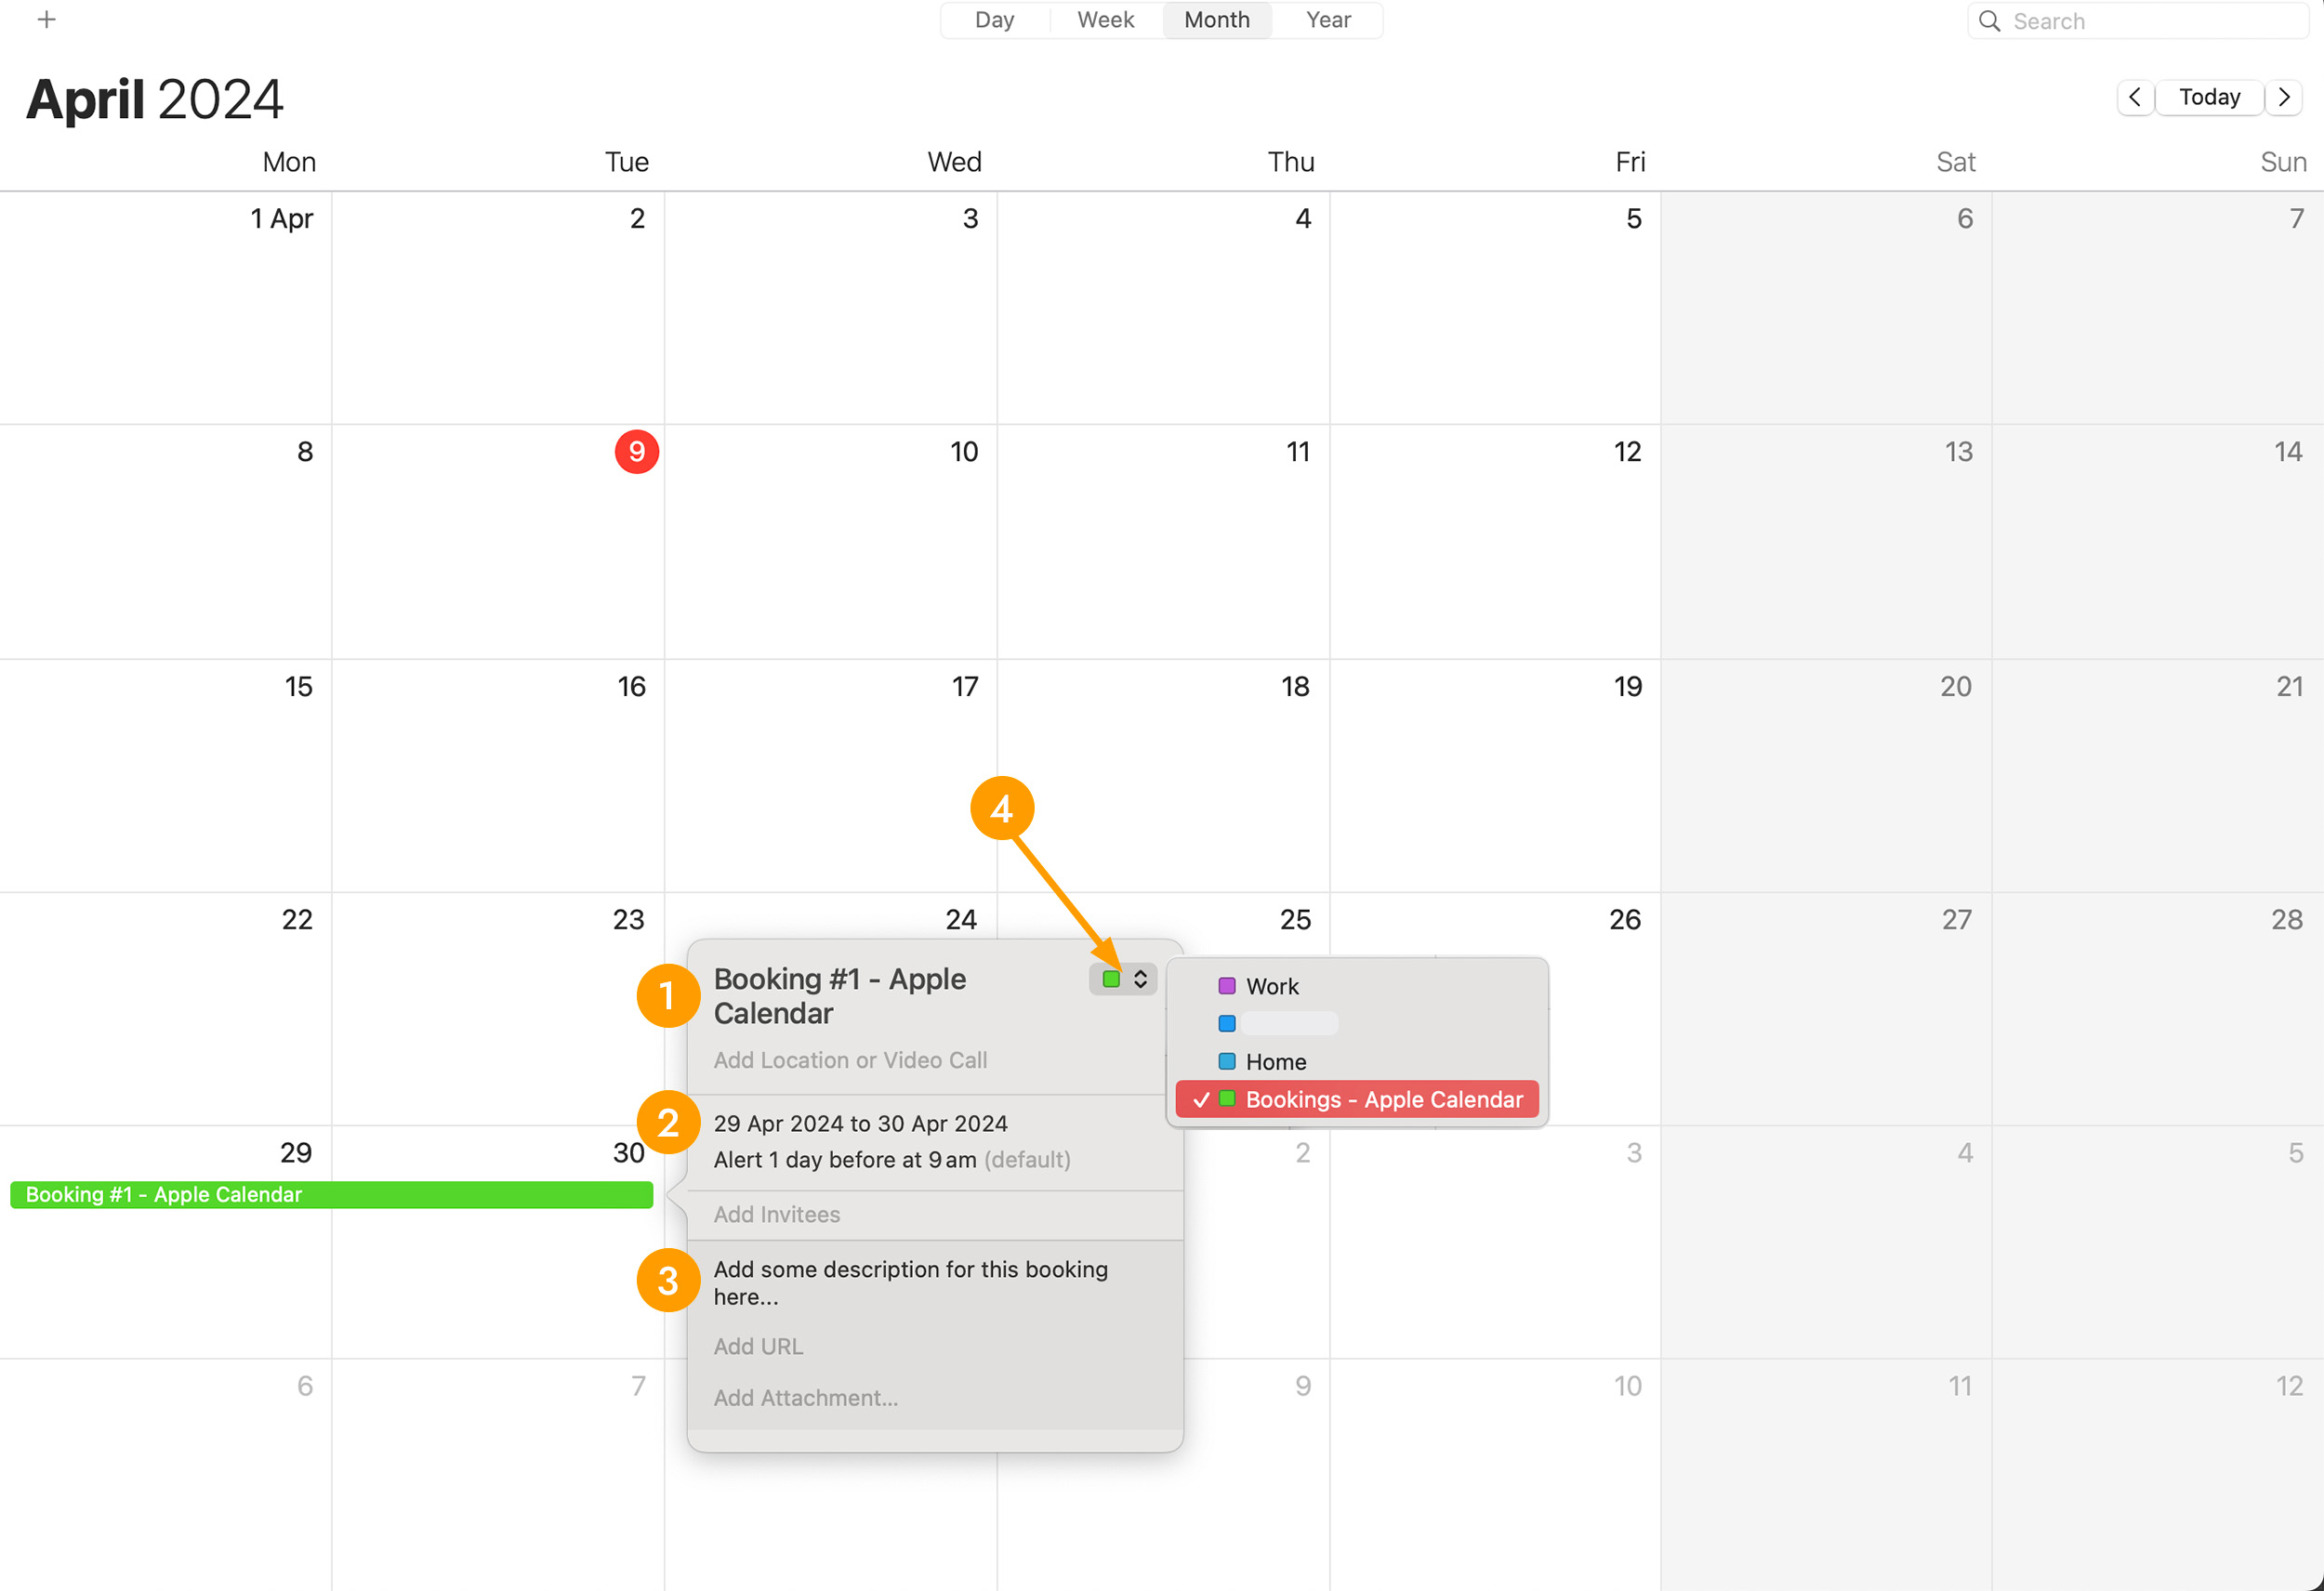
- Please note that when selecting dates, the check-out date needs to be excluded. For example, if you check in on April 29, 2024 and check out on May 1, 2024, your stay will be two nights on the 29th and 30th. When creating a booking in Apple Calendar, the dates selected should be the 29th to the 30th.
- You can repeat step 3 to add multiple bookings to the calendar.
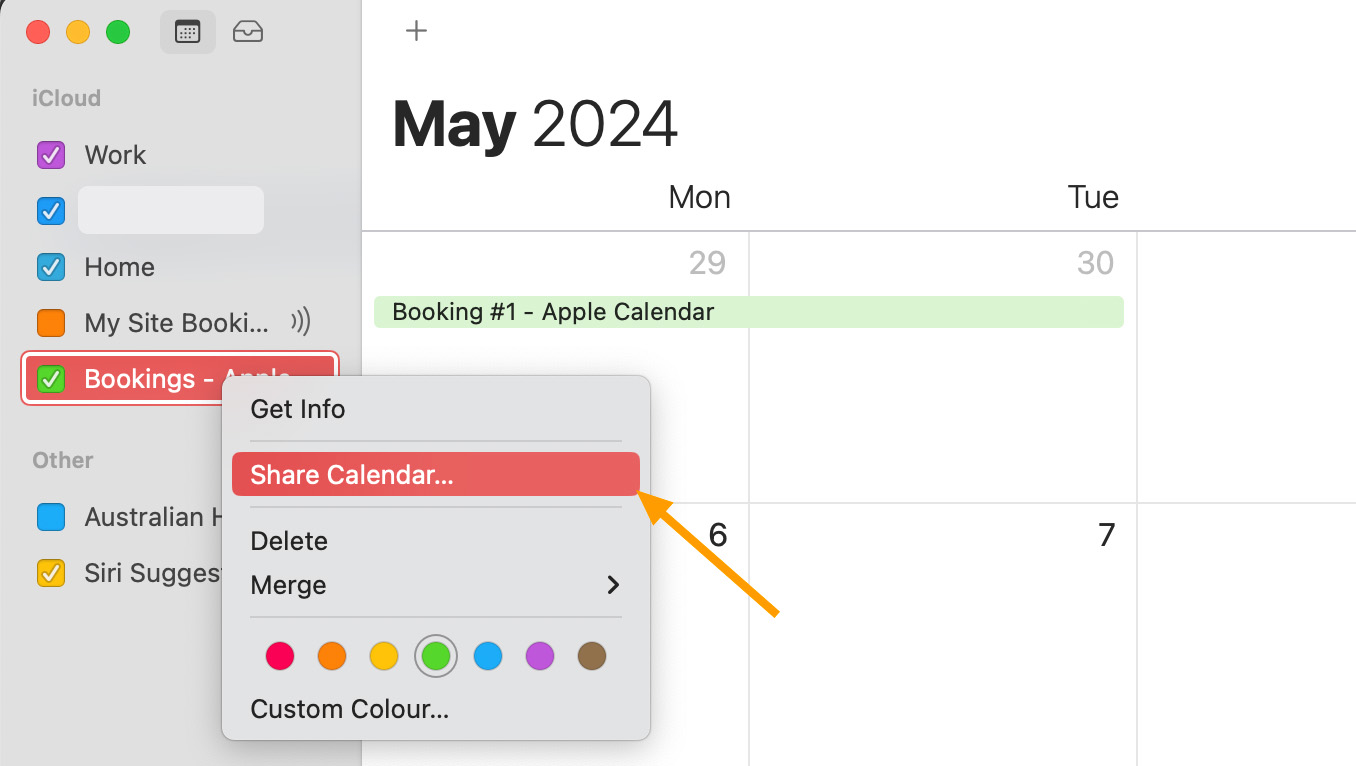
- In the left toolbar of your Apple Calendar, find the newly created calendar and right-click on it, select “Share Calendar“.
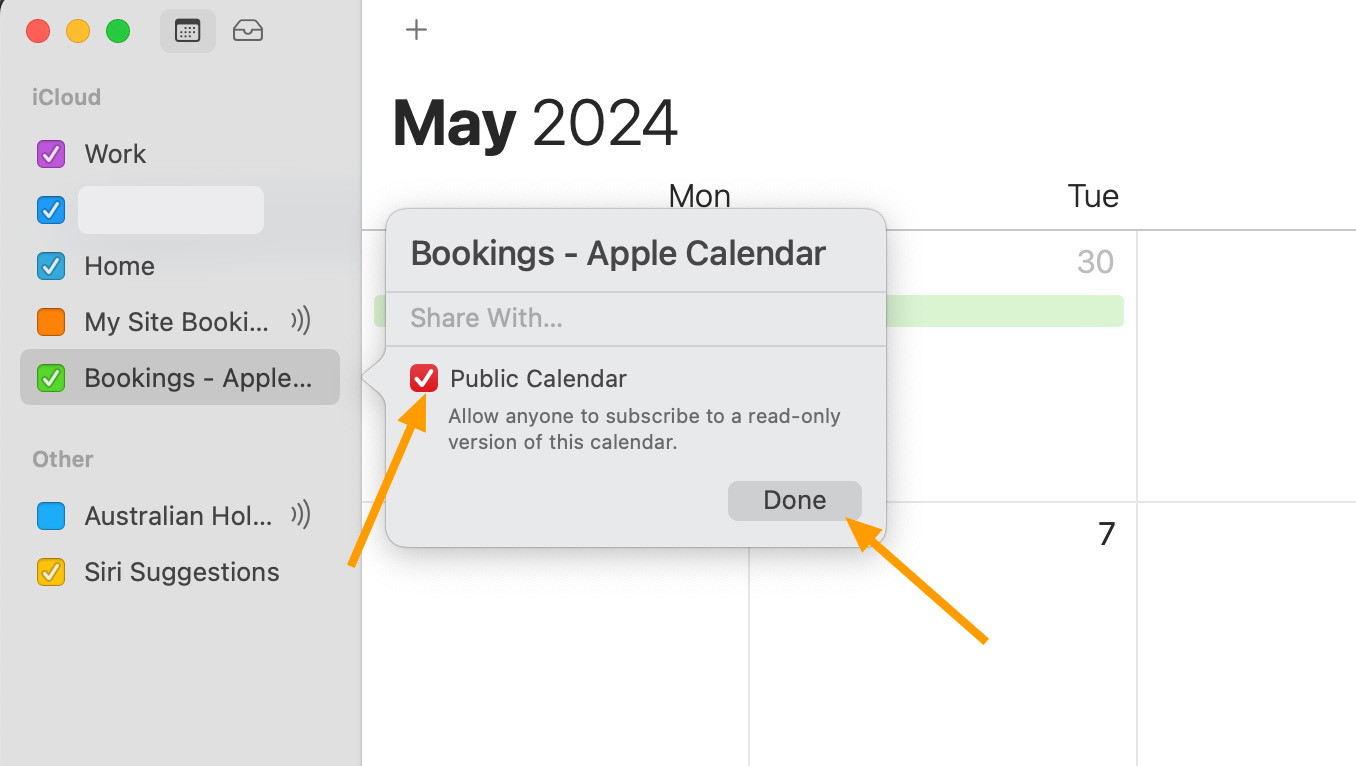
- Tick the checkbox of “Public Calendar” and click “Done“.
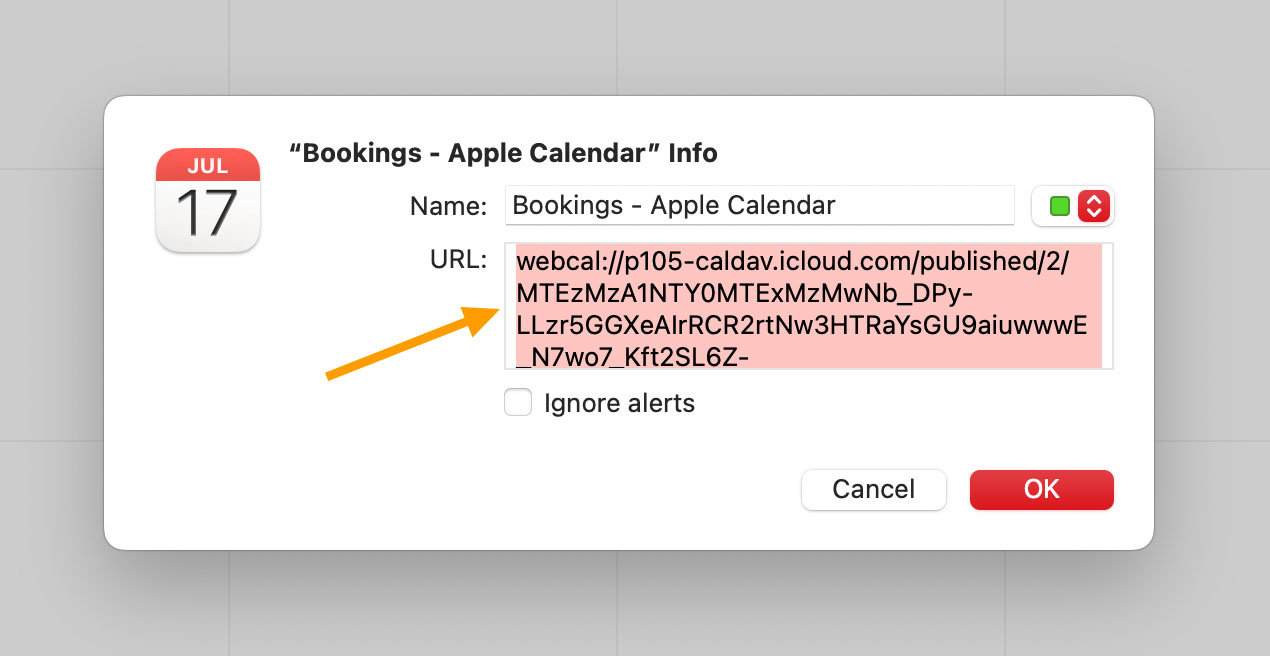
- Right-click on the calendar again and select “Get Info“.
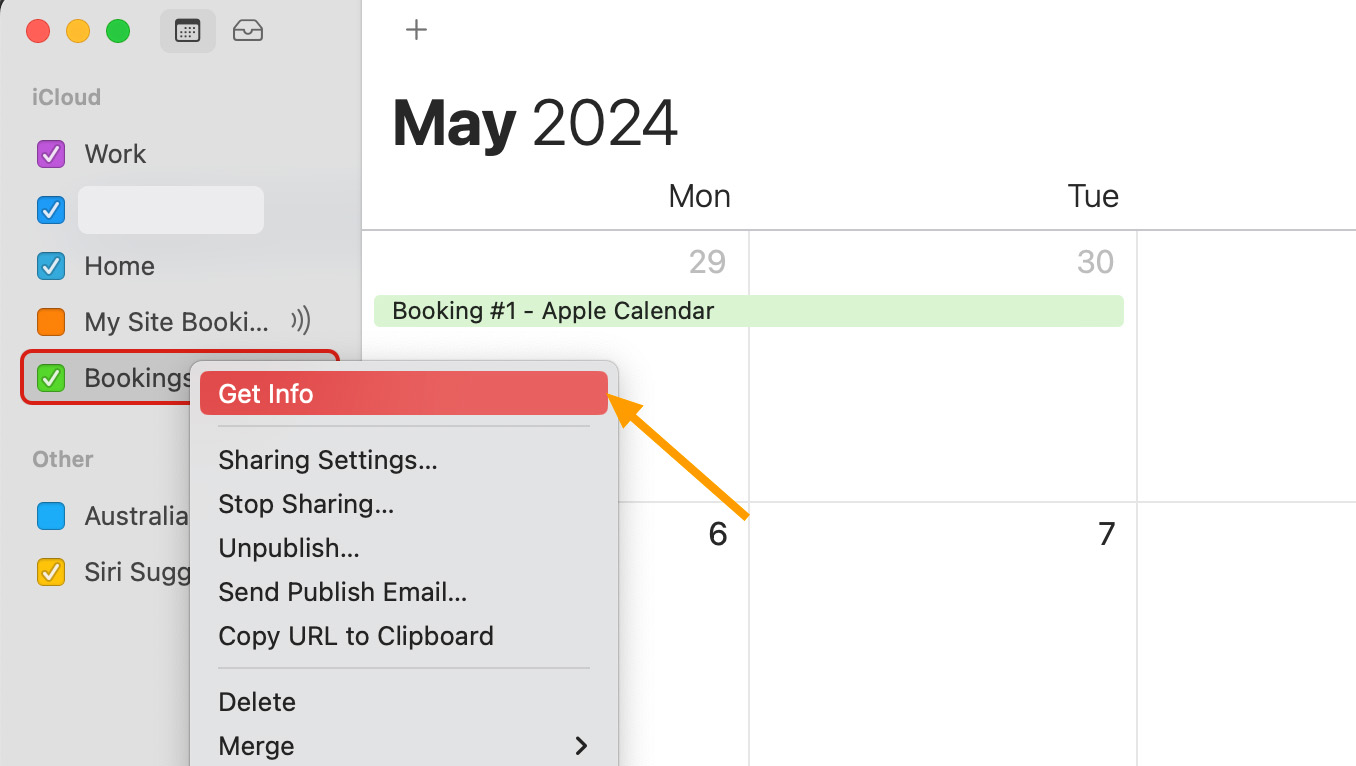
- Copy the URL.
- After copying the calendar URL, log into your WordPress website dashboard, navigate to Rooms > iCal Sync > In the “Sync Calendars” tab, find the “Import” column.
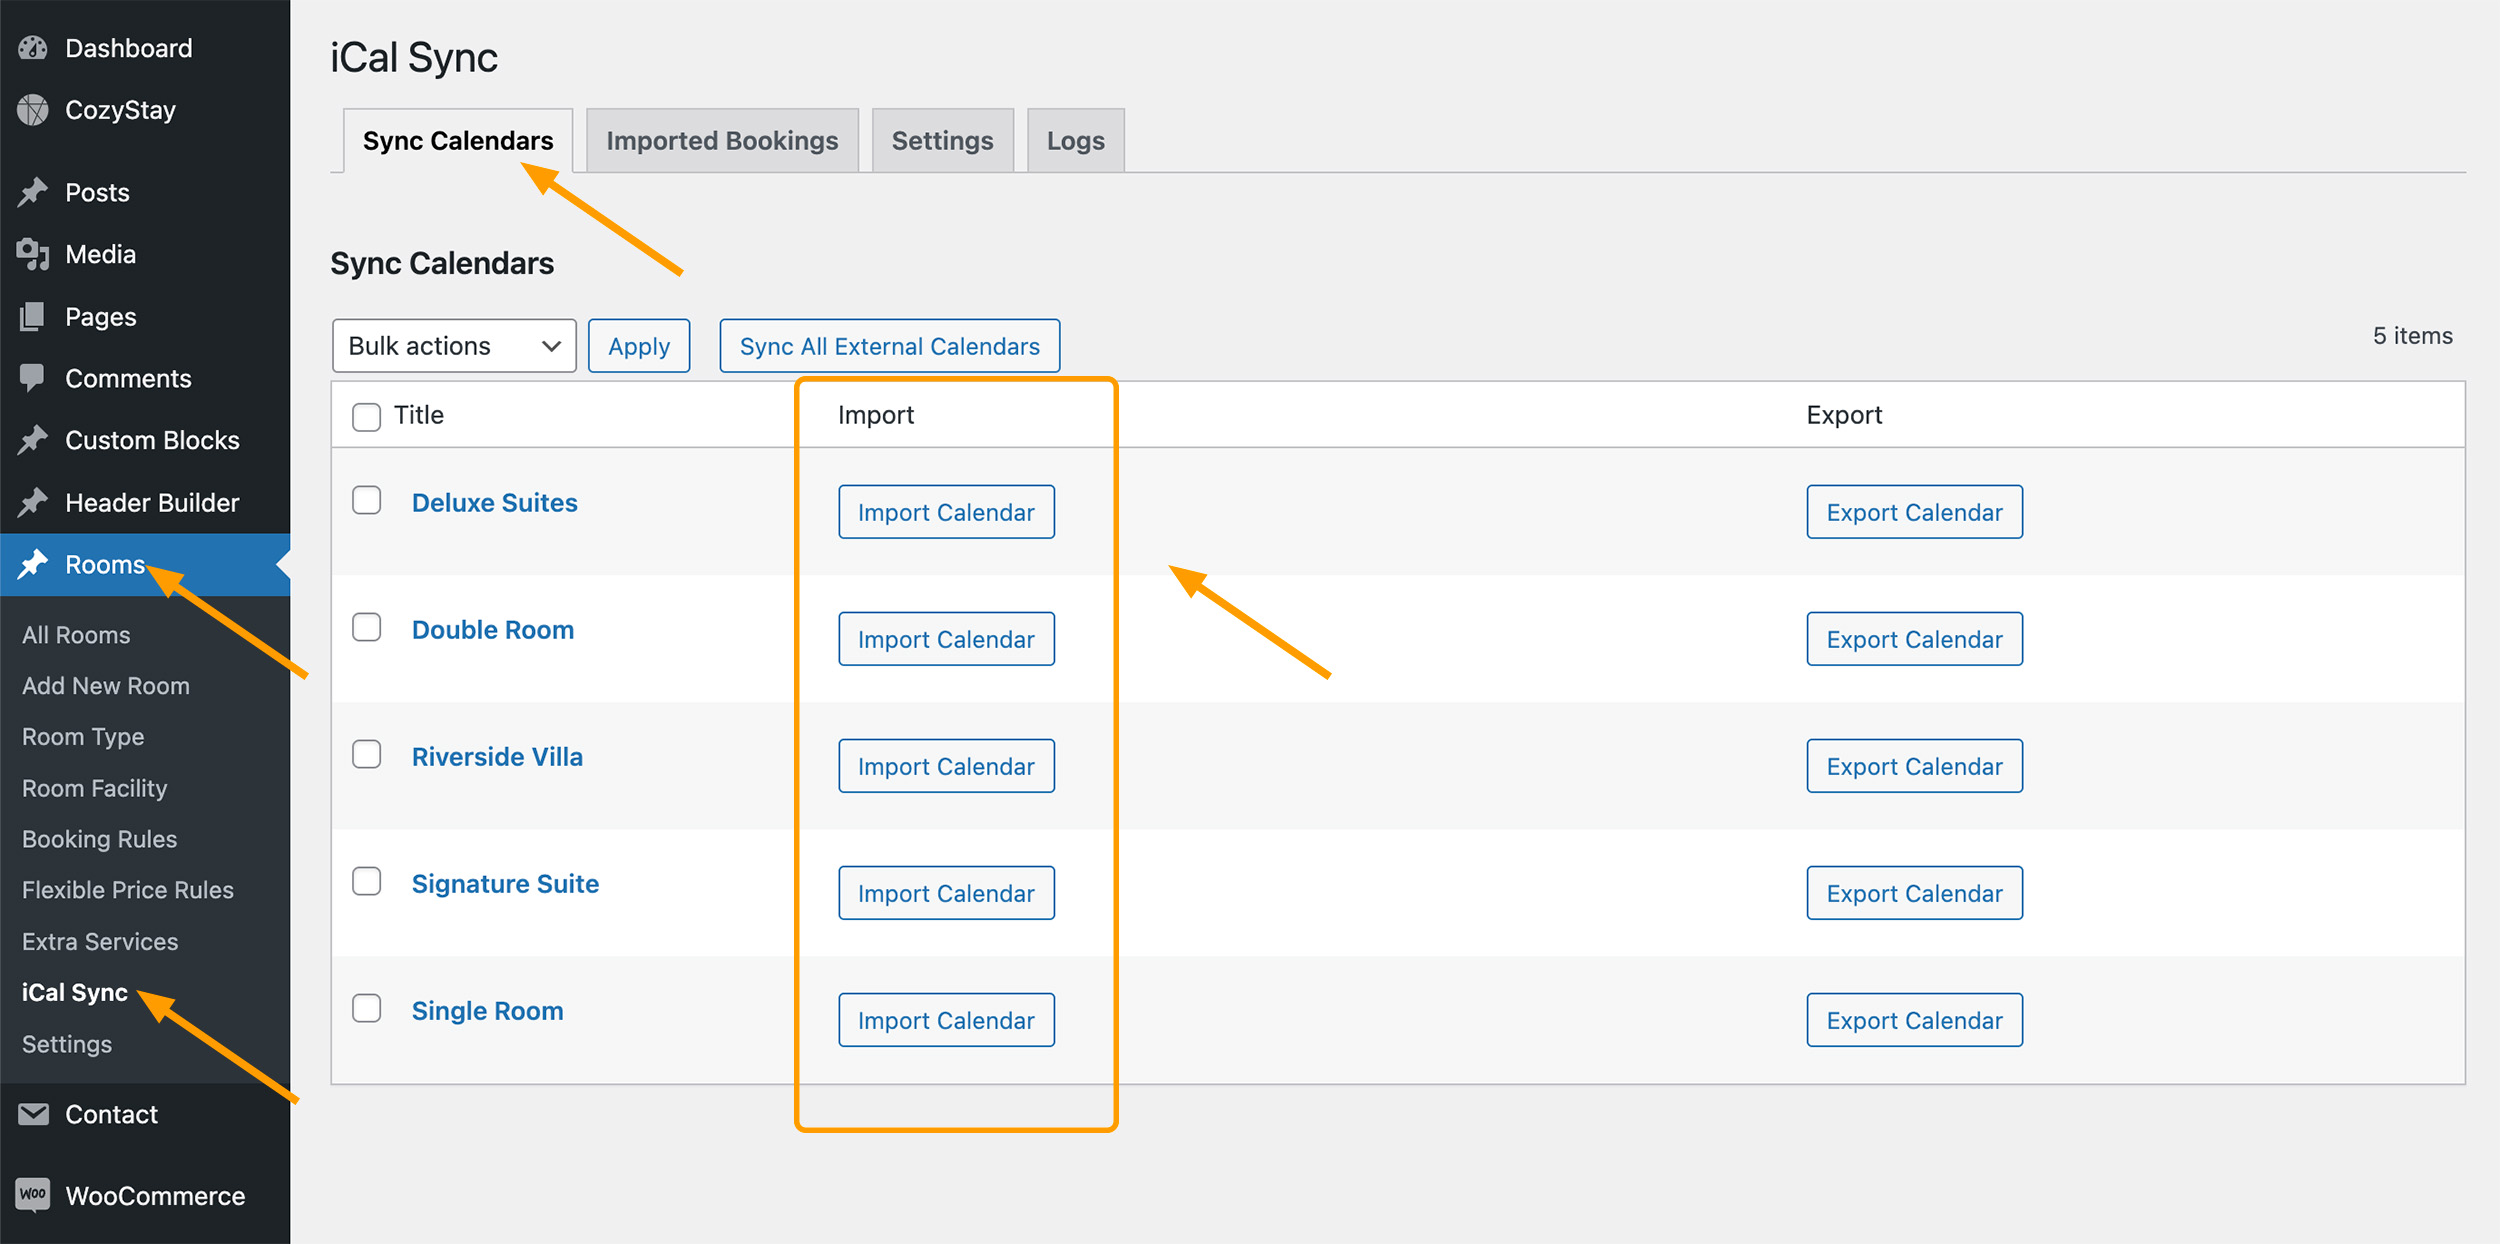
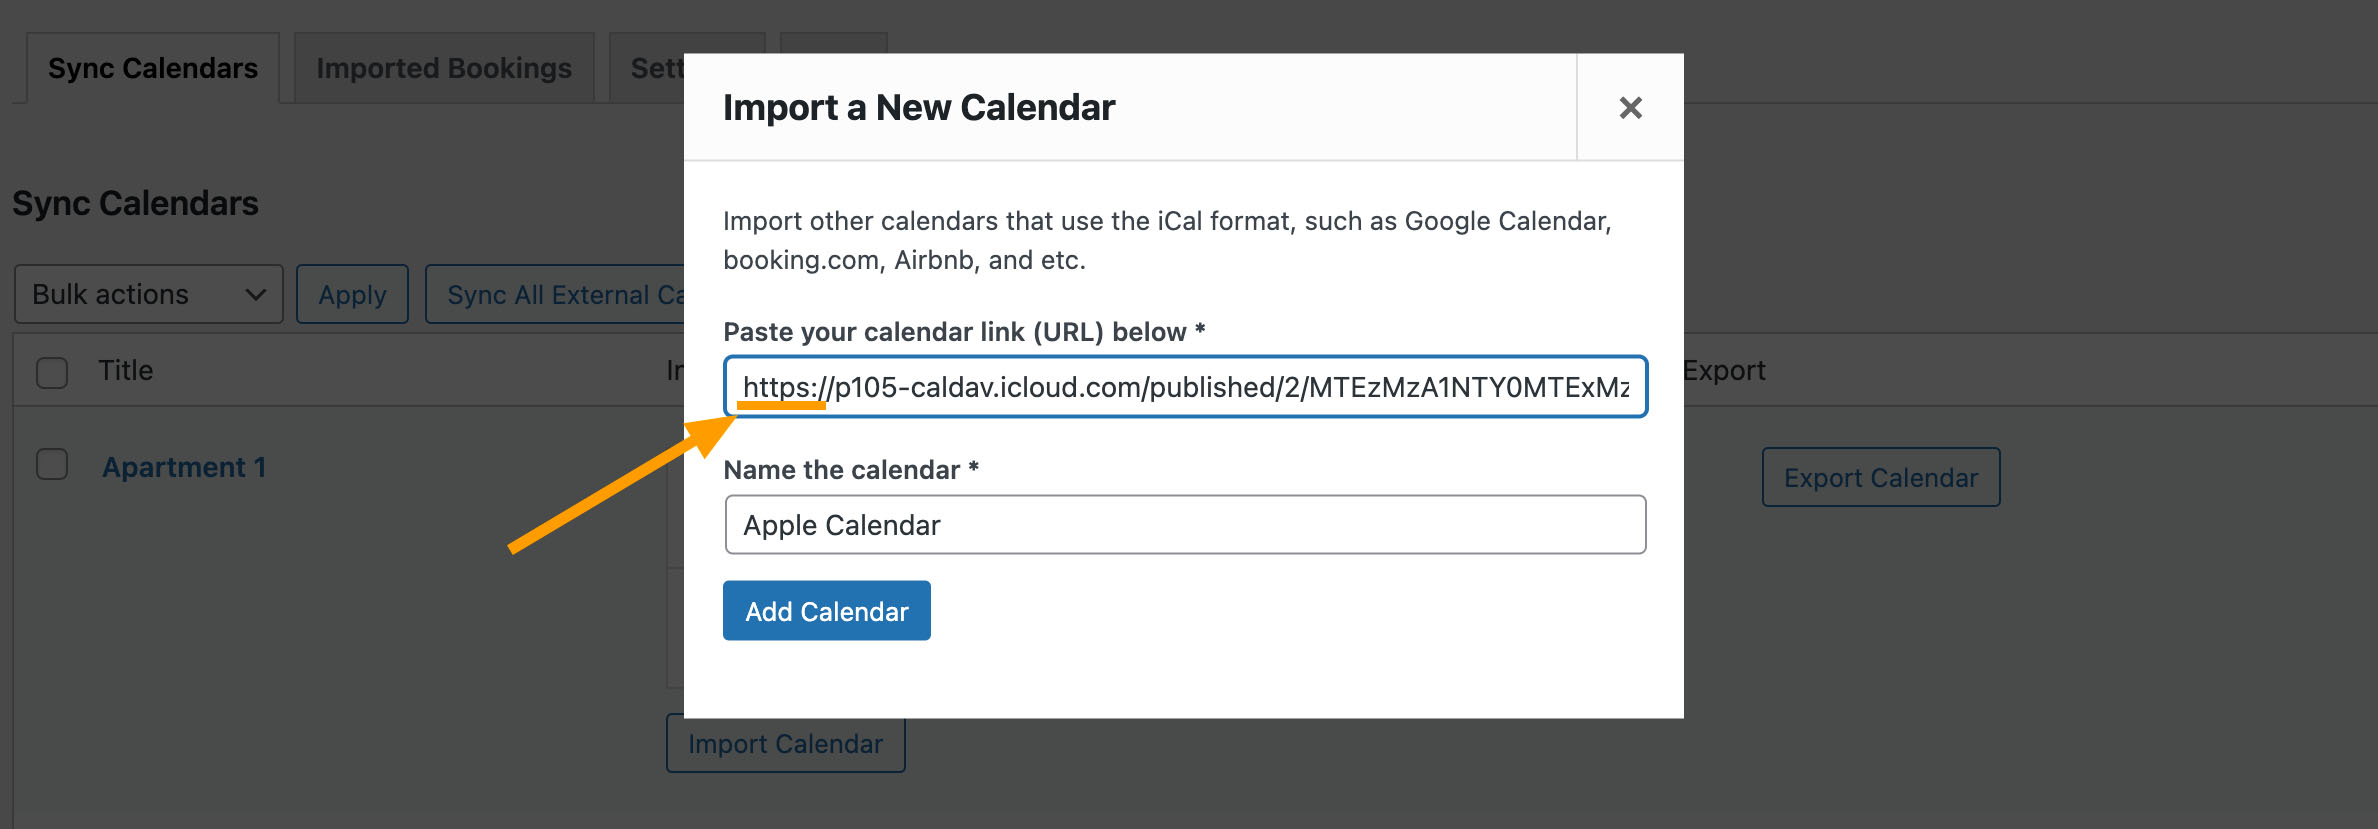
- Click the “Import Calendar” button of a room, in the pop-up window, paste the copied URL into the first field (Please note: You need to replace “webcal” at the beginning of the copied link with “https”), and enter a name for this external calendar. Then click “Add Calendar” to save this external calendar.
 Please note that this calendar has only been saved at this time and has not yet been synchronized.
 - You will then see the new external calendar added. Click the name of the calendar to open a pop-up window to modify the information. Click the “Sync” button to synchronize the data in the external calendar.
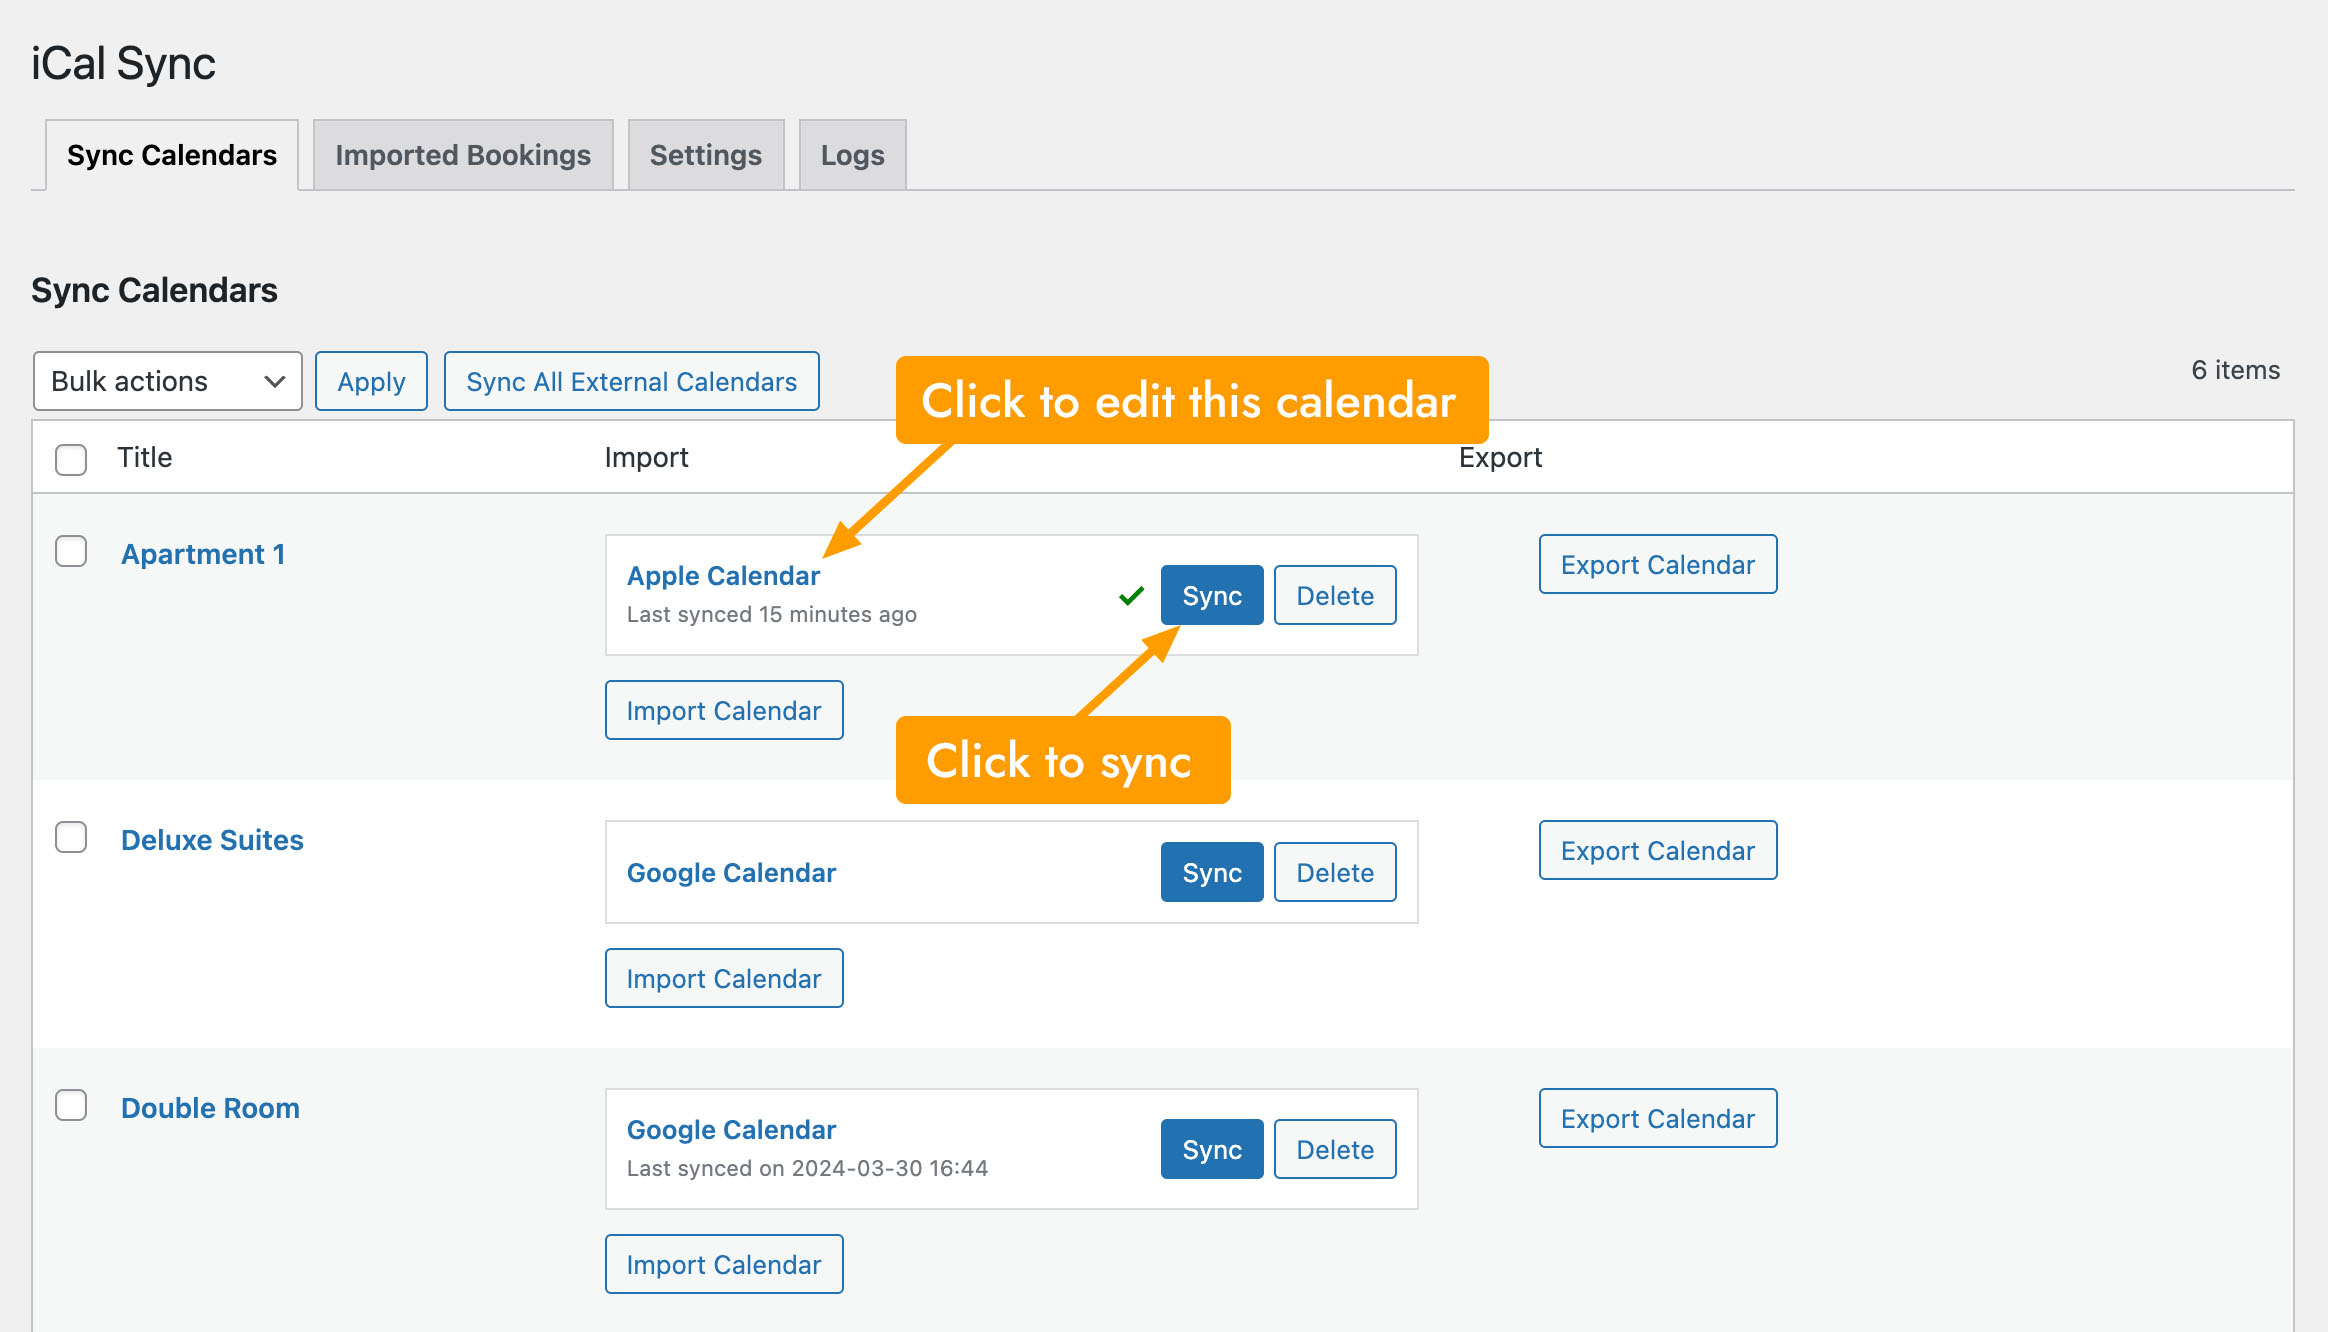
- You can view all imported bookings in the “Imported Bookings” tab. And view detailed logs of each synchronization process in the “Logs” tab.