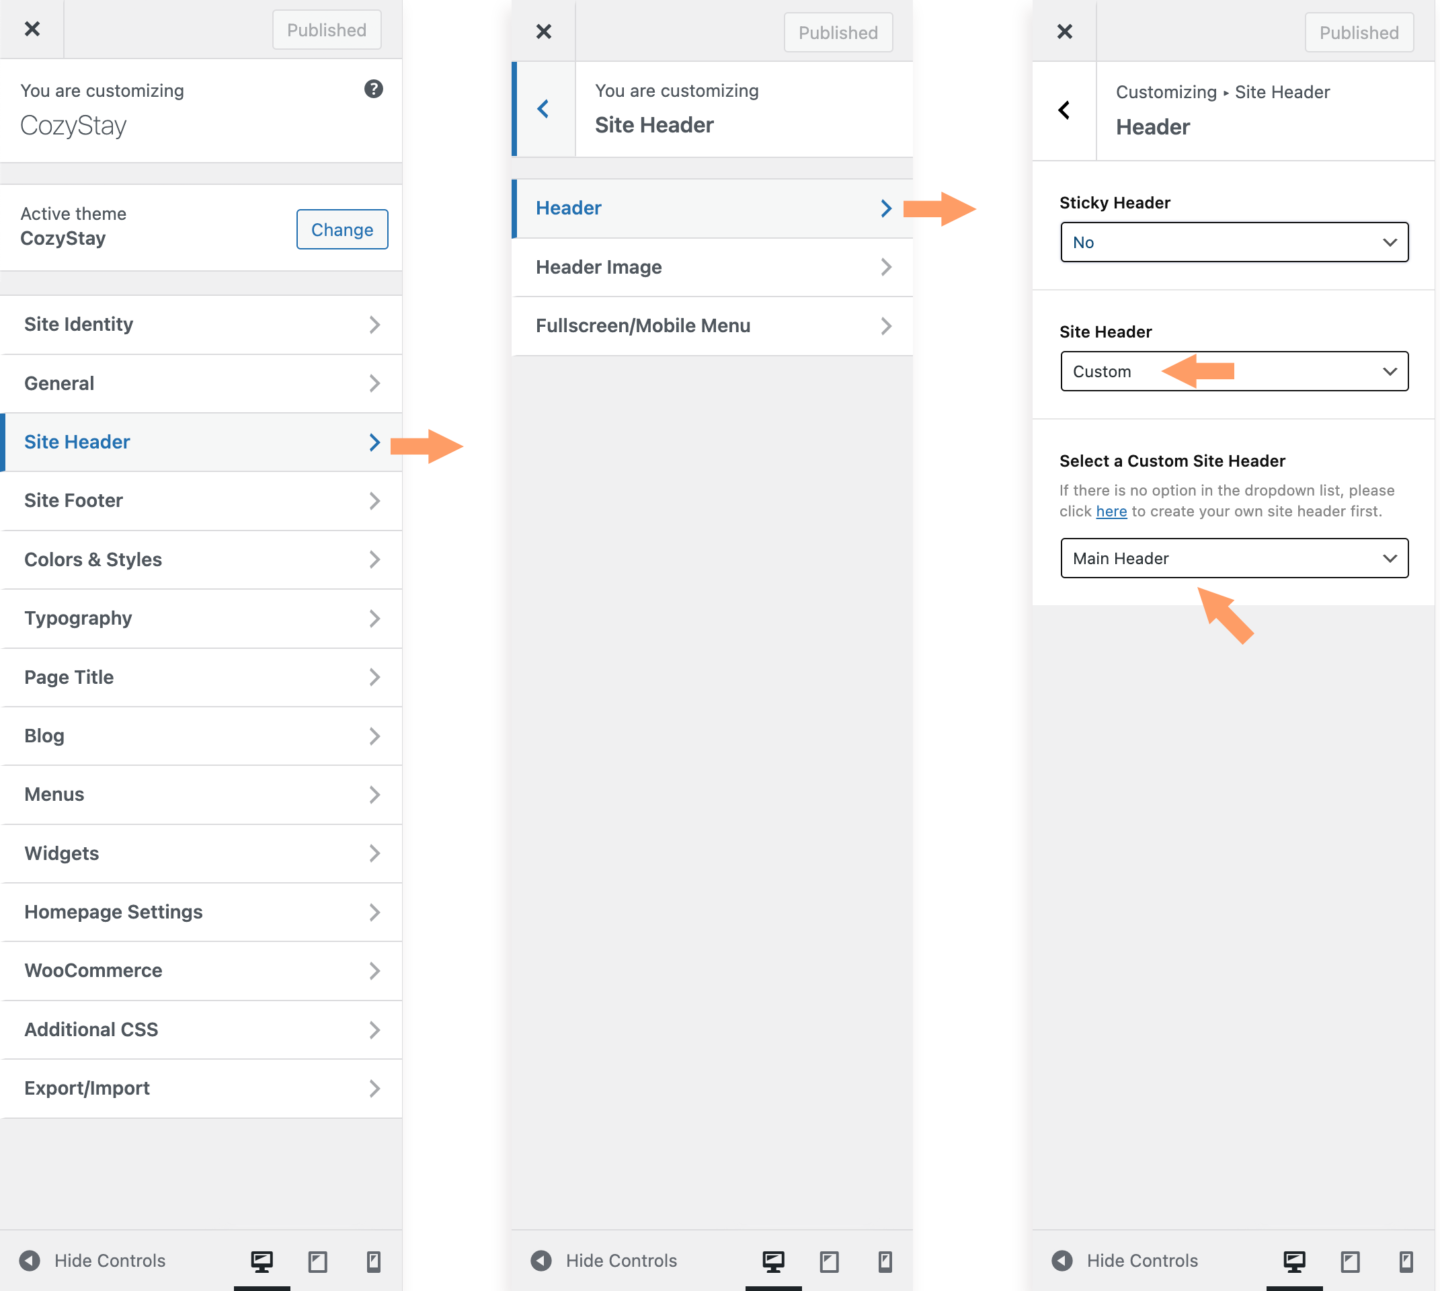
In WordPress Customizer > Site Header > Header, there you can set up the global site header of the entire site.
You can choose different site headers for different pages. For related settings, please refer to this tutorial.
If you are looking for how to edit the site header after importing a demo, please read this tutorial.
Custom Site Header (created by Elementor Header Builder)
We recommend using the Header Builder provided by the theme to create and manage your site headers. If you have imported a demo provided by us, then you also need to manage your site headers through the Header Builder.
- Please create a site header in the Header Builder (more details can be found in this sub-chapter).
- And then please go to WordPress Customizer > Site Header > Header > Select “Custom”, and select the site header you just created to set it as the global site header here.
- By default, the “Sticky Header” feature is turned off (“Sticky Header: No”). When you choose “Always sticky” or “Sticky when scroll up”, you can select a custom header as the global sticky header. More details can be found in this chapter.
Default Site Header (Non-Elementor)
If you don’t want to use Elementor to create a site header, you can adjust the site header style by adjusting the following settings of the customizer.
Please go to WordPress Customizer > Site Header > Header, find “Site Header” option and select “Default”. Then you can adjust the following options:
- Enable Sticky Header effect or not.
- Enable / Disable the Overlap Header
- Display / Show the Search Icon
- Display / Show the Mini Cart – WooCommerce is required.
- Please note that the default site header only has one base style. If you’d like to change more elements for the site header, please use the Header Builder to create a custom header and select it as the site header.
