PatioTime Documentation

Create a new site header

November 25, 2022

Create a new site header

  1. After installing and activating PatioTime Core & Elementor, please navigate to Dashboard > Header Builder. There you can see the list of all the site header created. You can create, delete, duplicate, and edit the site headers. To set one of them to be the global site header, please open the WordPress customizer and navigate to Site Header > Header.
  2. After the initial installation of the theme, if you did not import the demo, there will be a “Sample Site Header” on this page. It will help you work quickly. You can edit this header directly, or copy one and edit it, or simply create a brand new one.
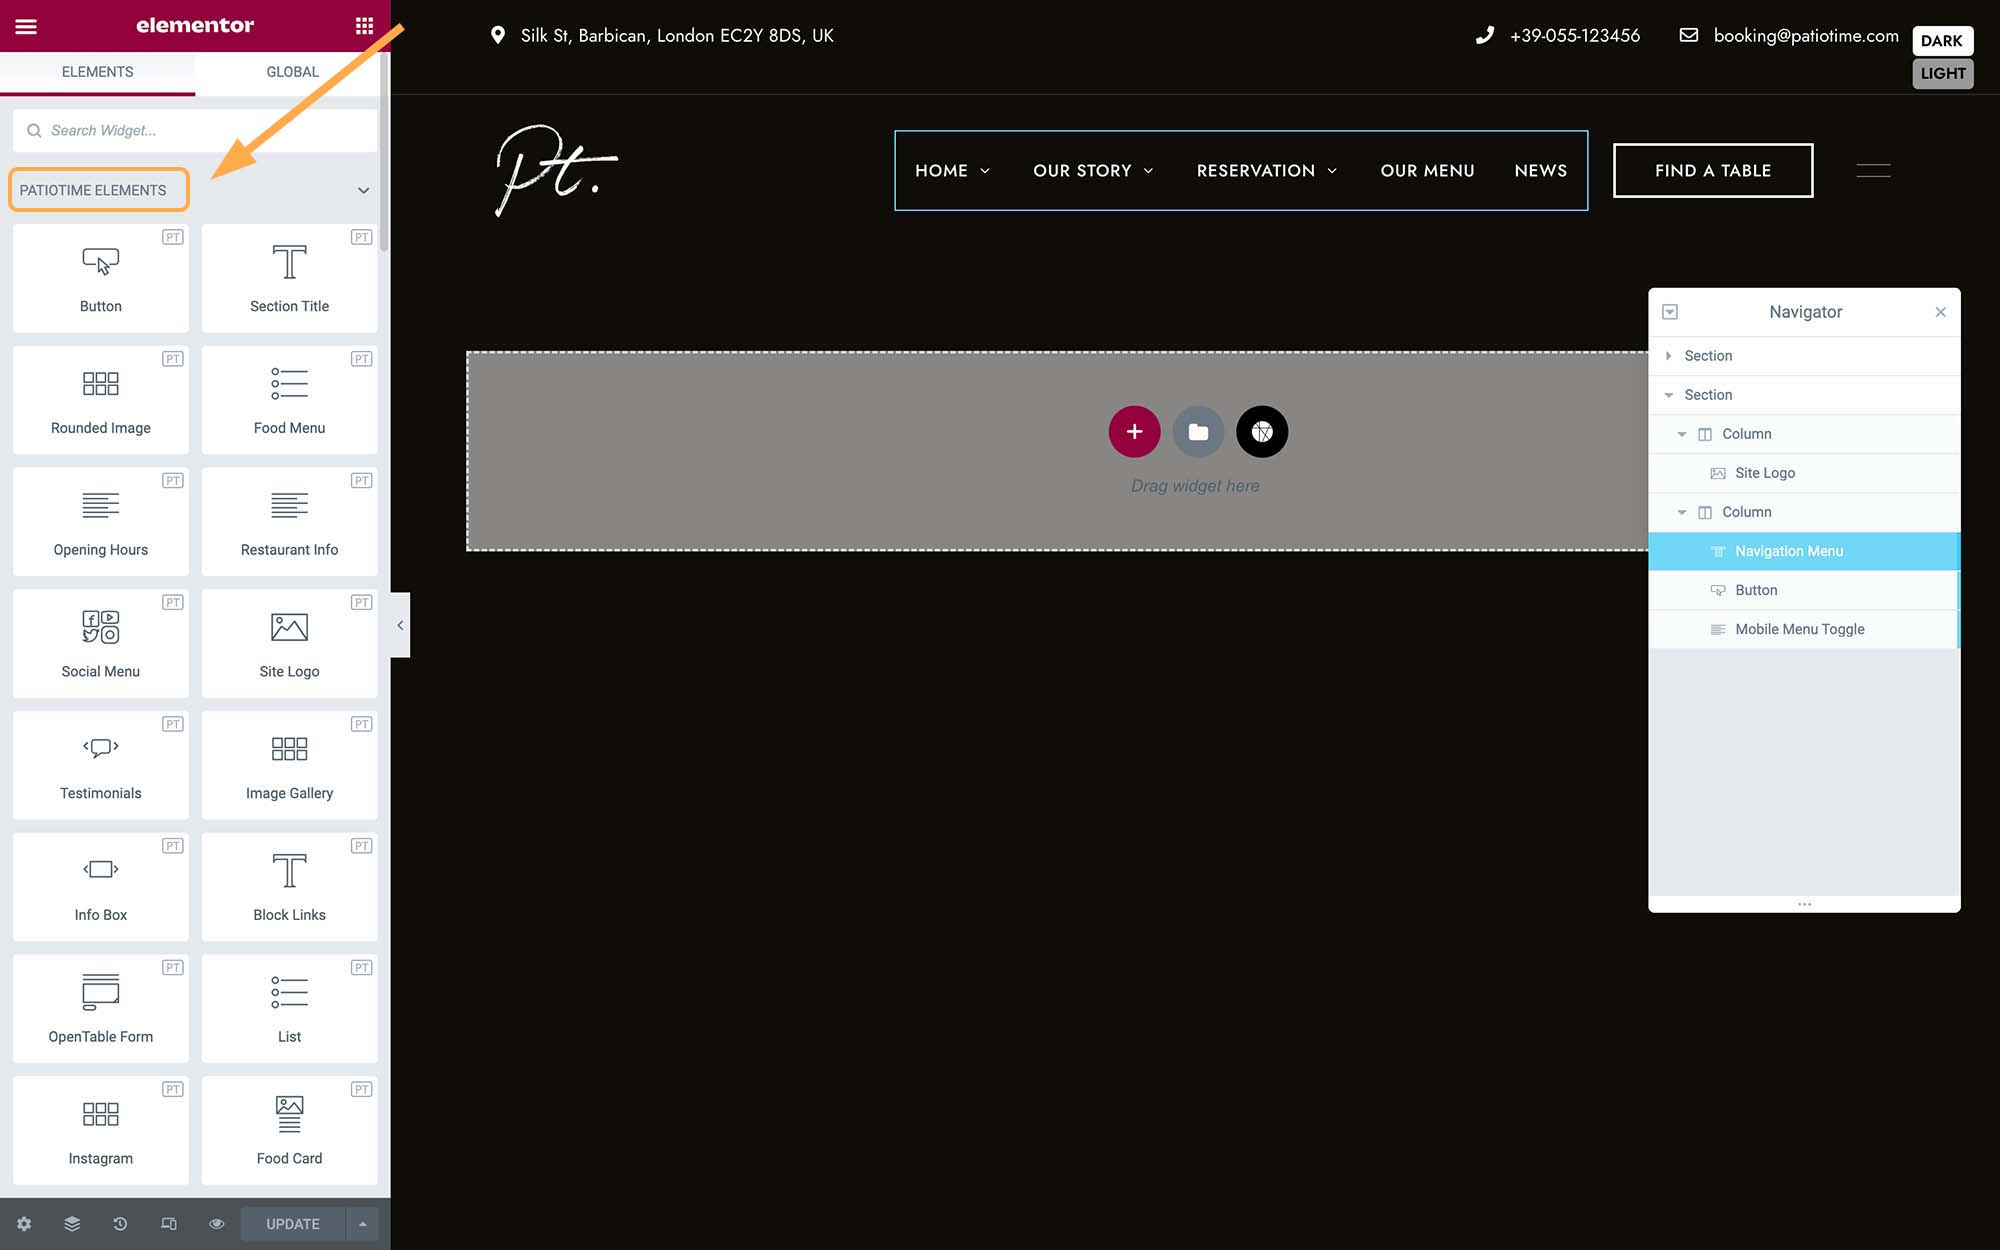
  3. When editing a site header with Elementor, in the left sidebar, you will find PatioTime Elements. Here you can find common elements in the site header of a website, such as Site LogoNavigation MenuMini Cart, etc.

Quickly create a new site header with PatioTime Library

  1. Navigate to Dashboard > Header Builder, click the “Add New” button. Enter a name of this new site header and then edit with Elementor.
  2. In the Elementor editor, please open the “PatioTime Template Library” and navigate to “Block” > “Site Headers“.
  3. Select a pre-made site header and insert it to the content area. Then you can start editing each element.
Each pre-made site header includes responsive styles. For example, as you can see from this video, after adding this site header, there are 3 sections on the page. But in preview, only the first and second sections are displayed in desktop mode, and only the third section is displayed in tablet and mobile modes. This is achieved by adjusting the Responsive Visibility of each element (choose to Show Hide an element according to the device). For more details, please read the following tutorial.
  • How To Adjust Settings For Mobile, Tablet, and Desktop
Close
Close