Installable WordPress File
We assume that you already have a running WordPress site. Now let’s install PatioTime theme.
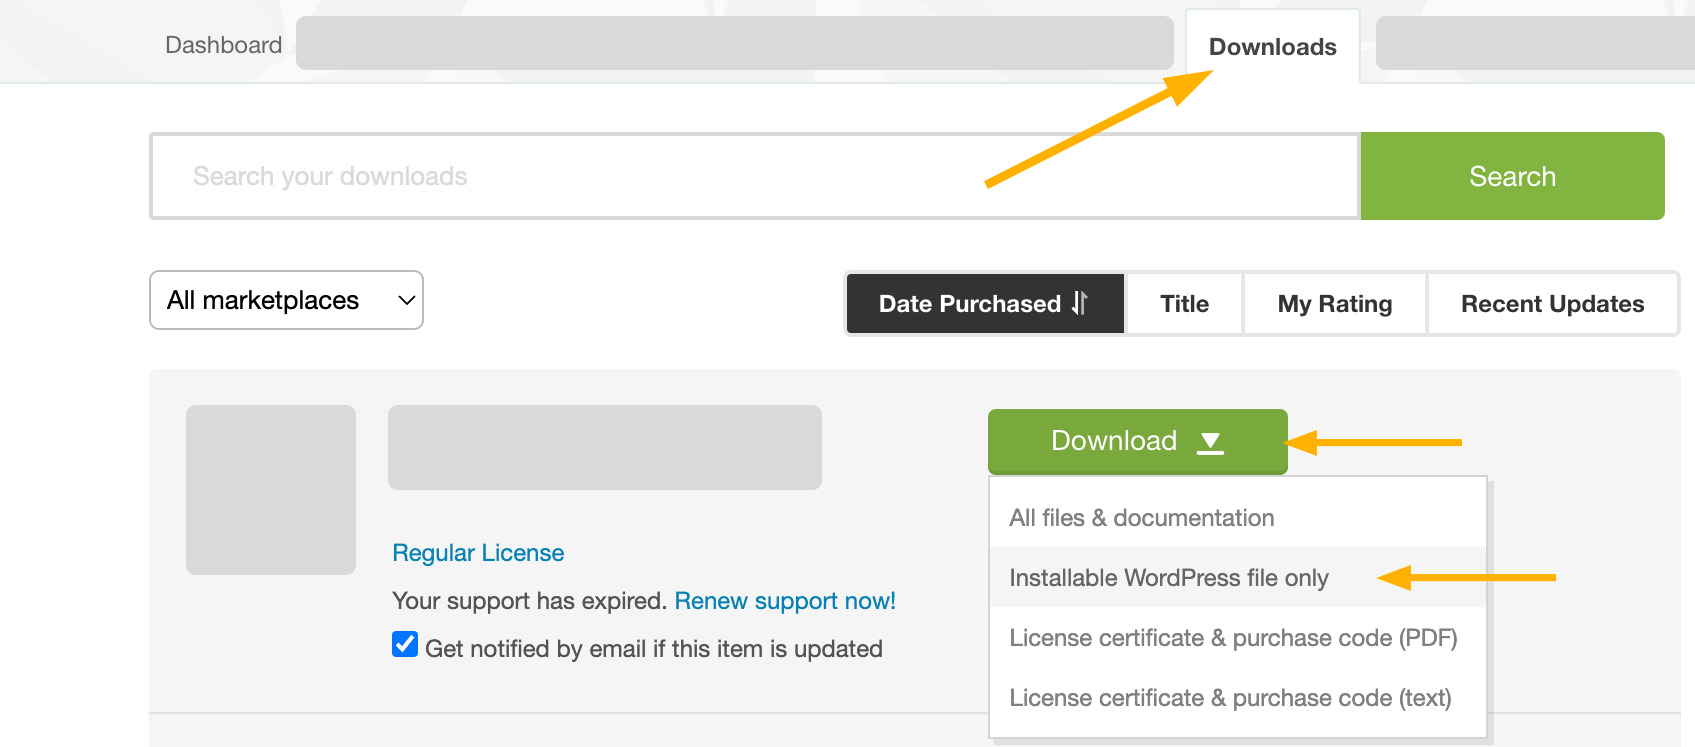
You need to download the theme zip file from ThemeForest first. Go to Downloads on ThemeForest, and find PatioTime. Download the files and find patiotime.zip – that’s what you need for installation.
- If you download the whole package, please unzip it, in the “WordPress Theme” folder, find patiotime.zip.
- Or, you can download the Installable WordPress File Only – which is patiotime.zip.
If you see “The package could not be installed. The theme is missing the style.css stylesheet” error message: It means that you have uploaded the incorrect file. Please unzip the file you tried to upload and then find “patiotime.zip” file in it. More detailed information can be found in this article: Theme is missing the style.css stylesheet error.
Upload theme via WordPress admin panel
- On your website admin panel, go to Appearance > Themes > Add New > Upload Theme.
- Choose patiotime.zip you just downloaded.
- Install and activate it.
- Once the theme is activated, if you are using PatioTime version 2.0 (or later), you will be directed to the theme’s Setup Wizard. Follow the wizard’s instructions to complete the installation and setup. (For a detailed description of the setup wizard, please refer to this tutorial.)
Upload theme via FTP
If you can’t install the theme via WordPress admin panel, you can try to install it via FTP.
- Find the file – patiotime.zip, unzip it.
- Upload the unzipped folder to your FTP > WordPress site root > wp-content > themes.
- Go back to your site admin panel > Appearance > Themes, activate PatioTime theme.
- Once the theme is activated, if you are using PatioTime version 2.0 (or later), you will be directed to the theme’s Setup Wizard. Follow the wizard’s instructions to complete the installation and setup. (For a detailed description of the setup wizard, please refer to this tutorial.)
Please note: If you are going to write custom code for the theme, then please use a child theme.