
Text Version of the Tutorial
We assume that your WordPress website has WPML related features installed and activated, and has been created in multiple languages.
- On your website dashboard, please navigate to “Appearance” > “Menus” > Create a new menu, for example, name it “Language Menu”. Please do not add any menu items to it. Save the change.
- Please navigate to “WPML” > “Languages” > find “Menu Language Switcher“, click the “+ Add a new language switcher to a menu” button.
- A new window pops up. In the “Choose a menu” dropdown, select the menu you just created: “Language Menu”. And select “List of Languages” for “Language Menu Item Style”. Save and close the popup window.
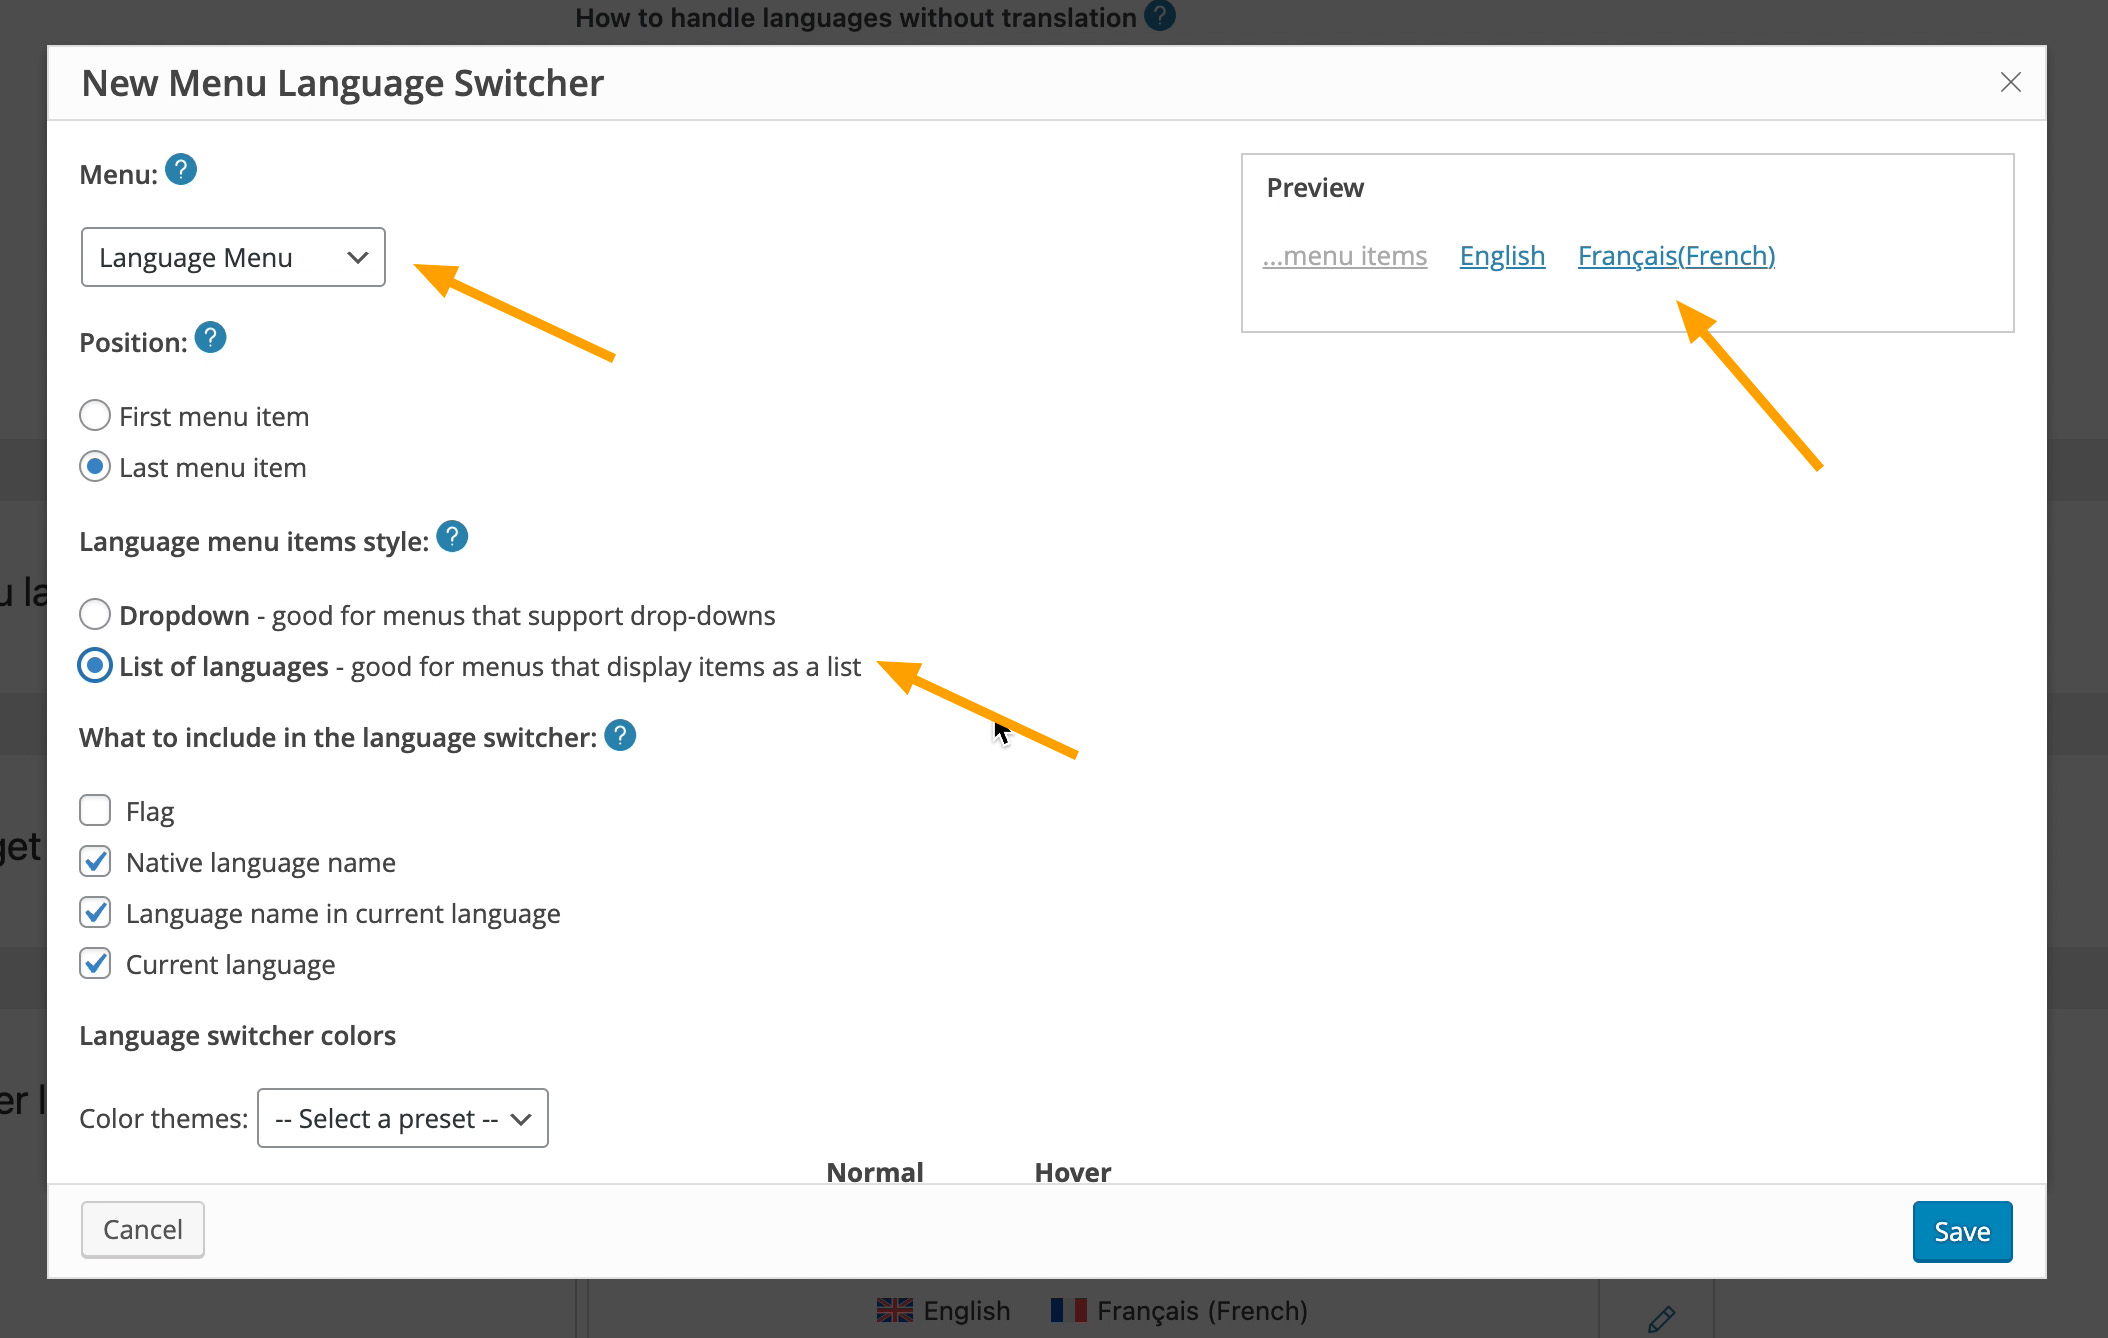
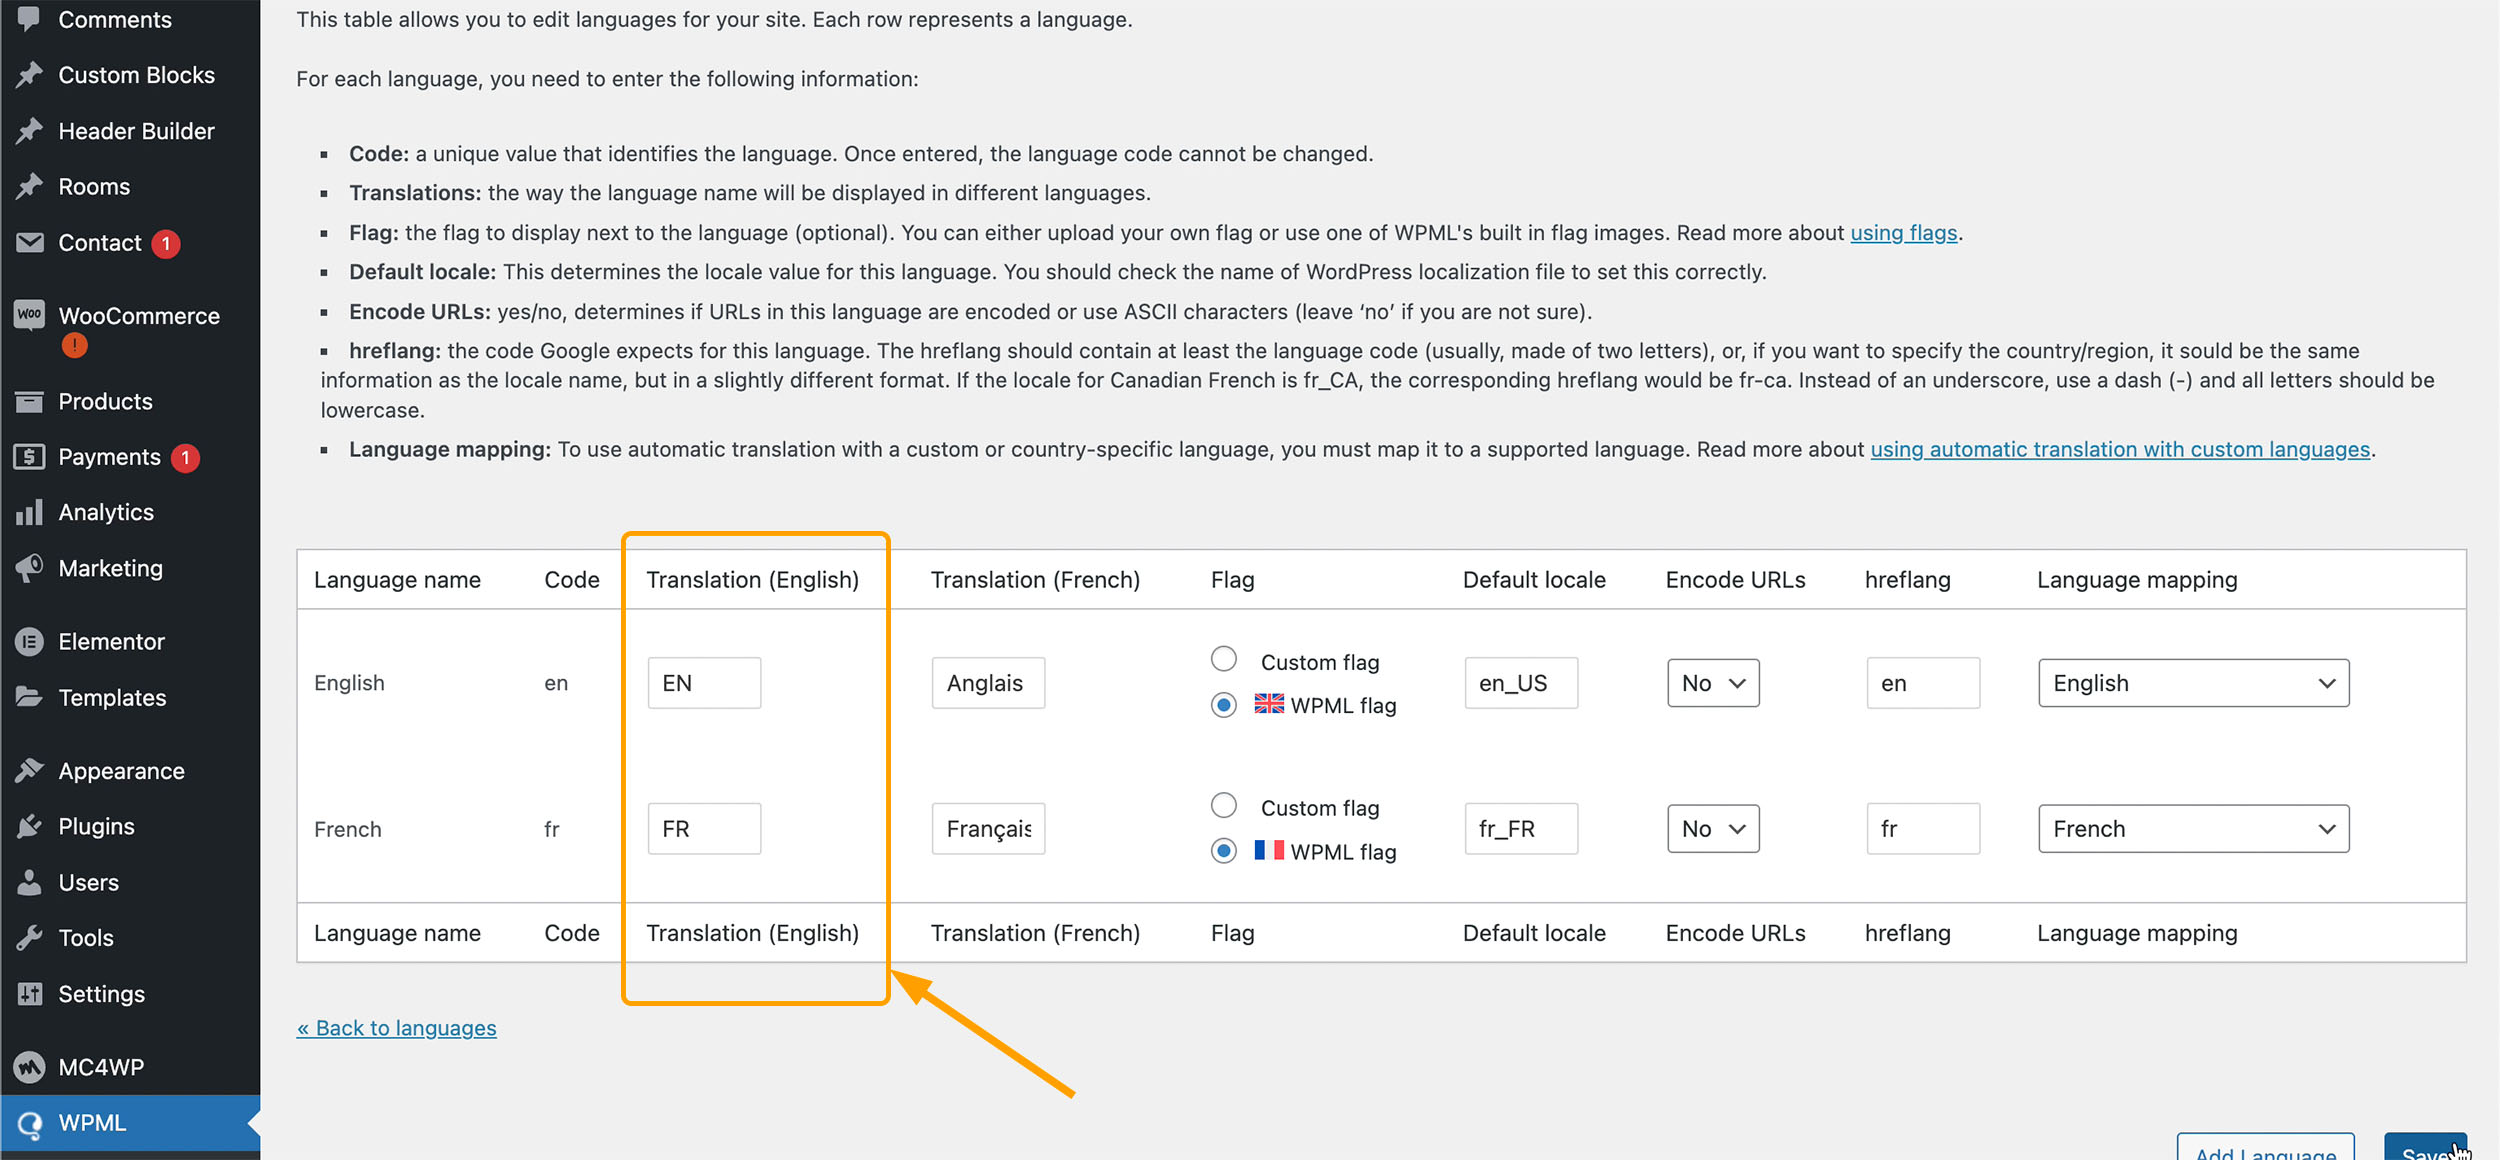
- Now the Language Switcher displays “English” and “French”. To change them to “EN” and “FR”, please scroll up the page, find “Site Languages”, and click the “Edit Language” link. Find “Translation (English)”, change the text to “EN” and “FR”. Save the changes and back to languages.
- Scroll down to find “Menu Language Switcher” and now you will see that the preview has changed. If you still see “Français” before “FR”, click the pencil icon to open the editor, and uncheck “Native language name”.

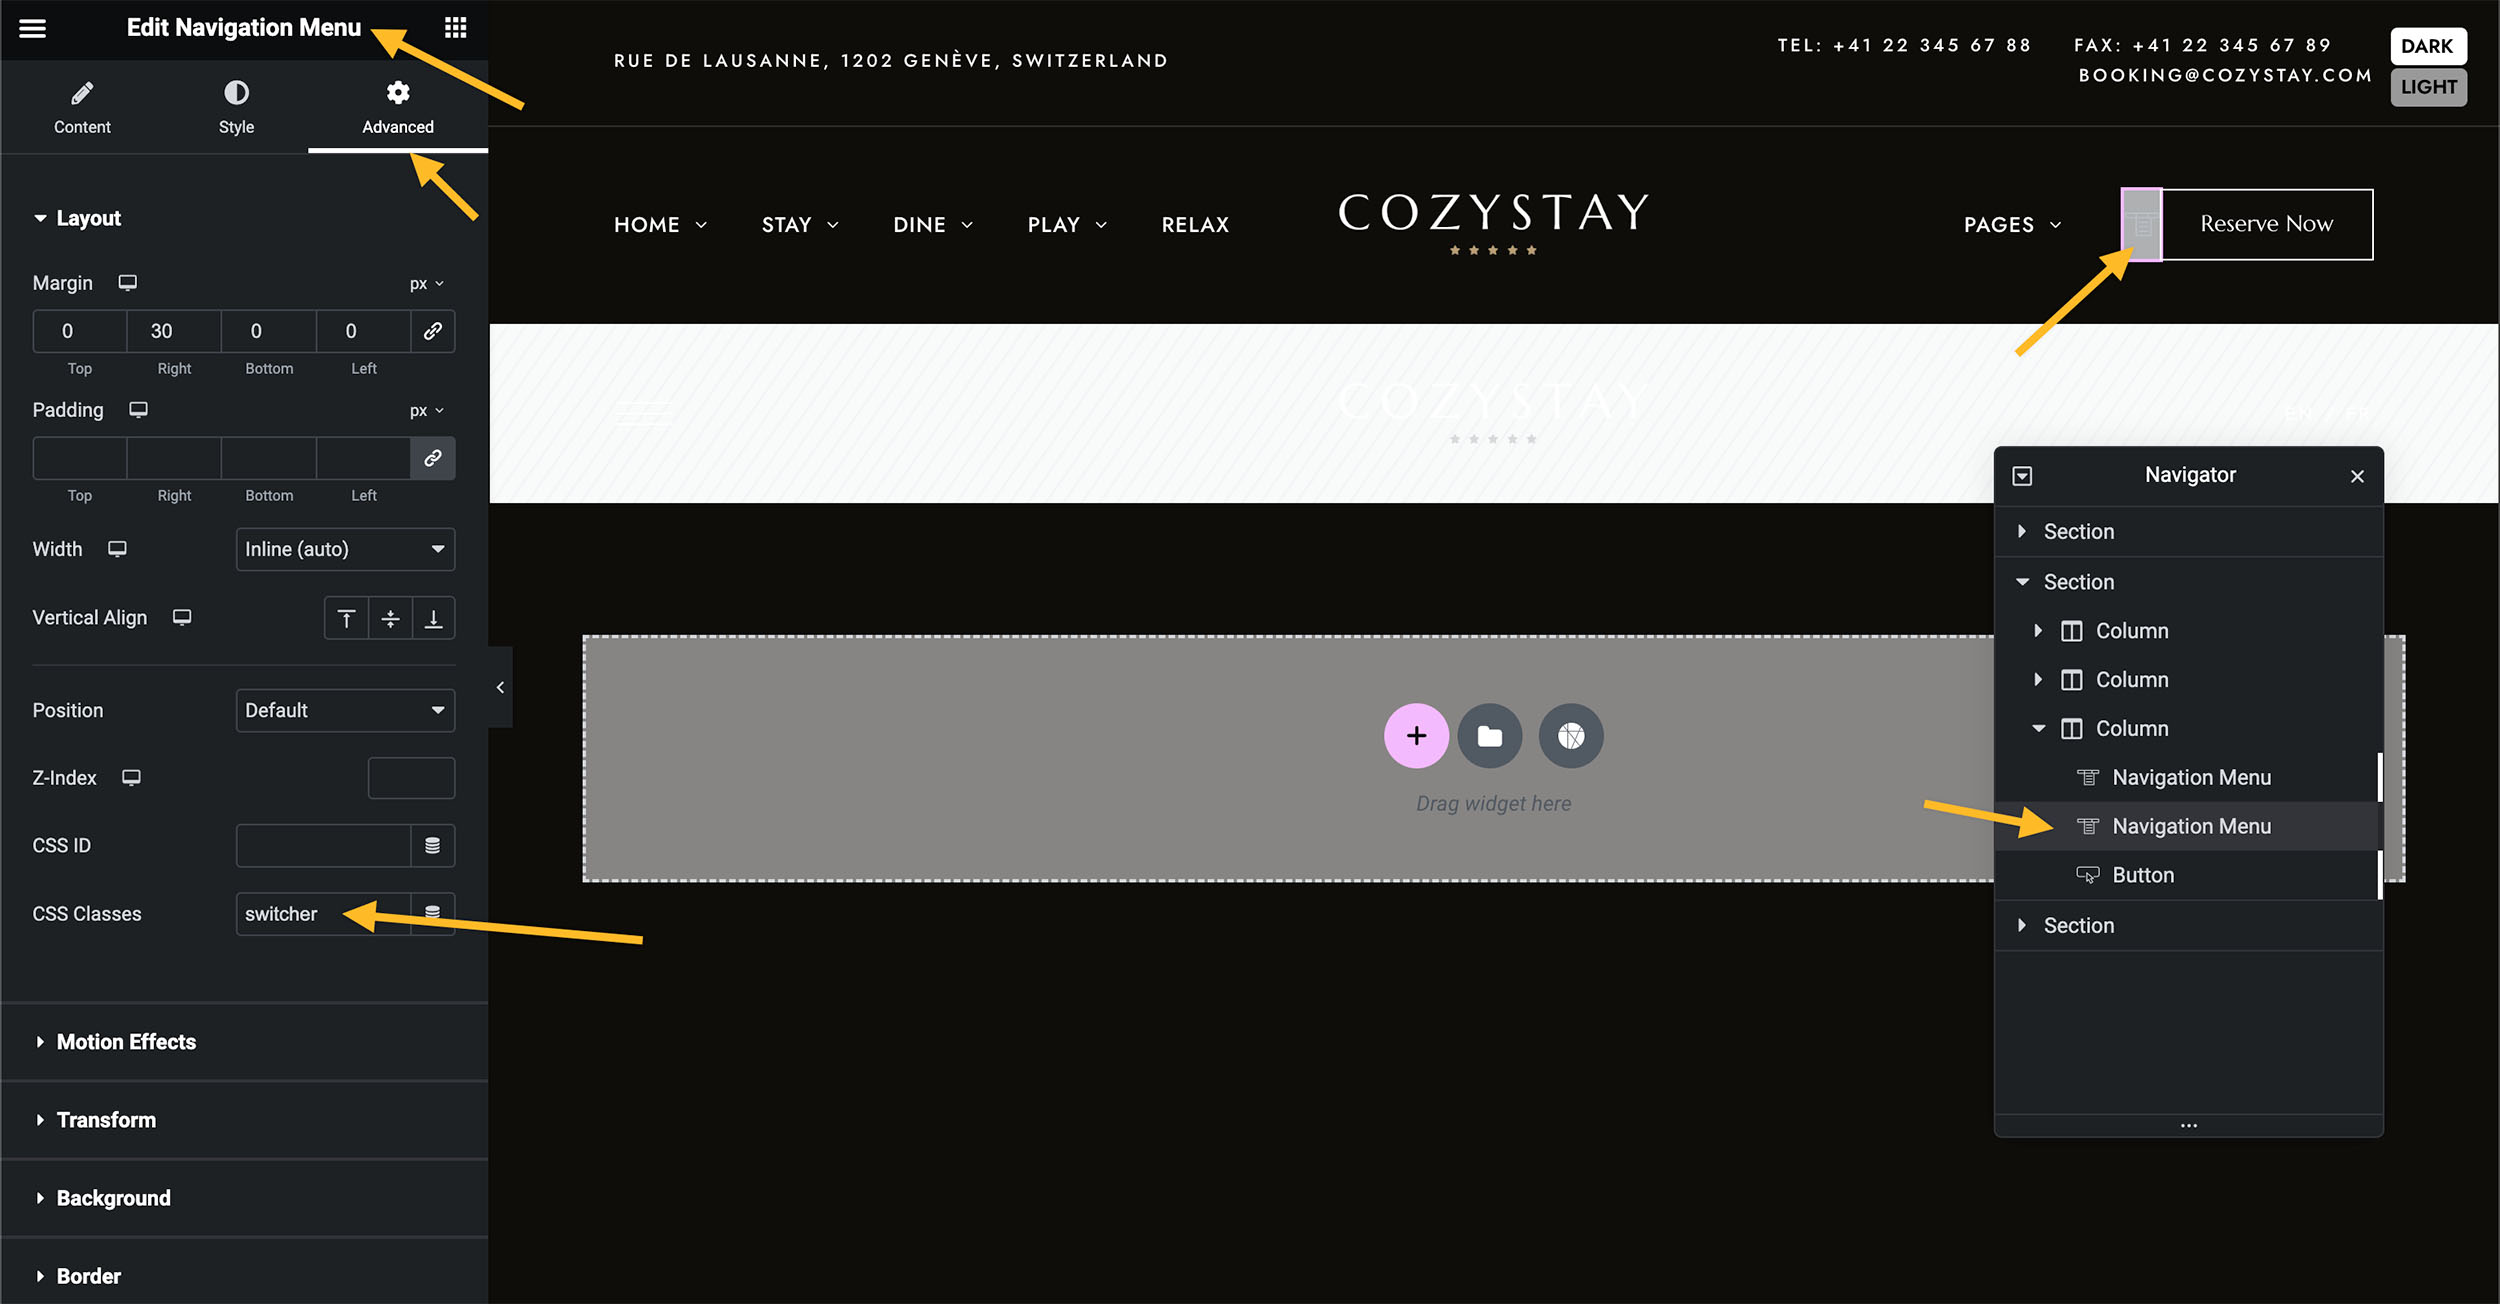
- Now we can add this Language Switcher where we want, such as in the site header, mobile menu, site footer, etc. For example, when editing your site header with Elementor, please find “Navigation Menu” in the Elementor left panel and add it to the page and then select “Language Menu”. Please note that the language switcher cannot be rendered in the Elementor editor, you will only see a placeholder. After saving your changes, you can visit your website page to see how it looks.
- If there are other elements in the same column and you want all the elements in the column to be displayed in a row: Navigate to the “Advanced” tab of each widget/element in the column, set “Width” to “Inline(auto)“. And you can set a side margin to each widget/element.
- When editing this Navigation Menu, in the “Style” tab, you can tweak the style for it, such as typography, menu item distance, etc.
- Save the changes to the site header, visit your website page and reload to see the language switcher in the site header. It will now display as “EN FR” and look like the screenshot below. If you’re satisfied with the result, you can stop here. If you want to add a slash between “EN” and “FR”, then please continue to check the steps below.

- To add a slash between “EN” and “FR”, please edit the site header with Elementor, find the language switcher (Navigation Menu element), in the “Advanced” tab, find “Layout” > “CSS Classes” > enter “switcher“. Save the change.
- Now open the WordPress Customizer and navigate to “Advanced CSS”, copy the following CSS code and paste into the box. Save the changes. Done.